Studio 6 Reference Guide
If you are already familiar with the Inference studio interface then this reference will provide resources for to quickly refer back to for troubleshooting and guidance.
If you are not yet familiar with the Studio interface please take a look at our Featured Tutorials section, which will guide you step-by-step through some of the key features in Studio.
Voice Tasks
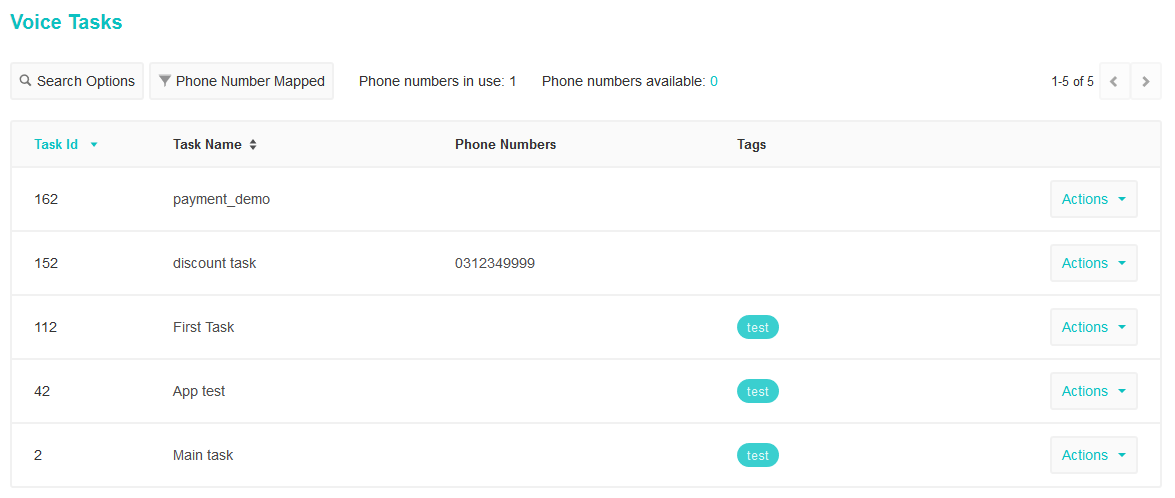
The Voice Tasks page is the dashboard containing all your task details. You can view current tasks, assigned phone numbers and task details.
From here you have access to the Actions menu where you can add functionality to your tasks.
If this is a new account, you will need to Add a Voice Tasks before you can apply actions to it.
To access the Voice Tasks page:
- Navigate to Task in the top menu.
- Select the Voice Tasks title.

3.From here you will be taken to the Voice Tasks page where you can see all current Voice Tasks.
Creating a Voice Task
- Navigate to Tasks in the top menu.
- Select the Voice Tasks + icon.
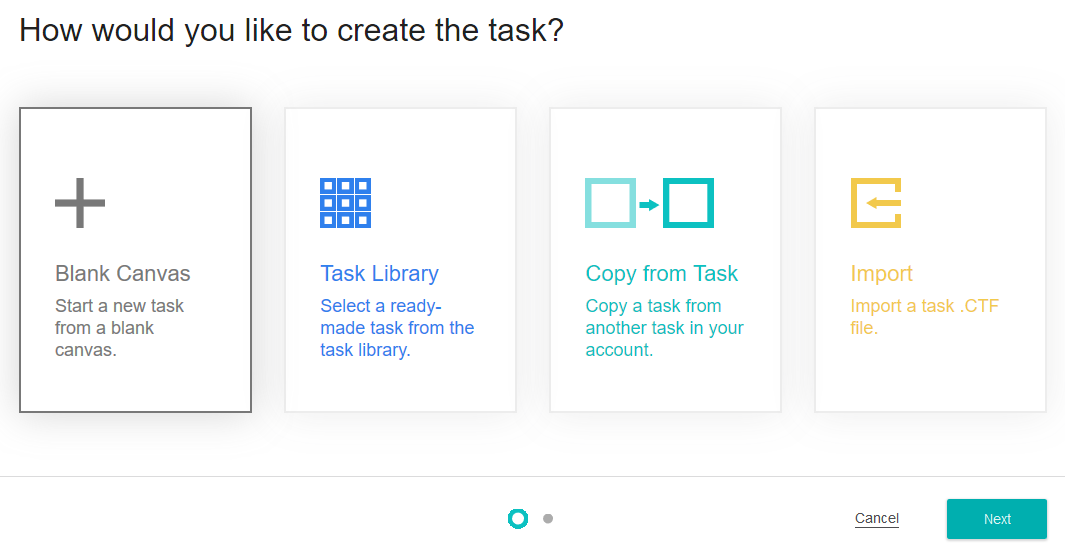
- Studio will ask how you would like to create the callflow. You can choose between Blank Canvas, App Library, Copy from Task or Import. Select Blank Canvas and click Next.
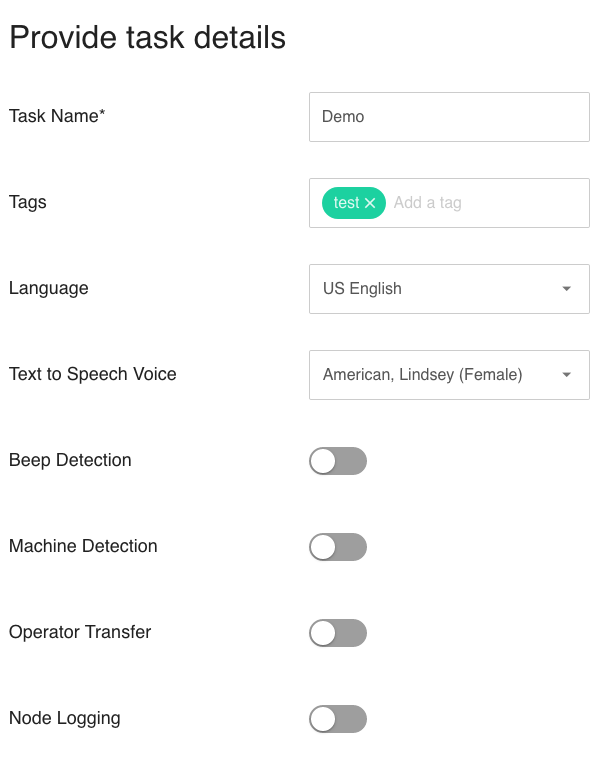
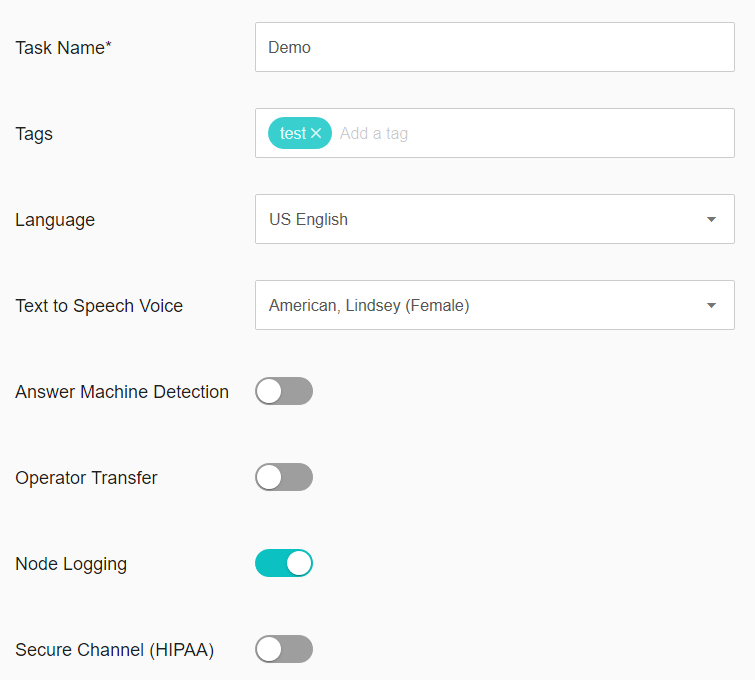
- In Task Name give your task a title. We have called ours Demo.
- Fill in the relevant Tags for your task. Tags are a good way to categorize your tasks. They allow you to search and filter your tasks. We will use the tag "Test" to specify that this task is being used for testing purposes.
- Select the default Language. Depending on your geographic region and service provider agreement, multiple languages may be shown under Language.
- Choose the TTS (Text To Speech) voice type you would like to use.
- Select whether your task should use Beep Detection. This is relevant only for outbound calls and is an advanced feature. Let's leave this set to Disabled for now.
- Select whether your task should use Answer Machine Detection. Let's leave this set to Disabled for now as well.
- Choose whether you would like to enable operator transfer capabilities for this task. This will only apply to tasks that will be performing outbound calling and is an advanced features. Leave this set to Disabled for now.
- Select whether you would like to use Node Logging. This is also an advanced feature. Leave this set to Disabled for now.
- Select Save to finish creating your Voice task.
Actions
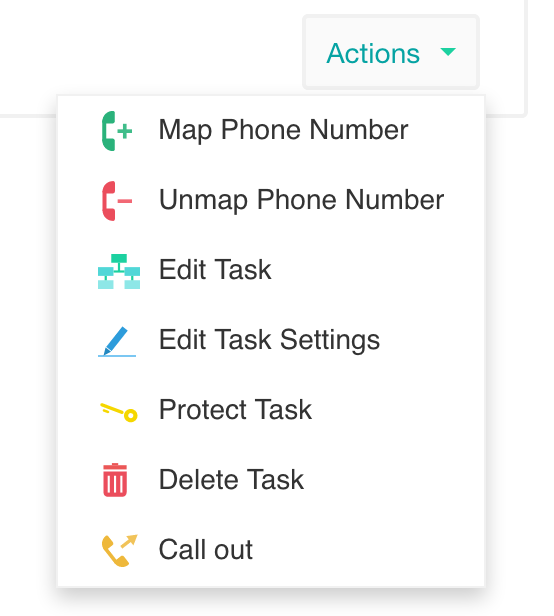
From the Tasks page you have access to the Actions menu. The Actions menu gives you access to the various features and options for your tasks i.e. it allows you to do things with the tasks you have created. For example, assigning a task to a service number is done through the Actions menu.
From here we will walk you through the various actions you can apply to your tasks.
Map Phone Number
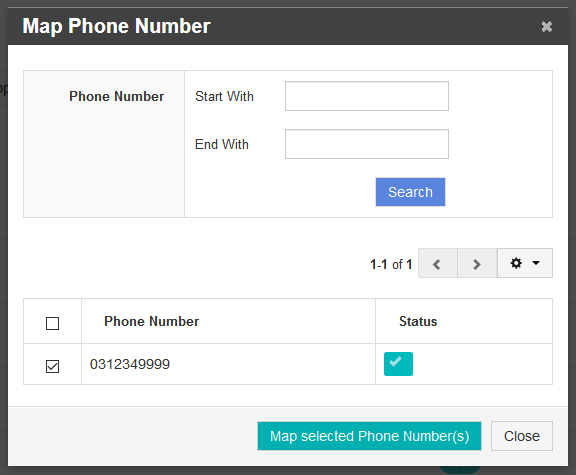
Before you can dial a Voice task with a telephone it will first need to be assigned to a phone number.
Phone numbers can be created and assigned to accounts by the service provider that owns the account. If you are an account level user then these numbers will already be assigned to your account.
- Select the phone numbers you would like to assign the Voice task to and select Map Selected Phone Number(s) Note: You can map more than one phone number to a Voice task.
WARNING
The Map Phone Number option will only be accessible if you currently have unmapped phone numbers.
TIP
If your account has a large number of phone numbers you can use the search function by providing the Start With and / or End With parameters.
Unmap Phone Number
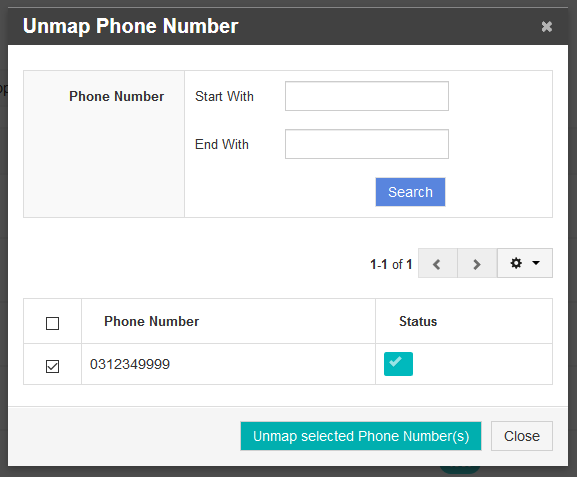
- To unmap phone numbers simply select the number(s) you would like to unmap and choose Unmap Selected Phone Number(s).
WARNING
Unmapping Service Number's will require password authentication to prevent accidental deletion of service numbers.
Move Phone Number
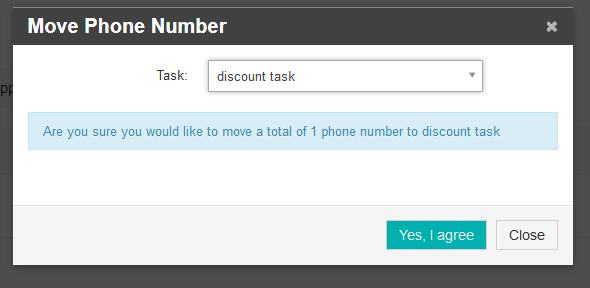
If you want to reassign multiple phone numbers from one task to another you can do this with the Move Phone Number action. This is helpful for bulk reassignments instead of Unmapping and Mapping phone numbers individually.
- From the Voice Tasks page, select Actions > Move Phone Number.
- Select the Voice Task you wish to move the phone numbers to, and select Yes, I agree.
WARNING
Moving Phone Number's will require password authentication to prevent accidental reassignment.
Edit Task
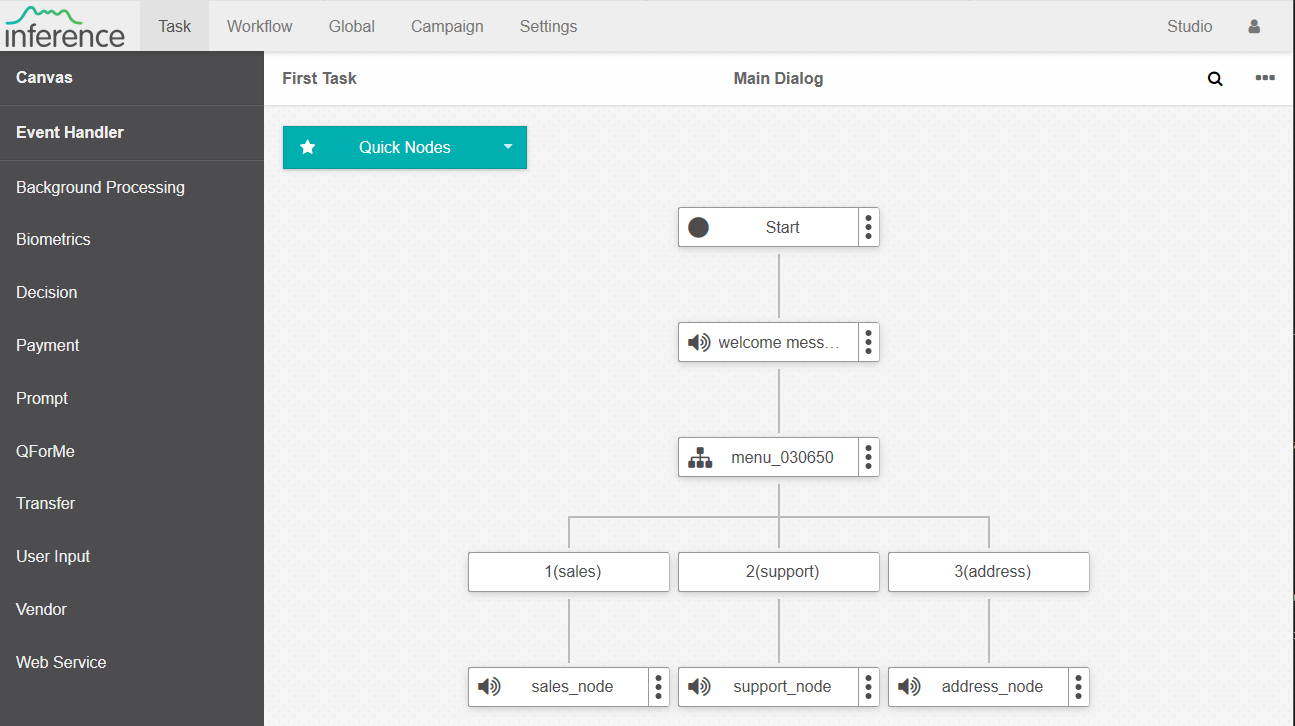
All Voice tasks are comprised of Nodes and each of these nodes have a specific function.
It is by linking these different nodes together that we produce the Call Flow.
The Canvas is the area where we insert Nodes and link them together.
You can also create multiple canvasses and link them together to produce a larger canvas. This is very helpful when working with tasks that might contain a lot of nodes as it allows you to keep track of certain areas in the call flow. Complex tasks can consist of hundreds of nodes so using more than one canvas is recommended.
You can access the Node Reference section for a breakdown on all current node types.
TIP
It is recommended that a Studio task not exceed 2,500 nodes. All nodes on all canvases of the task are included in this figure. Linked tasks are not included. The number of linked tasks is not limited.
Play Task
Play task features allows you to call your task without the need to map a phone number first. This is helpful for debugging and prototyping call flows.
How to Use the Play Task Feature
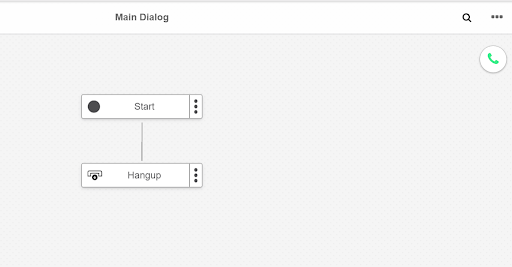
- Step 1
The Play task feature is on the top right hand side of the canvas.
Simply click the green call button to dial your task.
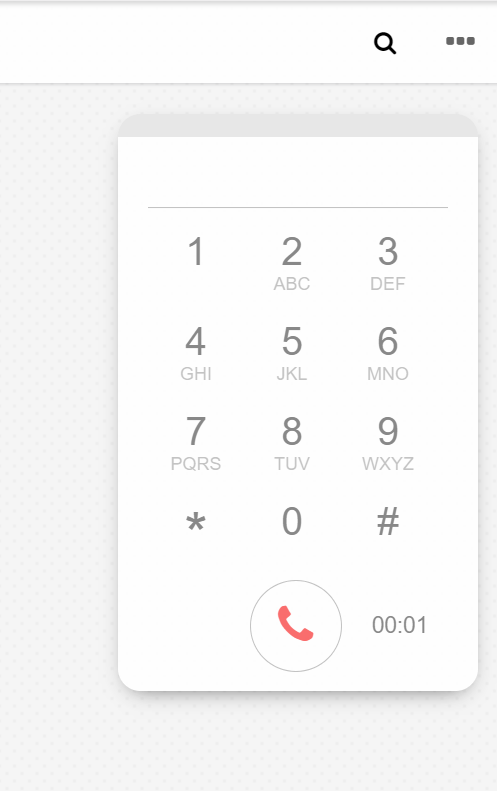
- Step 2
A dialpad will be displayed for you to interact with the task using the microphone and dialpad.
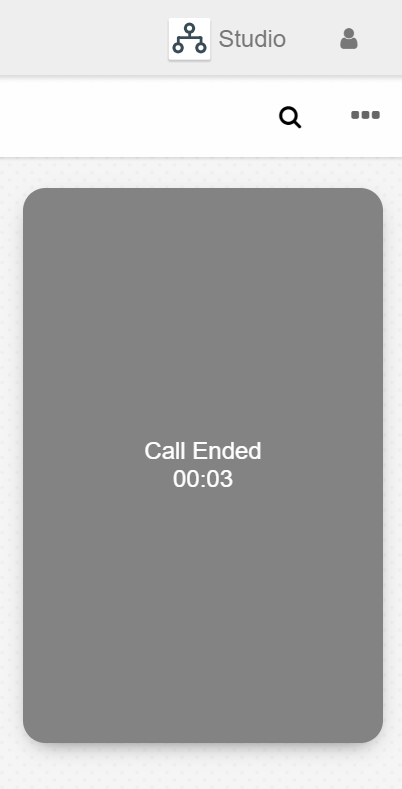
- Step 3
You will see the screen below once the call ends.
TIP
We recommend testing often as you build your task! This will give you a good sense of the customer experience.
WARNING
The Play task feature does not support call transfer. If you have a transfer node (Blind, Bridge or Screen-Pop transfer), the call will be terminated at that point.
Play task Requirements
Before you can use the Play task feature you need to ensure your computer is capable of placing a webRTC call. Here are the checks:
- you must have a microphone and speakers. Your web browser must also have authority to access your microphone and speaker.
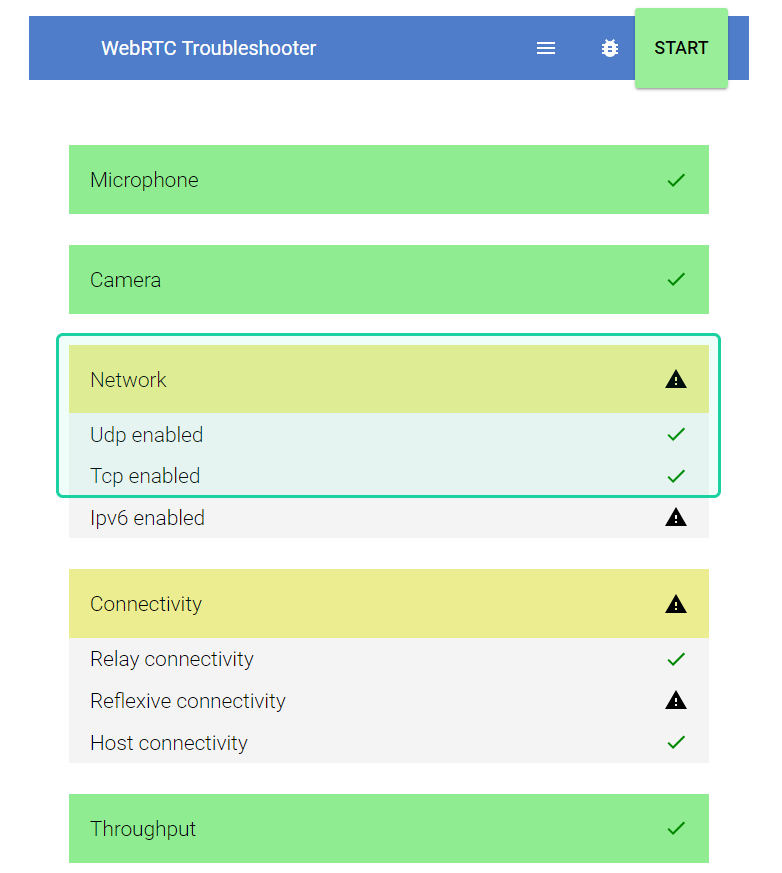
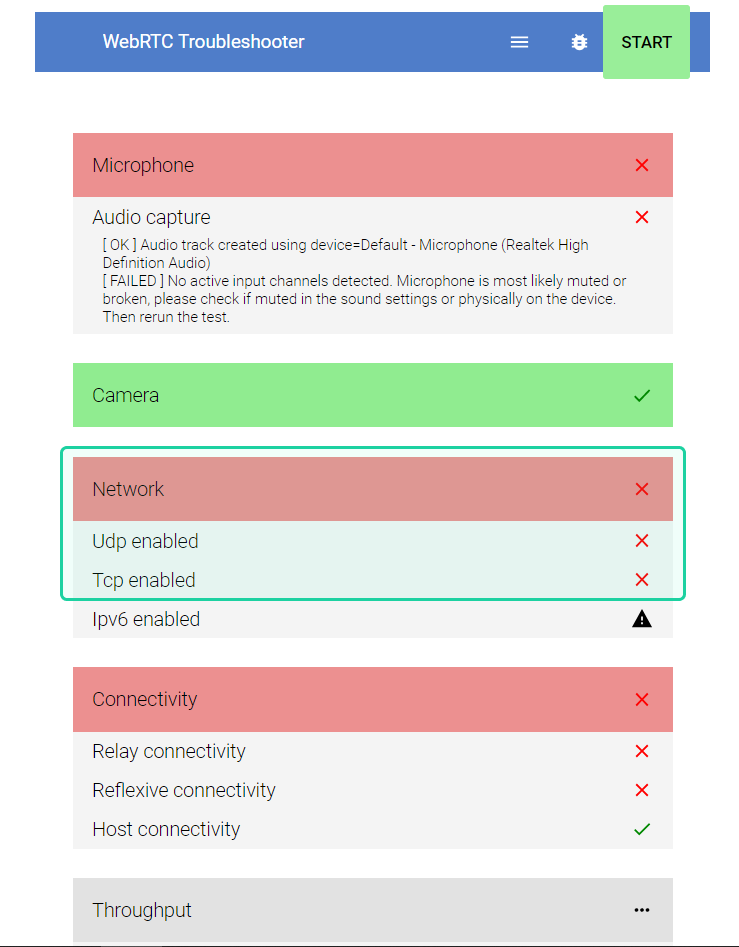
- You need to ensure that you have access to UDP protocol and its not blocked by your router. . Certain WIFI providers block UDP wh causes the WebRTC button to not run. This is most common with public Wi-Fi’s at hotels or public places. To test whether your internet router allows UDP use the URL: https://test.webrtc.org and click on the Start button. At the end of the test, you should have a green tick next to the microphone, UDP enabled and TCP enabled options as shown in the image below.
On the other hand if your result looks like the image below, your computer is not capable of placing a webRTC call and you may need to talk to your provider to enable UDP access.
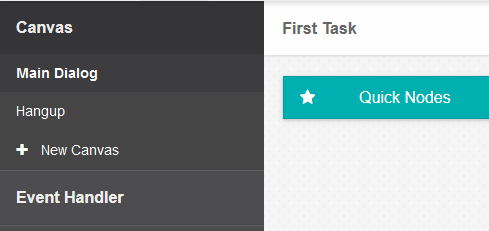
Creating and Selecting a Canvas
The Canvasses for each task are accessible by selecting the Canvas dropdown menu. From the dropdown menu you can also create a new canvas via the + New Canvas button.
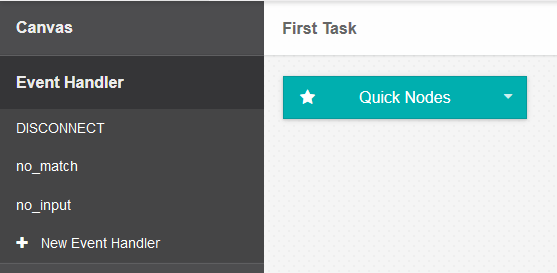
Creating and Selecting an Event Handler
An Event Handler is used in a number of different nodes within studio. An Event Handler is designed to direct a caller to an alternate area if their inputs are either not being heard or understood by the system.
From the Canvas you have access to the Event Handler dropdown menu were you can select and modify existing Event Handlers of create a new one via the + New Event Handler button.
System defined Event Handlers
There are a number of event handlers that are available to help you respond to events that may occur in your voice task.
| Event handler name | When this event handler runs |
|---|---|
| DISCONNECT | When the caller hangs-up. An outstanding defect means this event handler also currently executes on transfer with ANI and/or displayname override on transfer conclusion. Note: this handler does not run when Studio hangup is processed. |
| MACHINE_DETECTION | On callee answer appearing to be a voicemail. See campaigns and voicemail systems |
| BEEP_DETECTION | On callee answer presenting a beep. See campaigns and voicemail systems |
TIP
If you would like to run common functions, e.g. to write a call-tracking record on hangup of caller, use a Goto node to a common canvas that performs that function.
Working with Nodes
A Call Flow gets its functionality from the different nodes it contains. Each node is different in how it is created, how it functions and how it interrelates with other nodes.
You can access the Node Reference section for a breakdown on all current nodes which will guide you through the process of creating and implementing each node.
Edit Task Settings
- In Voice Task Name, rename your task.
- Fill in the relevant Tags for your task.
- Select the default Language. Depending on your geographic region and service provider agreement, multiple languages may be shown under Language.
- Choose the TTS (Text To Speech) voice type you would like to use. This option is included by default, however you can choose not to use TTS.
- Select whether your task should use Machine and/or Beep detection. This is an advanced feature and is set to No by default. It is recommended that Beep Detection and Machine Detection (AMD/CPA) should be enabled only for outbound tasks. See campaigns and voicemail systems for more information.
- Choose whether you would like to enable operator transfer capabilities for this task. This will only apply to tasks that will be performing outbound calling, such as Inference Studio campaigns. This is an advanced feature and is set to Disabled by default.
- Select Save to finish editing your Voice task.
Protect Task
Protecting a task prevents a user accidentally modifying a task.This is useful if the task is being used in a production application where any edits could affect customers.
- Select Protect Task
- Provide a text description of why the task is protected.
- Click Protect.
- A small lock icon will appear next to the task name to show it is protected.
- If you wish to edit a protected a task click Unprotect task.
- Then confirm that you want to unprotect.
Delete Voice Task
- From the Actions menu, select Delete.
- You will see the prompt Permanently Delete your Voice Task.
- You will need to confirm deletion by entering your account password. This is to protect against accidental task deletion.
WARNING
Once you delete the task, there is no way to reverse it. Any numbers Mapped to this task will need to be Unmapped. Any related configurations will also be deleted.
Callout
Callout is an advanced Business Feature so depending on your account type this may or may not appear in your Voice Task Actions menu.
Callout is a way of testing a Voice task in the same way it would actually be used as part of a telephony service. Regardless or whether a task is intended for inbound calls our outbound campaigns it will run the same way, following the same Callflow. This is a powerful feature for general task testing as well as user experience testing.
- Provide one or more service numbers.
- Select the Callout button.
- To confirm the Callout action has started, you will see the following prompt, You will receive a call shortly.
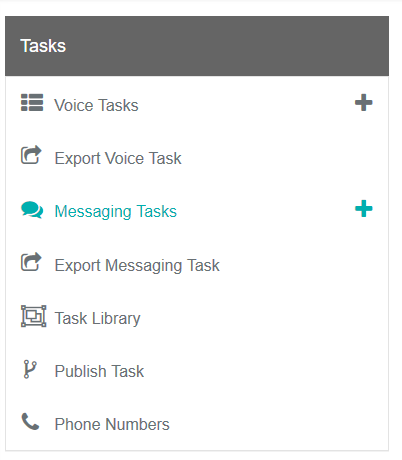
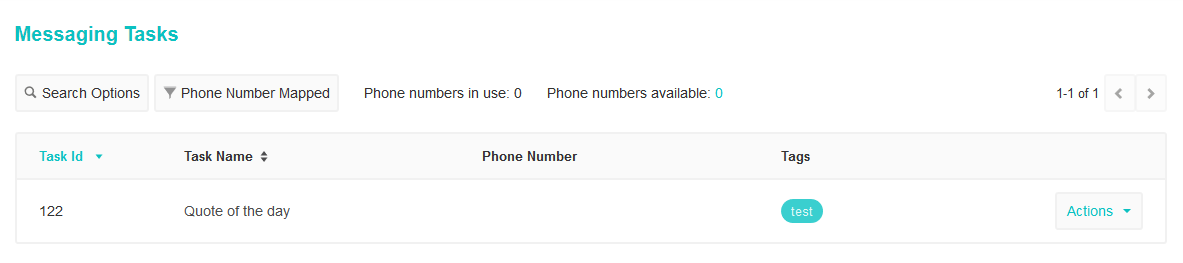
Messaging Tasks
The Messaging Tasks page is the dashboard containing all your task details. You can view current Tasks, assigned Service Numbers and task details.
From here you have access to the Actions menu where you can add functionality to your tasks.
If this is a new account, you will need to Add a Voice Task before you can apply actions to it.
To access the Messaging Tasks page:
- Navigate to Task in the top menu.
- Select the Messaging Tasks title.
3.From here you will be taken to the Messaging Tasks page where you can see all current Messaging Tasks.
Creating a Messaging Task
- Navigate to Task in the top menu.
- Select the Messaging Tasks + icon.
- Studio will ask how you would like to create the Messaging callflow. You can select between a Blank Canvas, App Library, Copy from Task and Import. Select the Blank Canvas option and click Next.
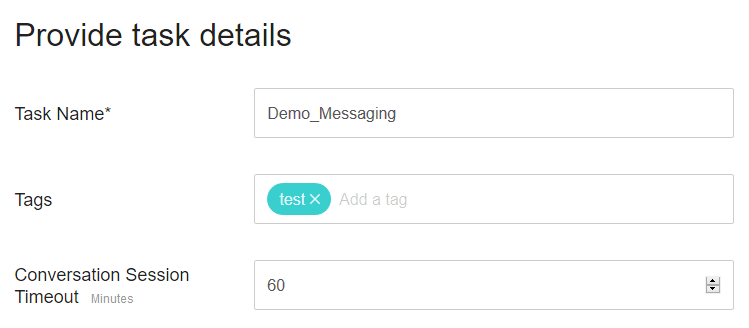
- In Messaging Task Name give your task a title.
- Fill in the relevant Tags for your task. Tags are a good way to categorize your tasks. They allow you to search and filter your tasks.
- Select Add to finish creating your Messaging task.
Actions
From the Messaging Tasks page you have access to the Actions menu. The Actions menu gives you access to the various features and options for your tasks i.e. it allows you to do things with the tasks you have created. For example, assigning a task to a service number is done through the Actions menu.
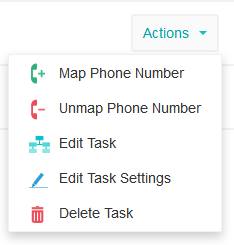
From here we will walk you through the various actions you can apply to your Messaging tasks.
Map Phone Number
Before you can text in to a Messaging task it will first need to be assigned to a phone number. A phone number is simply a telephone number.
Phone numbers can be created and assigned to accounts by the service provider that owns the account. If you are an account level user then these numbers will already be assigned to your account.
- Select the phone numbers you would like to assign the Voice task to and select Map Selected Phone Number(s) Note: You can map more than one phone number to a messaging task.
WARNING
The Map Phone Number option will only be accessible if you currently have unmapped phone numbers.
TIP
If your account has a large number of phone numbers you can use the search function by providing the Start With and / or End With parameters.
Unmap Phone Number
- To unmap phone numbers simply select the number(s) you would like to unmap and choose Unmap Selected Phone Number(s).
WARNING
Unmapping Phone Number's will require password authentication to prevent accidental deletion of phone numbers.
Move Phone Number
If you want to reassign multiple phone numbers from one task to another you can do this with the Move Phone Number action. This is helpful for bulk reassignments instead of Unmapping and Mapping phone numbers individually.
- From the Messaging Tasks page, select Actions > Move Phone Number.
- Select the Messaging Task you wish to move the phone numbers to, and select Yes, I agree.
WARNING
Moving Phone Number's will require password authentication to prevent accidental reassignment.
Edit Task
All Messaging tasks are comprised of Nodes and each of these nodes have a specific function.
It is by linking these different nodes together that we produce the overall text conversation.
The Canvas is the area where we insert Nodes and link them together.
You can also create multiple canvasses and link them together to produce a larger canvas. This is very helpful when working with tasks that might contain a lot of nodes as it allows you to keep track of certain areas in the call flow. Complex tasks can consist of hundreds of nodes so using more than one canvas is recommended.
You can access the Node Reference section for a breakdown on all current node types.
TIP
It is recommended that a Studio task not exceed 2,500 nodes. All nodes on all canvases of the task are included in this figure. Linked tasks are not included. The number of linked tasks is not limited.
Creating and Selecting a Canvas
The Canvasses for each task are accessible by selecting the Canvas dropdown menu. From the dropdown menu you can also create a new canvas via the + New Canvas button.
Creating and Selecting an Event Handler
An Event Handler is used in a number of different nodes within studio. An Event Handler is designed to direct a caller to an alternate area if their inputs are either not being heard or understood by the system.
From the Canvas you have access to the Event Handler dropdown menu were you can select and modify existing Event Handlers of create a new one via the + New Event Handler button.
Working with Nodes
A Call Flow gets its functionality from the different nodes it contains. Each node is different in how it is created, how it functions and how it interrelates with other nodes.
You can access the Node Reference section for a breakdown on all current nodes which will guide you through the process of creating and implementing each node.
Edit Task Settings
- In Messaging task Name, rename your task.
- Fill in the relevant Tags for your task. Tags are a good way to categorize your tasks. They allow you to search and filter your tasks. We will use the tag "Test" to specify that this task is being used for testing purposes only.
- Select Save to finish editing your Messaging task.
Protect Task
Protecting a task prevents a user accidentally modifying a task.This is useful if the task is being used in a production application where any edits could affect customers.
- Select Protect Task
- Provide a text description of why the task is protected.
- Click Protect.
- A small lock icon will appear next to the task name to show it is protected.
- If you wish to edit a protected a task click Unprotect task.
- Then confirm that you want to unprotect.
Delete Messaging Task
- From the Actions menu, select Delete.
- You will see the prompt Permanently Delete your Messaging Task.
- You will need to confirm deletion by entering your account password. This is to protect against accidental task deletion.
WARNING
Once you delete the task, there is no way to reverse it. Any numbers Mapped to this task will need to be Unmapped. Any related configurations will also be deleted.
Task Library
If you are a Service Provider you will have access to the Task Library. Here you will be able to see all of the pre-built Studio Tasks.
- To access the Task Library select Task from the top menu, then select Task Libray.

- From the App Library you will be able to view the list of current apps. As well as edit and delete any templates that have been created in your account.
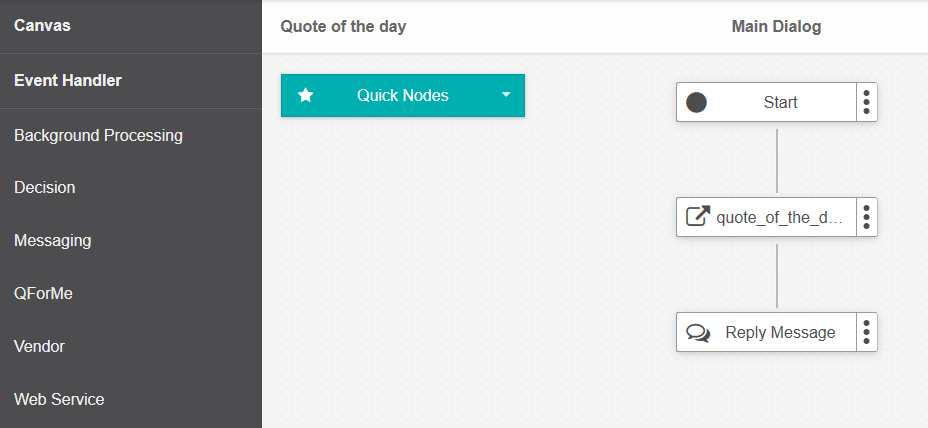
Chatbot Tasks
A Chatbot Task works in a very similar way to a Messaging Task. The main difference is that instead of mapping phone numbers, the Chatbot Task will auto-create and provide it's API details for you to connect it to an endpoint or front end.
The Chatbot Tasks page is the dashboard containing all your task details. You can view current Tasks, API documentation and task details.
From here you have access to the Actions menu where you can add functionality to your tasks.
If this is a new account, you will need to Add a Chatbot Task before you can apply actions to it.
To access the Chatbot Tasks page:
- Navigate to Task in the top menu.
- Select the Chatbot Tasks title.
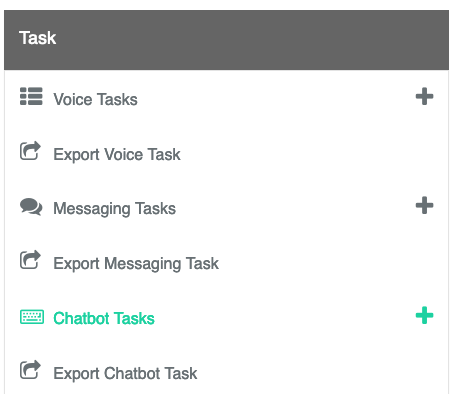
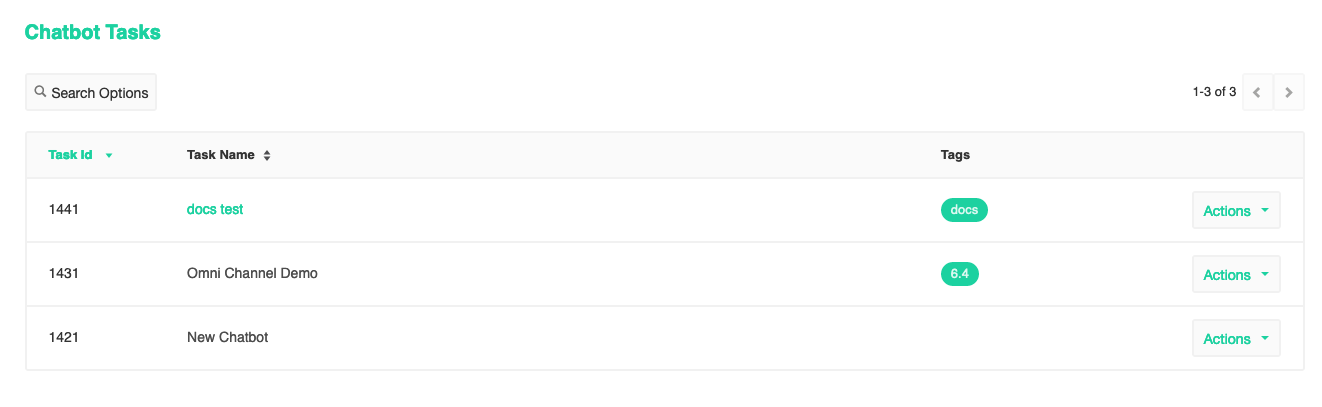
3.From here you will be taken to the Chatbot Tasks page where you can see all current Chatbot Tasks.
Creating a Chatbot Task
- Navigate to Task in the top menu.
- Select the Chatbot Tasks + icon.
- Studio will ask how you would like to create the Chatbot callflow. You can select between a Blank Canvas, App Library, Copy from Task and Import. Select the Blank Canvas option and click Next.
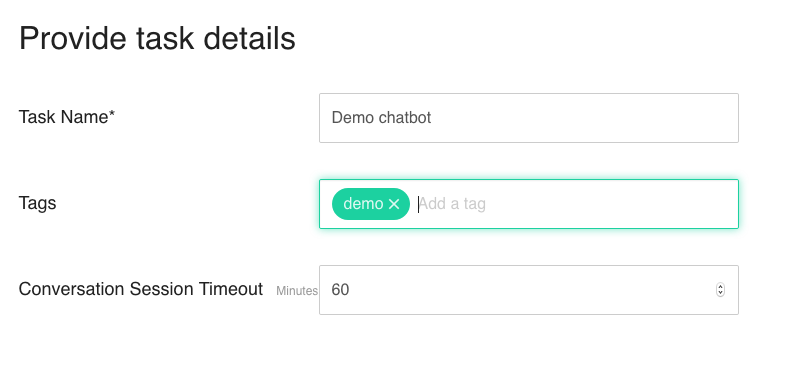
- In Chatbot Task Name give your task a title.
- Fill in the relevant Tags for your task. Tags are a good way to categorize your tasks. They allow you to search and filter your tasks.
- Select Add to finish creating your Chatbot task.
Actions
From the Messaging Tasks page you have access to the Actions menu. The Actions menu gives you access to the various features and options for your tasks i.e. it allows you to do things with the tasks you have created.
From here we will walk you through the various actions you can apply to your Messaging tasks.
Edit Task
All Messaging tasks are comprised of Nodes and each of these nodes have a specific function.
It is by linking these different nodes together that we produce the overall text conversation.
The Canvas is the area where we insert Nodes and link them together.
You can also create multiple canvasses and link them together to produce a larger canvas. This is very helpful when working with tasks that might contain a lot of nodes as it allows you to keep track of certain areas in the call flow. Complex tasks can consist of hundreds of nodes so using more than one canvas is recommended.
You can access the Node Reference section for a breakdown on all current node types.
TIP
It is recommended that a Studio task not exceed 2,500 nodes. All nodes on all canvases of the task are included in this figure. Linked tasks are not included. The number of linked tasks is not limited.
Creating and Selecting a Canvas
The Canvasses for each task are accessible by selecting the Canvas dropdown menu. From the dropdown menu you can also create a new canvas via the + New Canvas button.
Creating and Selecting an Event Handler
An Event Handler is used in a number of different nodes within studio. An Event Handler is designed to direct a caller to an alternate area if their inputs are either not being heard or understood by the system.
From the Canvas you have access to the Event Handler dropdown menu were you can select and modify existing Event Handlers of create a new one via the + New Event Handler button.
Working with Nodes
A Call Flow gets its functionality from the different nodes it contains. Each node is different in how it is created, how it functions and how it interrelates with other nodes.
You can access the Node Reference section for a breakdown on all current nodes which will guide you through the process of creating and implementing each node.
Edit Task Settings
- In Chatbot task Name, rename your task.
- Fill in the relevant Tags for your task. Tags are a good way to categorize your tasks. They allow you to search and filter your tasks. We will use the tag "Test" to specify that this task is being used for testing purposes only.
- Select Save to finish editing your Chatbot task.
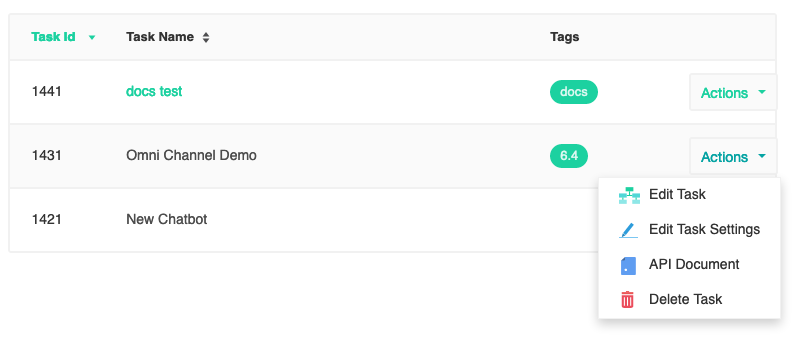
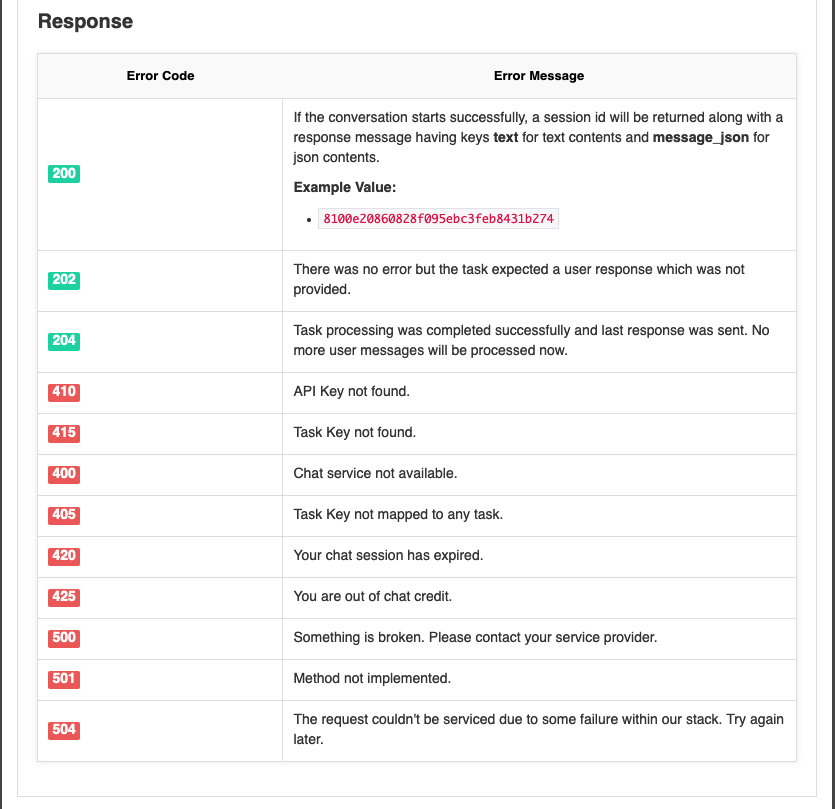
API Document
The API Document will provide the information required to implement a Studio chatbot into your platform/front end. It provides the necessary URL information, as well as Parameters and Response Codes.
- From the Actions menu, select API Document.
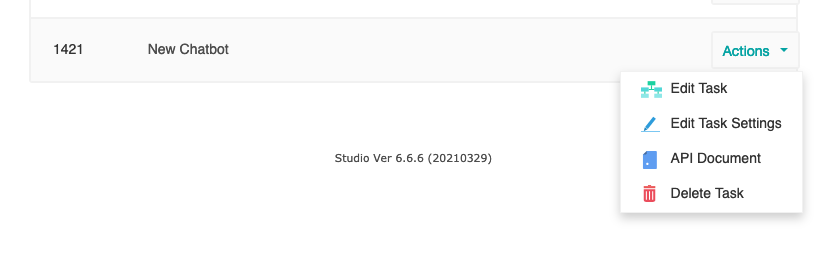
- The API document will display any URL, Parameter and Response Code information you will need to use the Chatbot API.

message_json
In the API Document > Parameters section you will see the message_json parameter. This parameter can be used with your chat client to send information in addition to regular chat messages.
This message_json parameter must be in JSON format and is accessible within the chatbot task as the array variable named LAST_MESSAGE_JSON
TIP
Note: Studio only supports single level JSON objects. JSON objects deeper than one level are not supported and will result in unexpected values in the LAST_MESSAGE_JSON variable.
{
    "status": "500",
    "userId": "",
    "messages": "hello"
}
The example JSON object above is supported.
{
    "status": "500",
    "userId": "",
    "messages": [
        {
            "action": "hang_up",
            "userId": "",
            "critical": false
        }
    ]
}
The example JSON object above is NOT supported because it is deeper than one level.
Delete Messaging Task
- From the Actions menu, select Delete.
- You will see the prompt Permanently Delete your Messaging Task.
- You will need to confirm deletion by entering your account password. This is to protect against accidental task deletion.
WARNING
Once you delete the task, there is no way to reverse it. Any endpoints using the Chatbot API will no longer work. Any Studio related configurations will also be deleted.
Task Library
If you are a Service Provider you will have access to the Task Library. Here you will be able to see all of the pre-built Studio Tasks.
- To access the Task Library select Task from the top menu, then select Task Library.
- From the App Library you will be able to view the list of current apps. As well as edit and delete any templates that have been created in your account.
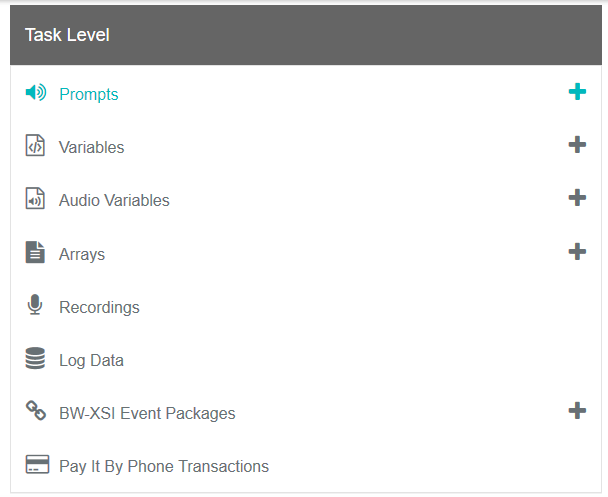
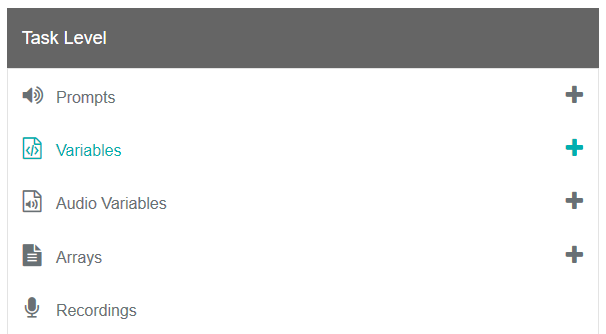
Task Level
The Task Level menu provides access to different components in your Studio tasks. Each of these components will be created inside the current task and will not be available outside of this task.
We will now walk you through each of these task level components.
Task Prompts
Task Prompts are used in tasks to provide outbound audible messages to your callers. These prompts can consists of TTS (Text To Speech) or uploaded audio files.
- Navigate to Task in the top menu.
- Under the Task Level section, select the Task Prompts title. This will take you to the Task Prompts page.
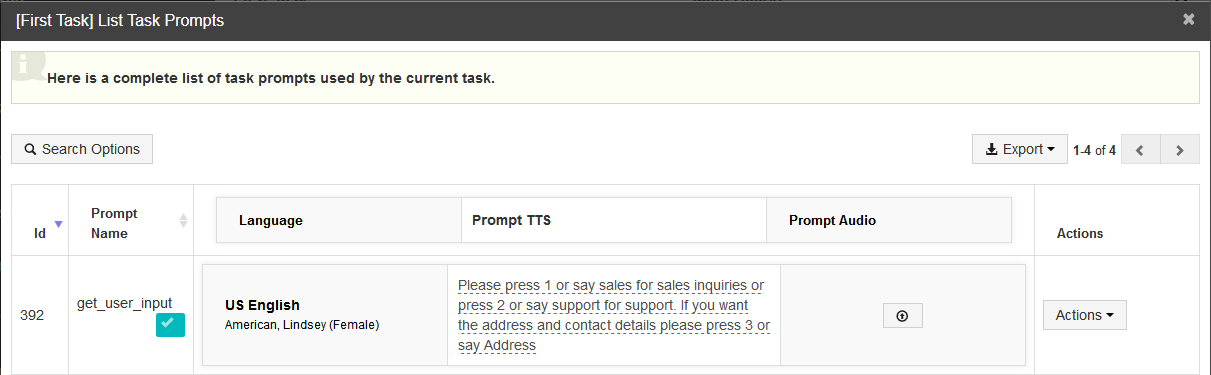
Task Prompts
The Task Prompts page displays all prompts being used by the current task.
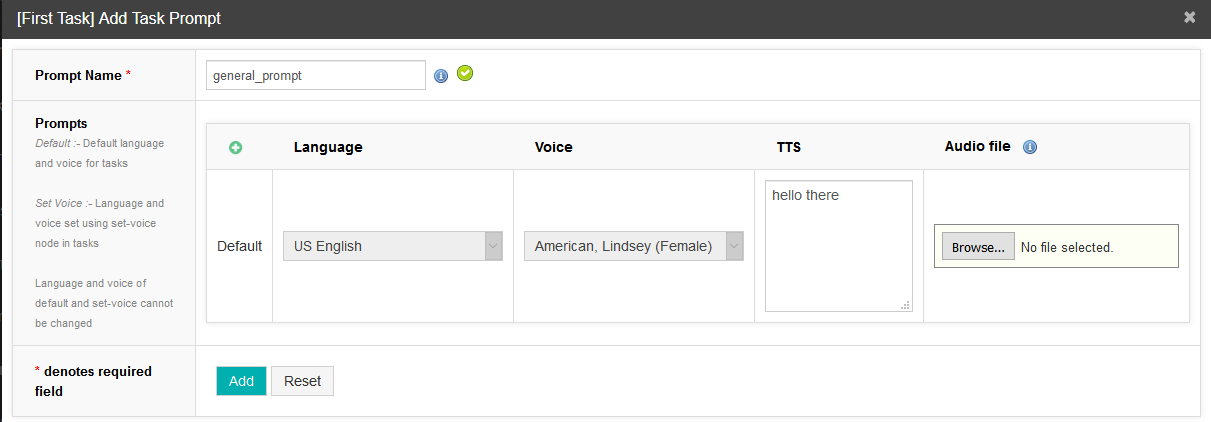
Add Task Prompt
- To create a new task level variable, navigate to Task in the top menu.
- Under the Task Level section select the Task Prompts + icon. This will take you to the Add Task Prompt page.
- Provide a prompt name.
- Select a Language from the dropdown menu.
- Select a Voice Type.
- If you would like to use TTS, provide the text content you wish to be converted into audio.
TIP
Depending on which voice type you are using will change which values you can provide in the TTS box.
If you are using a standard voice type you will be able to type in plain text or paste in SSML.
If you are using a Google Wavenet voice type you will be able to use the advanced SSML Editor to fine-tune your prompts.
- If you wish to use an Audio File instead of TTS, select the Browse button to locate the file on your computer and select upload.
- Finally, select Add to finish creating your task prompt.
Task Variables
The Task Variables page displays all current task level variables.
- Navigate to Task in the top menu.
- Under the Task Level section, select the Variables title. This will take you to the Task Variable page.
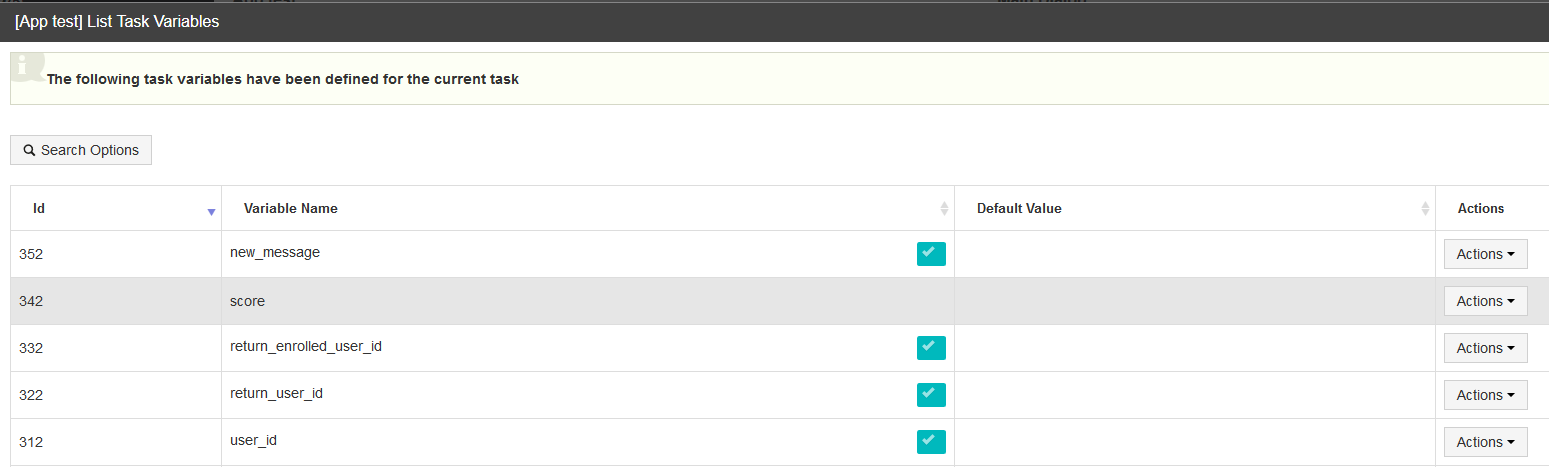
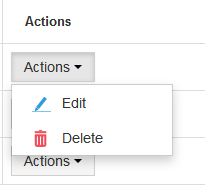
- From the Actions dropdown menu you can Edit and Delete task variables.
Add Task Variable
- To create a new task level variable, navigate to Task in the top menu.
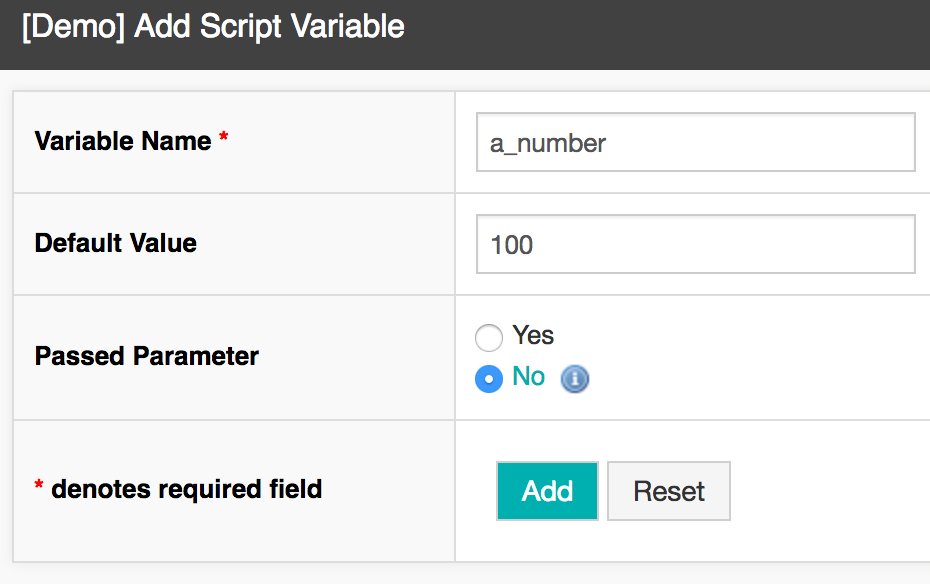
- Under the Task Level section select the Variables + icon. This will take you to the Add Task Variable page.
- Provide a variable name. We will call ours a_number.
- You have the option of providing a default value for your variable. We will provide the value 100.
- From the Passed Parameter option select whether you would like the variable to be take passed parameters which will change the value of the variable during the call flow. We will select No.
- Click Add.
Arrays
The Task Variables page displays all current task level arrays.
- Navigate to Task in the top menu.
- Under the Task Level section, select the Arrays title. This will take you to the Task Arrays page.
- From the Actions menu you canb Edit the array name or delete the array.
Using Arrays
Arrays are used in conjunction with the Integration Node and Data Stores. For more contextual information on how to use arrays read the Integration Node documentation.
Array as Return Value (Integration node)
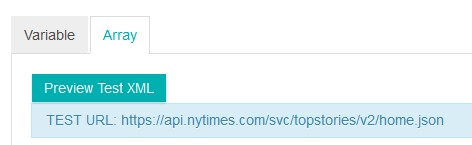
You can assign an Xpath to an existing array or == NEW ARRAY == within the Array tab. By assigning to an array it means you can return and assign all instances of a particular XPath rather than just a single instance.
- Select the Arrays tab.
TIP
Here we could fetch all of the current article titles and assign them to an Array. In this case, if we were using a variable instead of an array, we would have to go through the entire Xpath data and assign each title to a new variable, one by one. This would be very impractical and time consuming.

- Array) To assign the Xpath to a new array you will also need to provide an array name. Let's assign the Title XPath to a new array called "NYtimes_title".

- Click Add Return Value. The title Xpath is now assigned to the Title array.
Extracting data from Arrays
If you want to then extract particular keys or indices from a stored Array variable you will need to use a variable node and the expression builder. For this example, let's say we wanted to loop through our NYtimes array and extract the article title.
- Create a Variable node by dropping it onto the canvas anywhere beneath the integration node where you created the Array.
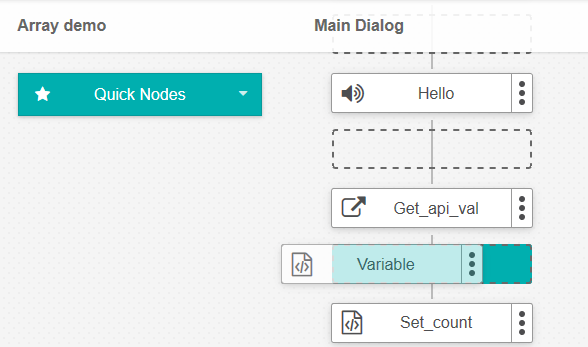
- Provide a name for the variable node.
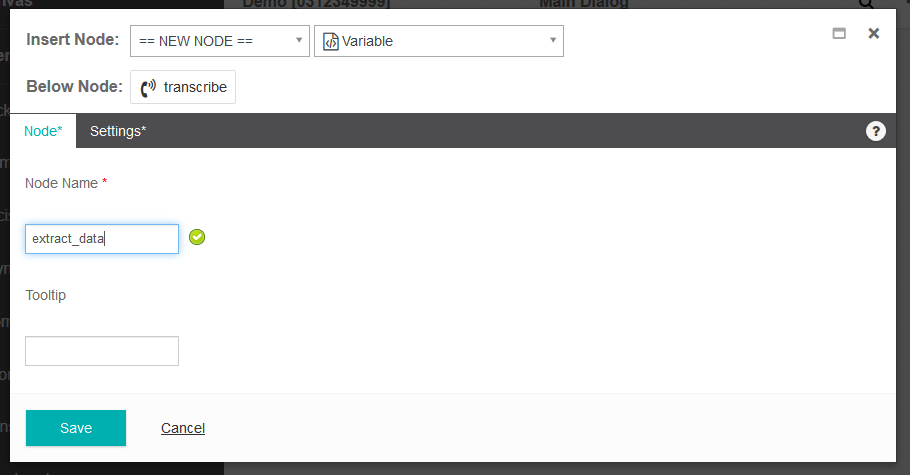
- Select == NEW VARIABLE == and provide a variable name. This is the variable where the extracted data from the 'NYTimes' Title array will be stored.
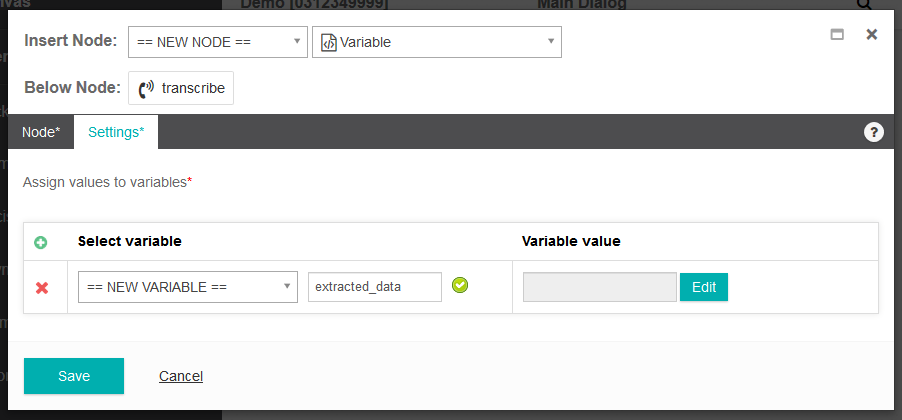
- Select the Edit Value button then in the Expression Builder select the Others button.
- From the Select Function dropdown, select Get Element from Array.
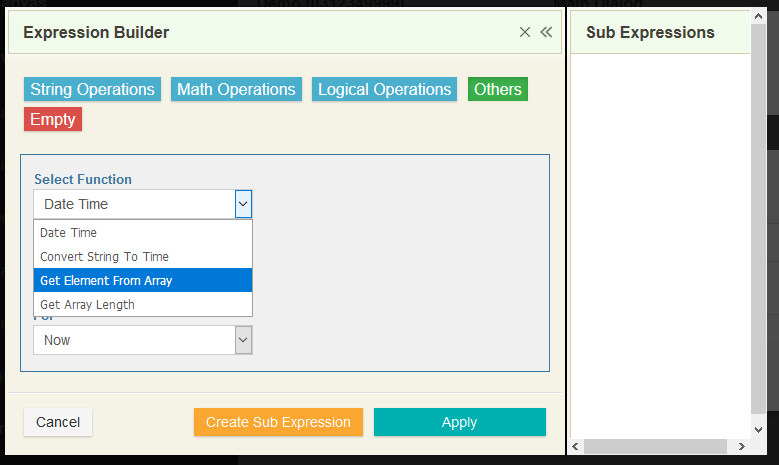
- From the Array Variable list, select the Array.Title array variable.
- From the Select Index or Key Type dropdown, you can select the key or index or the array. We will select number with the value 0, to simply get the first title.
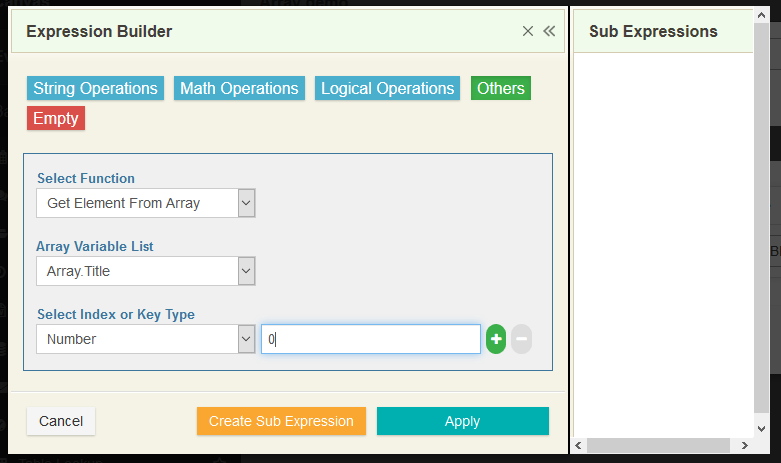
- Select Apply. The first NY Times article title is now assigned to the extracted_data variable.
Custom SIP Headers (Service Providers Only)
If you are a service provider that uses custom SIP headers, you can create variables in your task to capture information from those headers.
TIP
SIP header size limitations for x-header data passed between VCC and Studio are as follows. From Studio to VCC the characters entered in the hangup header node should not exceed 10k. From VCC to Studio the VCC EW Set Variable Module Properties should not exceed 2k.
In the example below, on the last line we have the custom header Timestamp.
INVITE sip:0370103255@inferencesolutions.com:5060 SIP/2.0
Via: SIP/2.0/UDP 10.216.235.11:5071;branch=z9hG4bK5c5iou200og15n4bc5q0.1
From: <sip:0370103204@10.83.154.138;user=phone>;tag=1100991650-1487286647048-
To: "0370103255 0370103255"<sip:0370103255@inferencesolutions.com>
Call-ID: BW101047048170217-1280007564@10.83.154.138
CSeq: 613981317 INVITE
Contact: <sip:0370103204@10.216.235.11:5071;transport=udp>
Supported: 100rel
Allow: ACK,BYE,CANCEL,INFO,INVITE,OPTIONS,PRACK,REFER,NOTIFY,UPDATE
Accept: application/media_control+xml,application/sdp,multipart/mixed
Max-Forwards: 28
Content-Type: application/sdp
Content-Length: 423
Timestamp: 2017-02-17T10:10:47.078Z
If we wanted to receive and use the Timestamp data inside studio we can achieve this by creating a new task level variable.
To create a new task level variable, navigate to Task in the top menu.
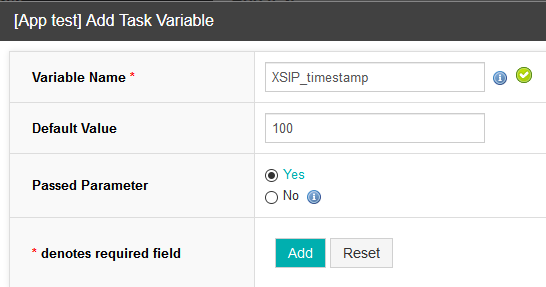
Under the Task Level section select the Task Variables + icon. This will take you to the Add Task Variable page.
- On the Add Task Variable page, provide the Variable Name with the naming convention
XSIP_variablename. The variable name must use the convention ofXSIPin all caps followed by an underscore_followed by the variable name in lowercase. e.g.timestamp. By using this convention Studio will automatically match the variable to a header with the same name. The final variable name in this case would beXSIP_timestamp. - Select Add to finish creating the variable.
Workflow
About Workflows
Workflow allows you to setup automated tasks that will run based on a set schedule. This is useful for things such as generating automated reports, or retrieving data from a third party data source on a periodic basis.
Workflows are created and managed in a similar way to callflow tasks; using Canvases, Nodes and Event Handlers.
The majority of Node types used in a Workflow are the same as those used in a call flow Task. You can learn about node types in the Node Types reference.
Workflows
The Workflows page is the dashboard containing all your current Workflows.
From here you have access to the Actions menu where you can view, edit and delete existing Workflows.
To access the Workflows page:
- Navigate to WORKFLOW in the top menu.
- Select the Workflows title.
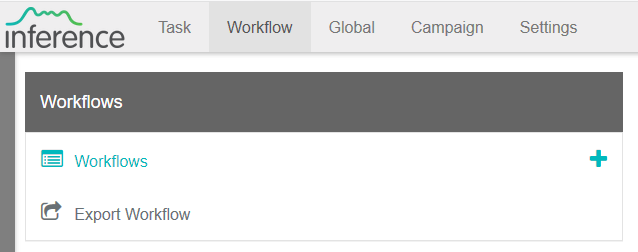
- The Workflows page will be displayed

Creating a Workflow
- Navigate to Workflow in the top menu.
- Select the + icon.
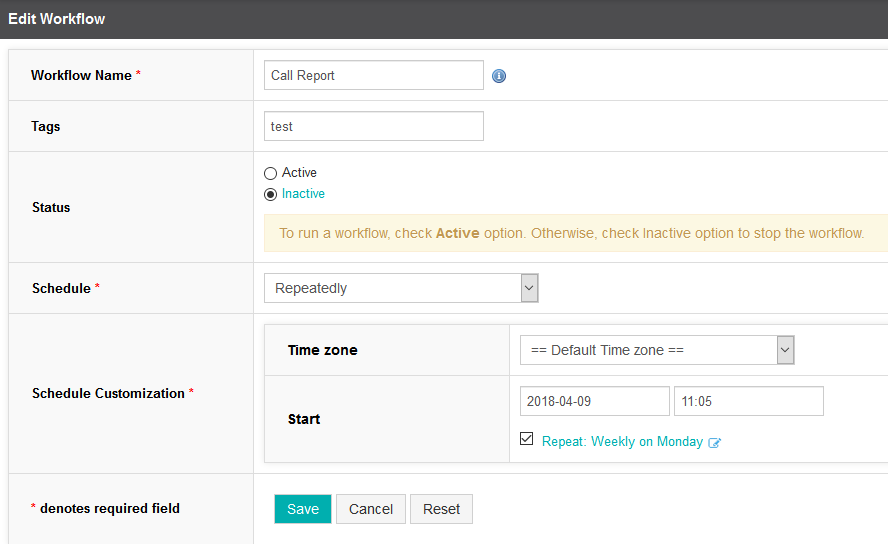
Adding Workflow Details
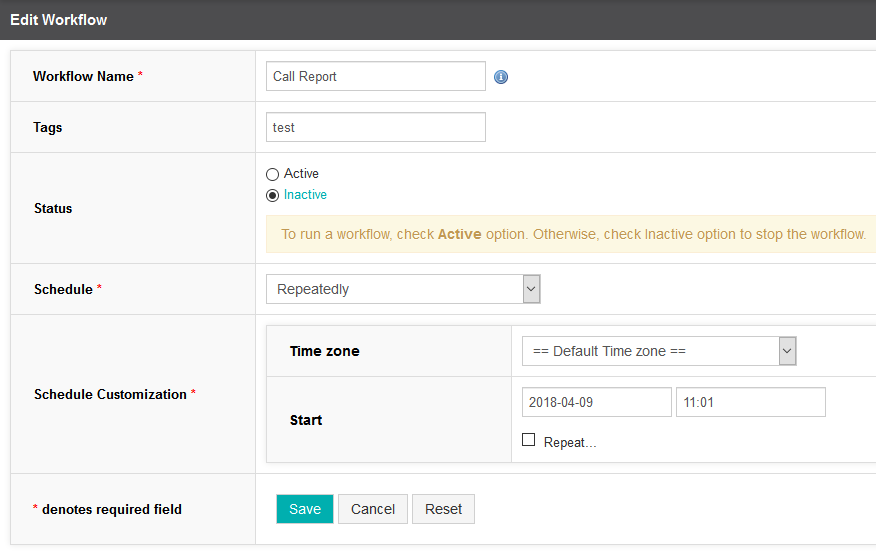
- In Workflow Name give your workflow a title. We have called ours Call Report.
- Fill in the relevant Tags for your workflow. Tags are a good way to categorize your different workflows. They allow you to search and filter your workflows. We will use the tag "Test" to specify that this workflow is being used for testing purposes only.
- Set the Status for your workflow. We will leave ours set to Inactive for now, as we can always change it later.
- Under the Schedule section dropdown you can select how often you want your workflow to run. The options are Once, Repeatedly and Always on. We will set ours to Repeatedly.
- Under the Schedule Customization section, the Time zone will default to the local server time. You can change the time zone using the drop down menu. We will leave ours set to the == Default Time Zone ==
- Choose a Start date and time. We will set our to today's date and the current time.
TIP
Because we selected the schedule to run Repeatedly, the Schedule Customization will also show a Repeat check box. You will need to check this and then complete the Repeat schedule which will immediately appear.
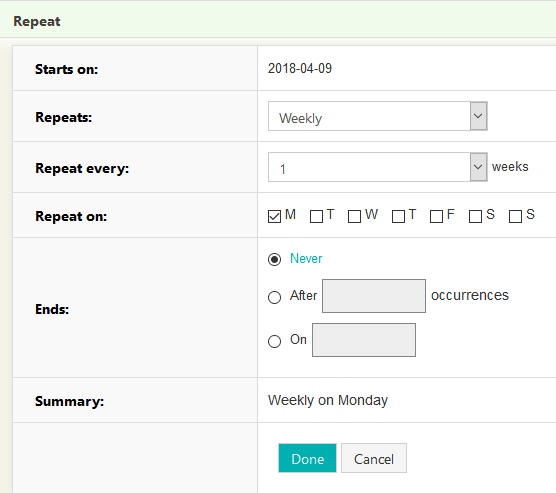
Repeat Schedule
- Set the repeat interval from the Repeats dropdown menu. You can select between Daily, Weekly, Monthly or Yearly. We will set our Repeats interval to Weekly.
- Select how often you want it to repeat from the Repeat every dropdown menu. We will select ours to repeat every 2 weeks.
- From the Repeat on section, choose which day(s) of the week you want the schedule to run. We will select ours to repeat on Fridays.
- Select when you want the schedule to End. This can be set to end After a specific number of occurrences, Or to end On a specific date. It can also be set to Never, to have it repeat indefinitely.
- Select Done to finish the schedule.
- Finally, select Add to finish creating your empty Workflow.
TIP
At the bottom of repeat schedule page you will see a Summary of the schedule that will change based on your selections. This is helpful to get an overview of your schedule.
- You will see that the workflow has been updated with the new repeat schedule.
Actions
So far we have created a new Workflow but it doesn't actually do anything yet. Lets fix that now.
- From the Workflows page you will see that the Workflow we just created (Call Report) is now listed. Studio has also automatically assigned it a unique Workflow Id.
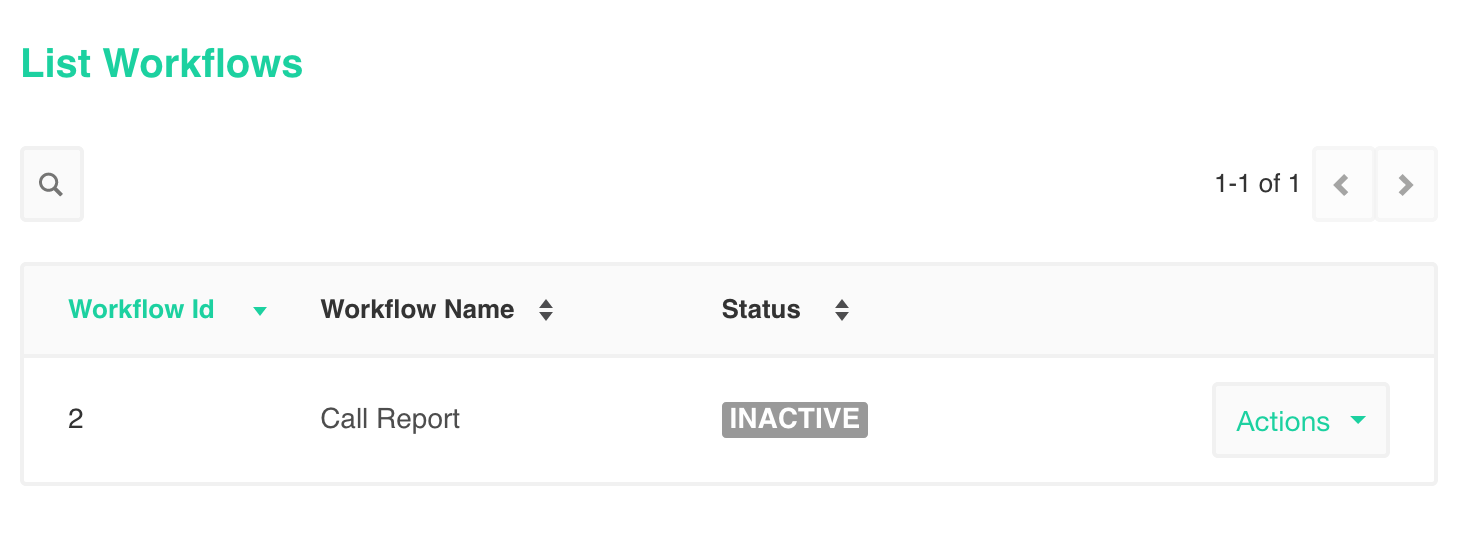
- To begin adding functionality to the Workflow select the Actions dropdown menu and select Open in Workflow Editor.
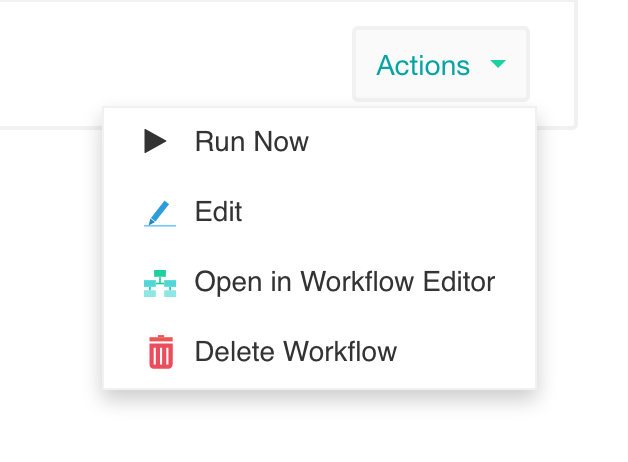
Open in Workflow Editor
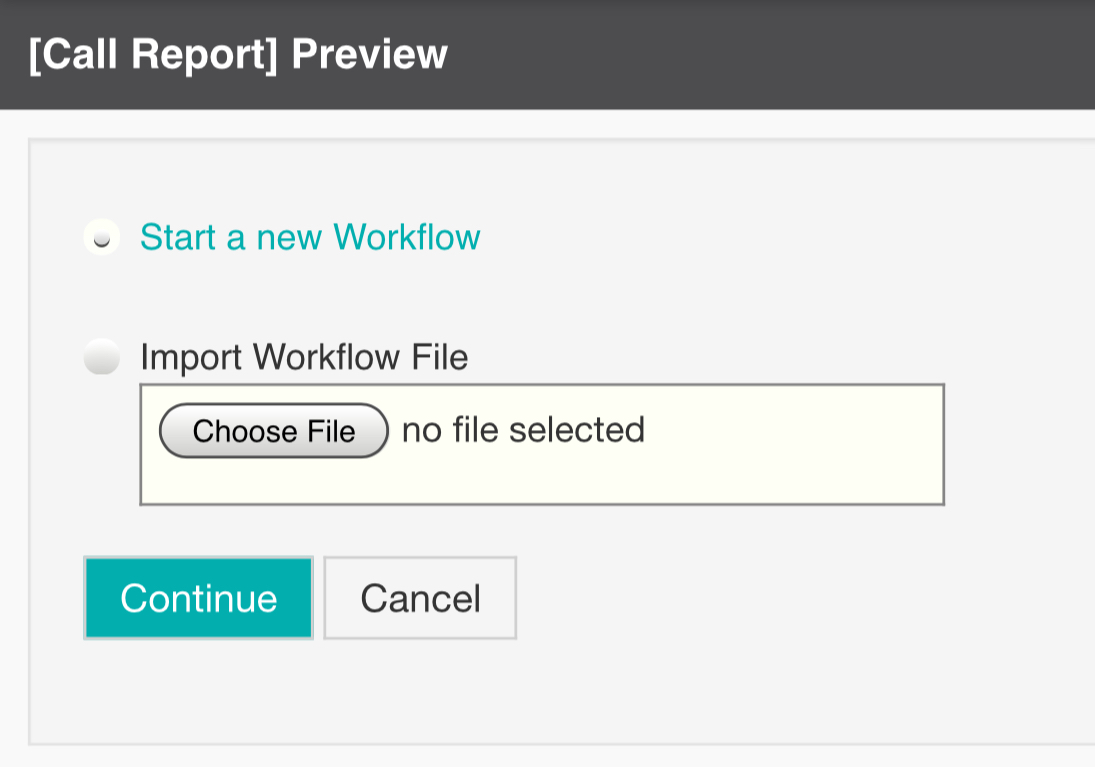
The Open in Workflow Editor option is where you will actually design the workflow and its component nodes.
As this is the first time we are editing the workflow you will need to select whether you would like to start a New Workflow or Import a pre-existing Workflow. We have selected a New Workflow.
Workflow Editor and Callflow Canvas
In the same way as Voice and Messaging tasks, workflow tasks are also comprised of nodes and each of these nodes has a specific function.
It is by linking these different nodes together that we produce the Workflow. Below is a basic starting Workflow call flow.
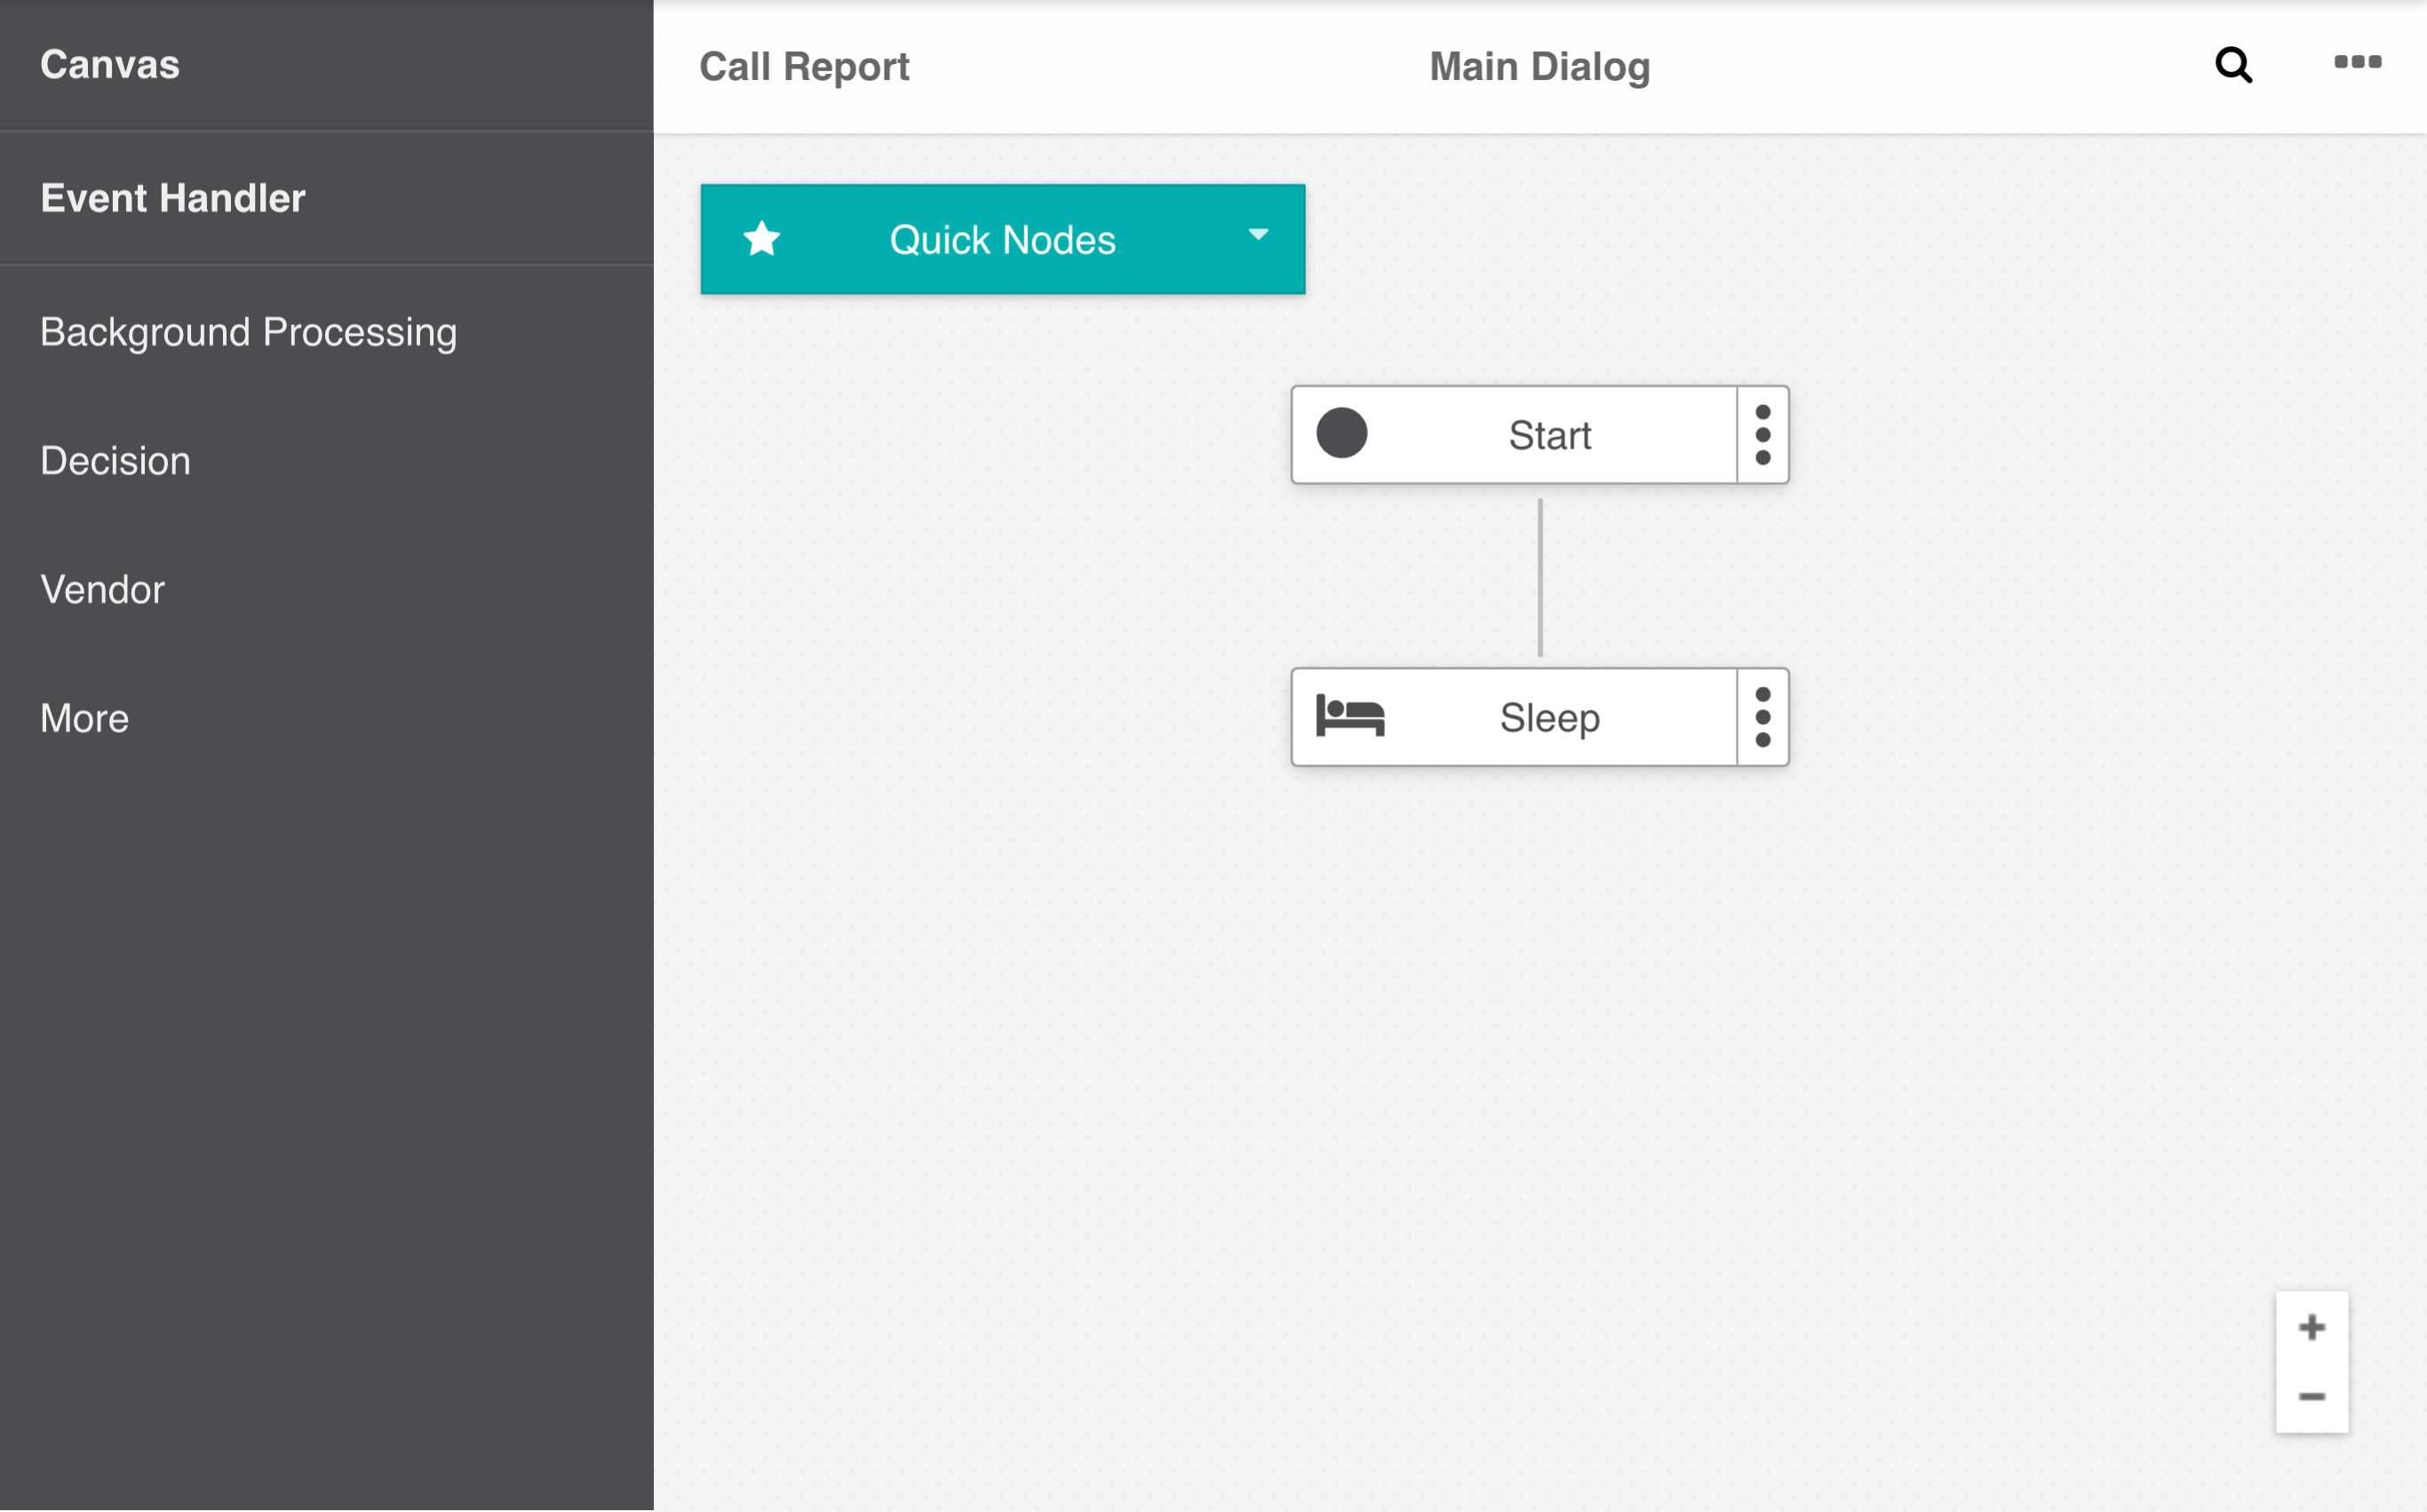
- Let's add an Email Report node directly below the Start node by selecting it from the node pallette on the left. You will find the Email Report node under the Background Processing category.
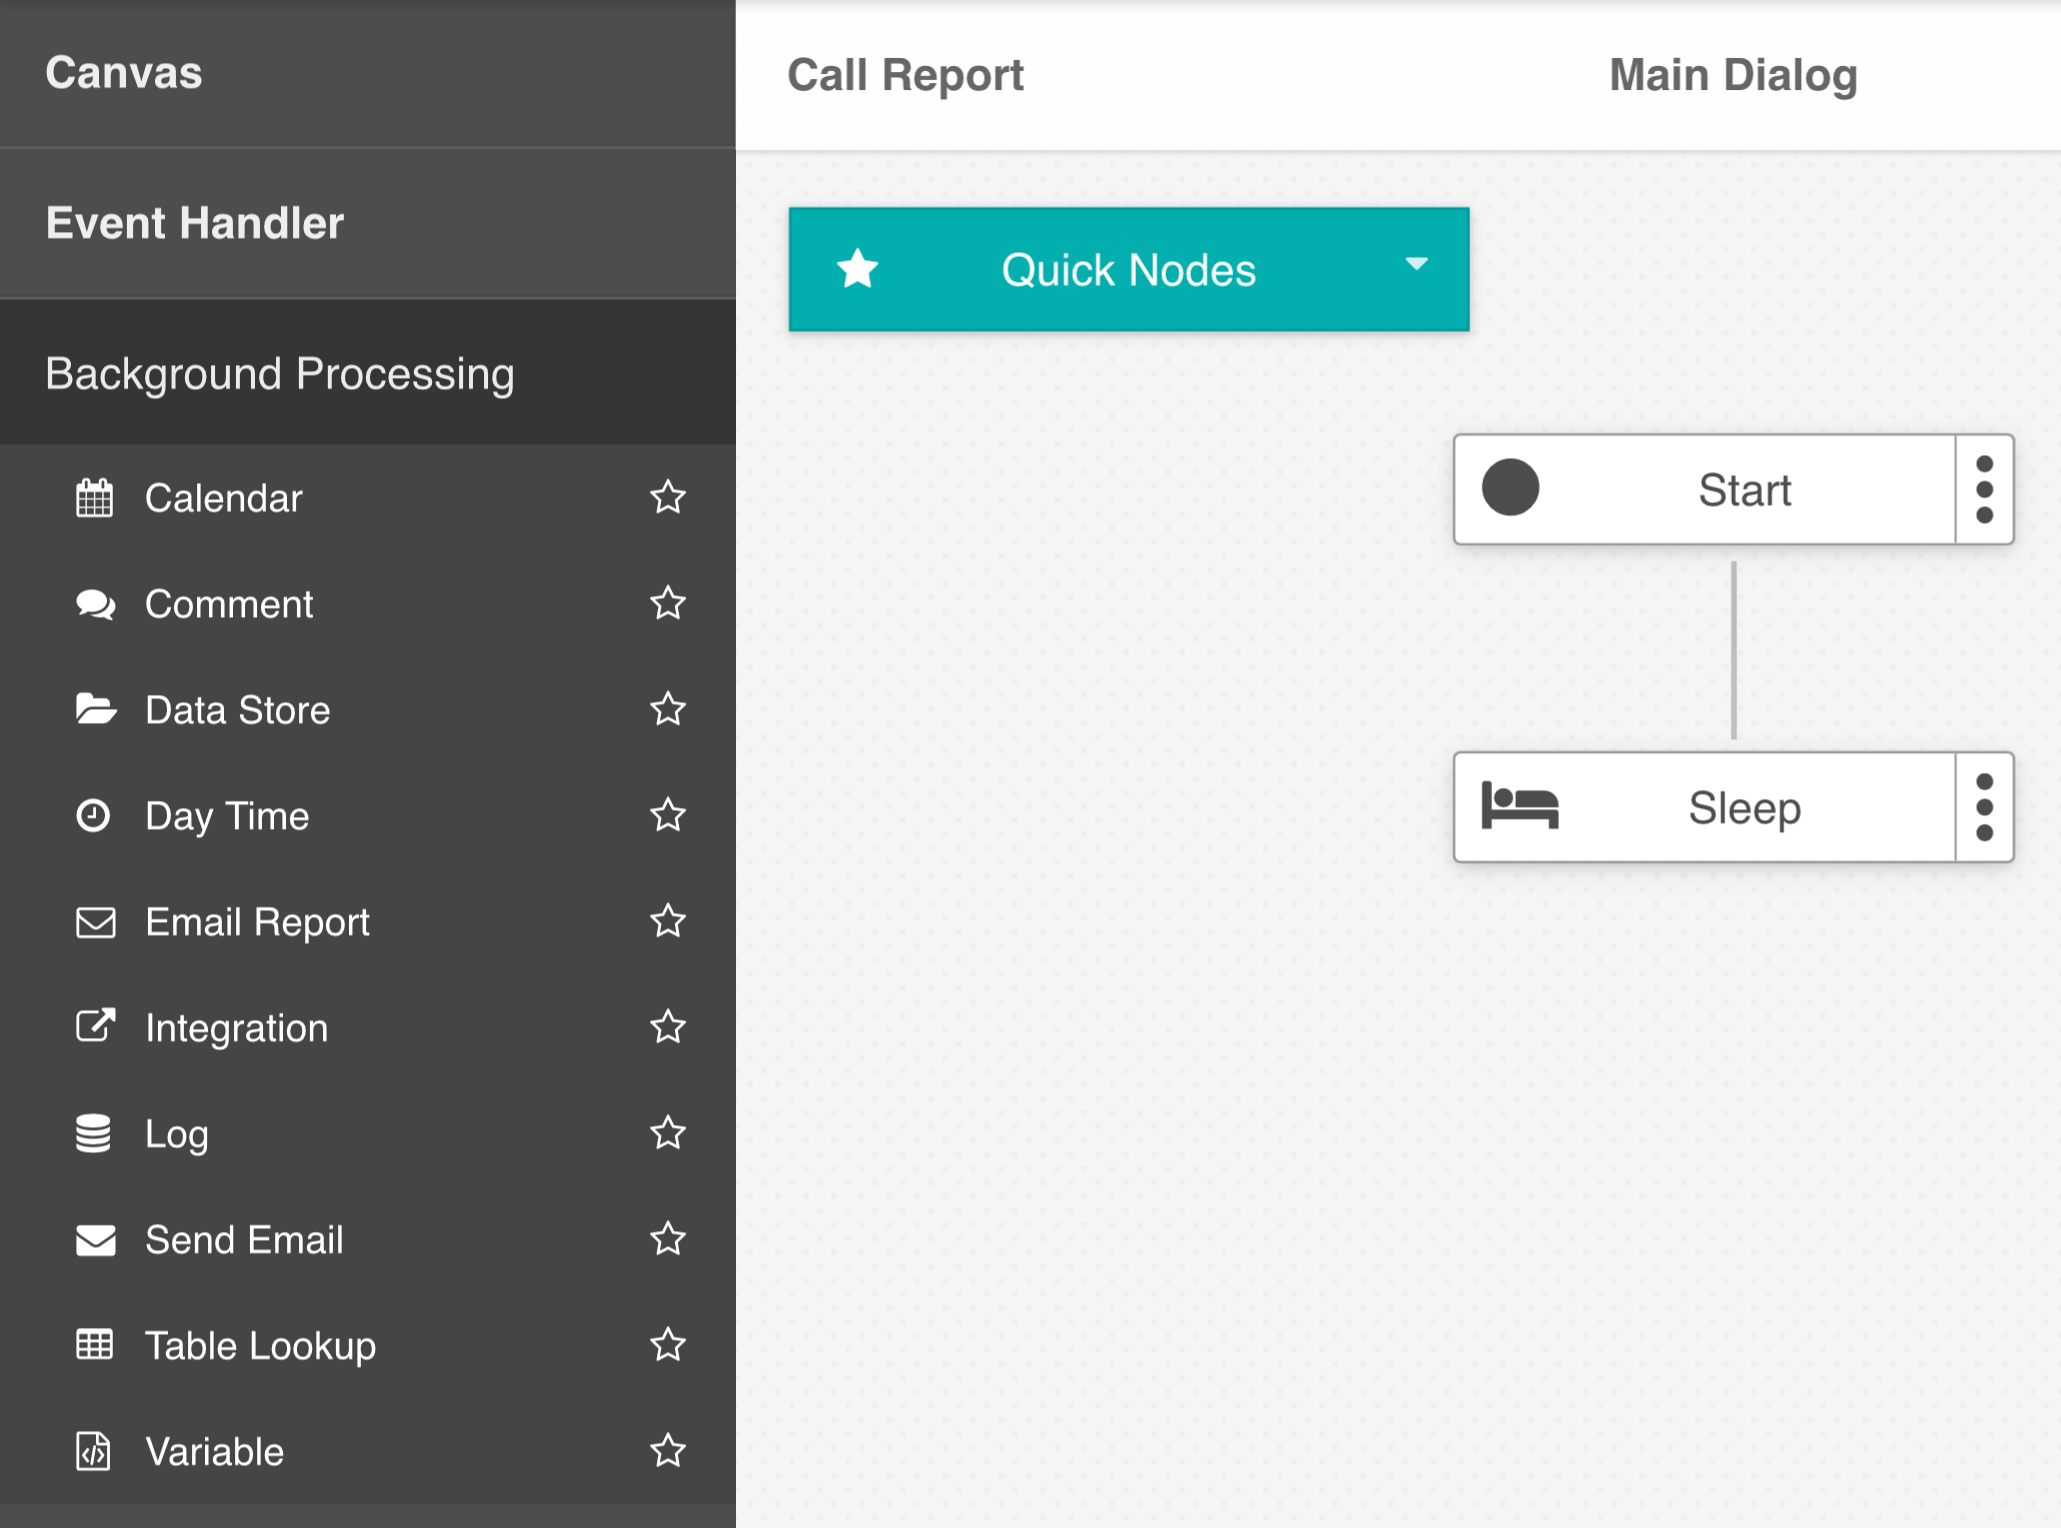
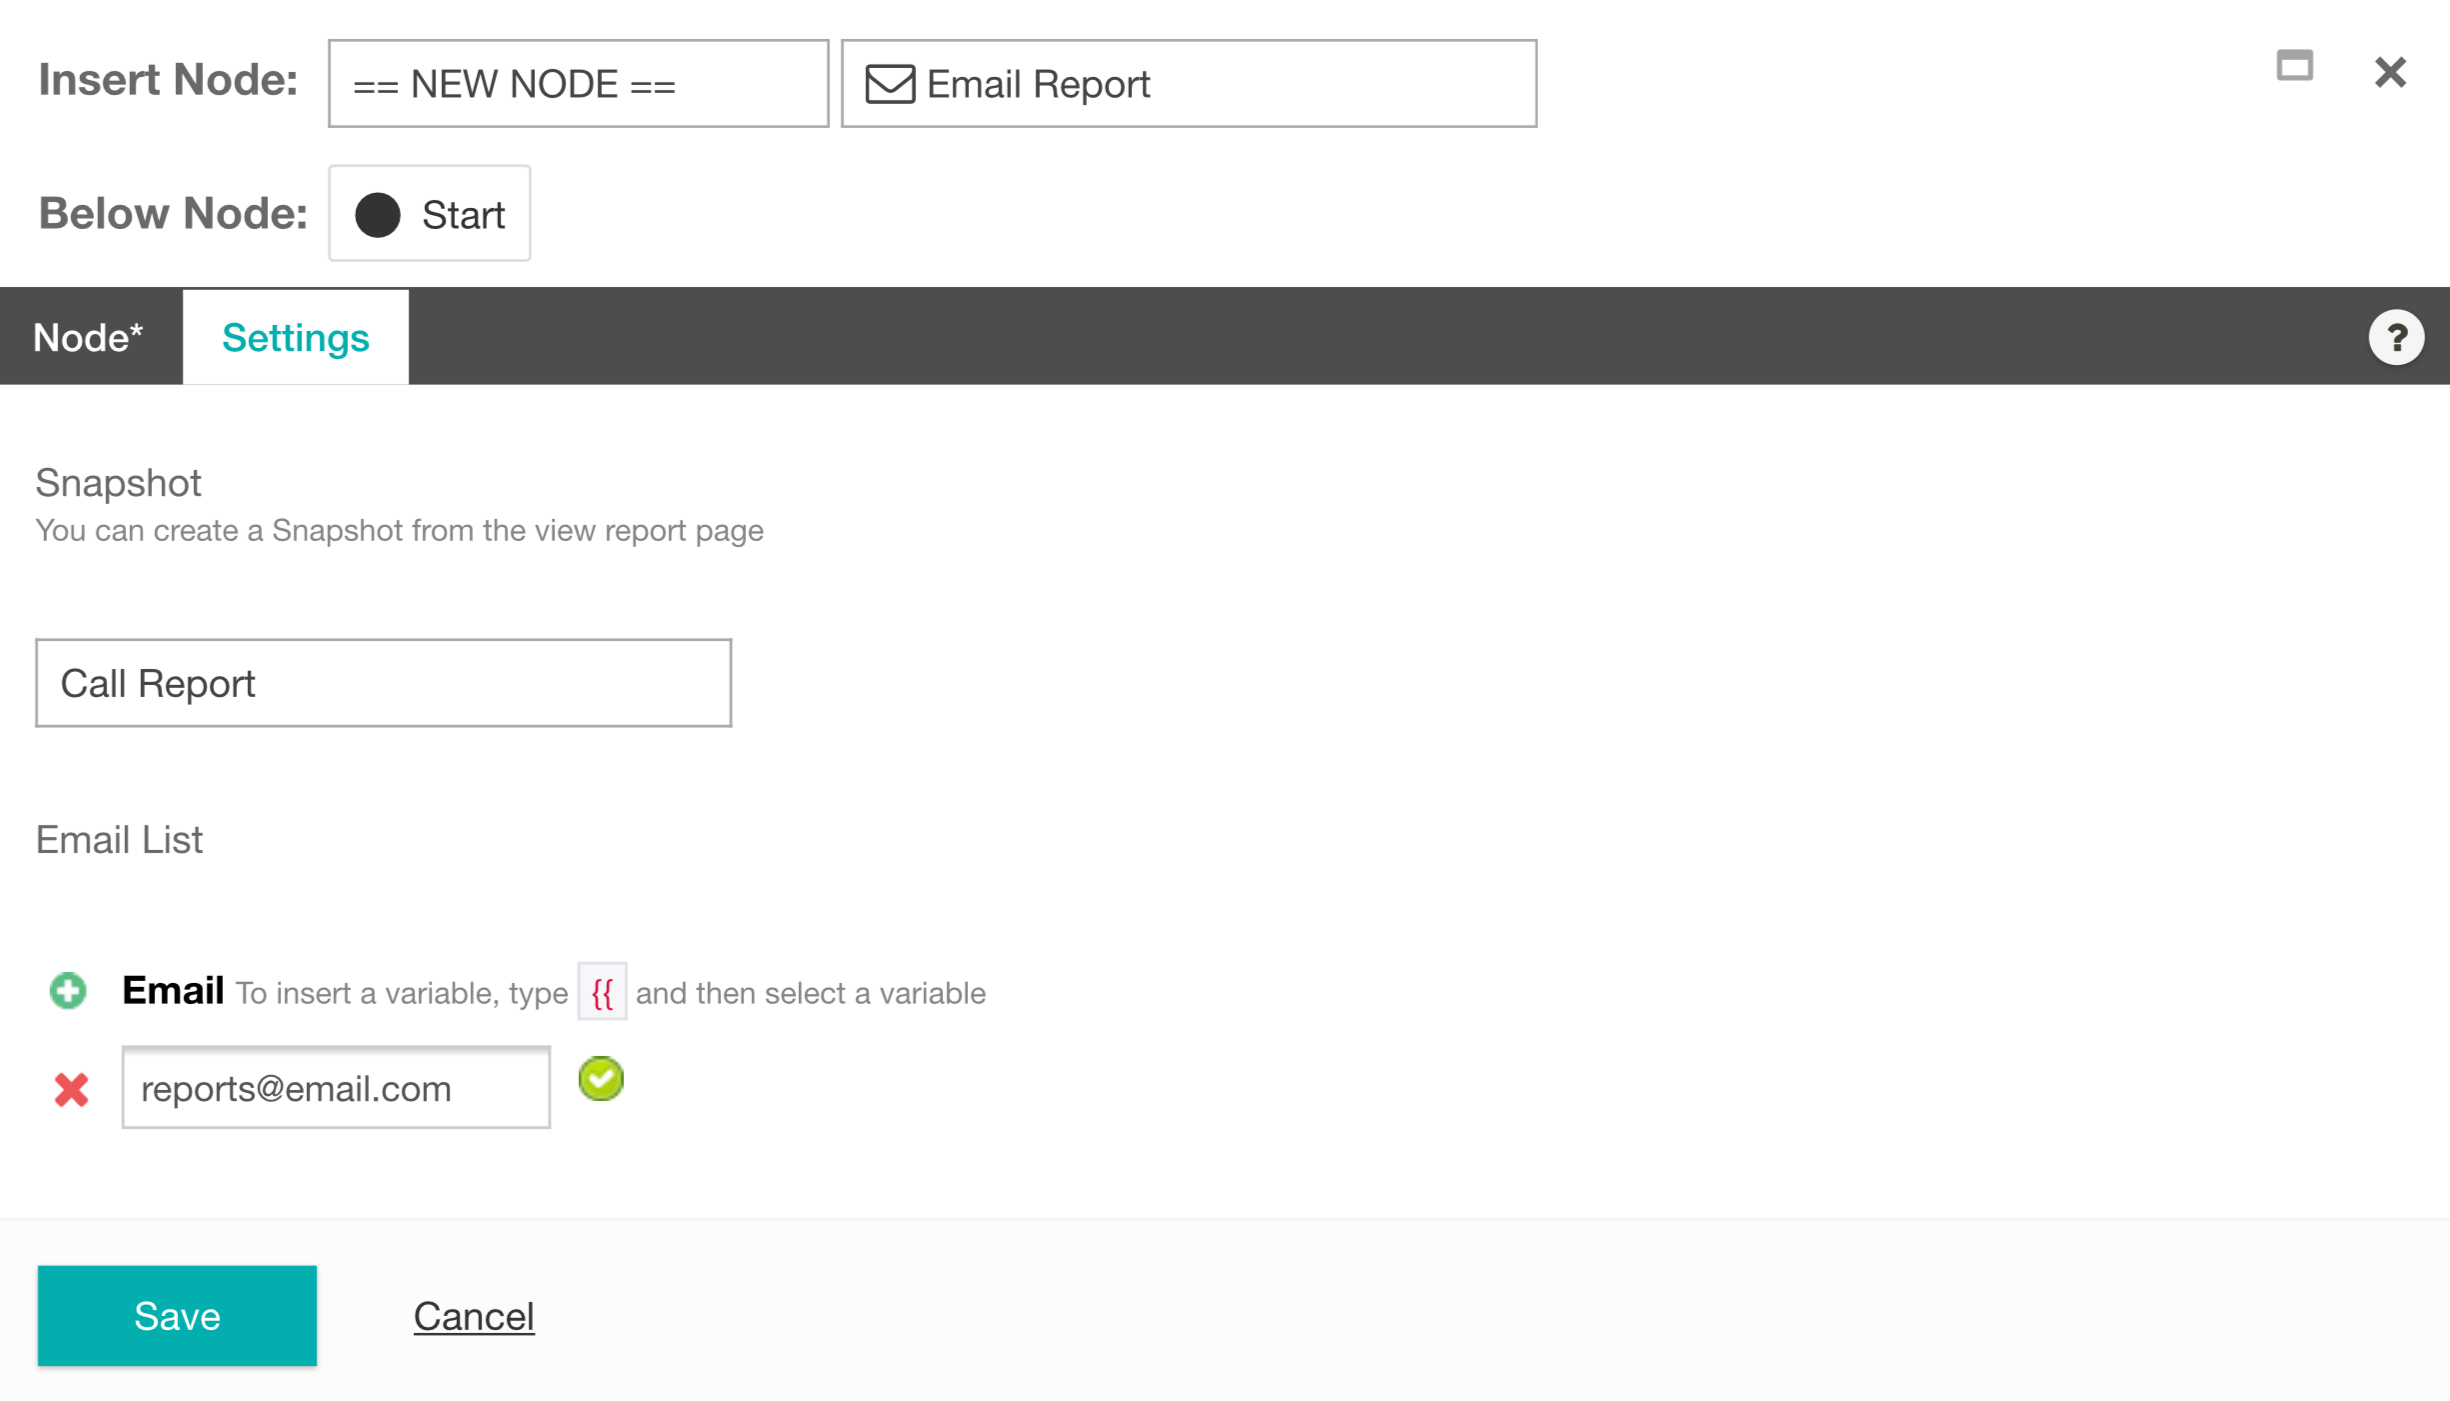
- From the Node tab, provide a new Node Name. We will call ours email_call_report.
- From the Settings tab you will then need to select a reporting Snapshot from the dropdown list.
WARNING
If you do not have a Reporting Snapshot, you will need to make one first.
- In the Email section, provide the email address(s) you would like your report to be sent to.
- Select Save.
- Repeat steps 1 to 6 for any additional nodes you would like to include in the Workflow.
Edit
Our task is now ready to be run but before it will actually work, we will need to set the task to Active.
- Head to the Workflows page.
- Choose Edit from the Actions dropdown menu associated with your new task.
- Change the Status from Inactive to Active.
- Select Save.
Run Now
The Run Now action let's you override any Workflow schedule and run the workflow immediately.
Activating a Workflow via API
Studio 4.2
As of Studio 4.2 you can also activate a Workflow via API.You can access the API Documentation from inside Studio via Settings, API Documentation.
You can also learn more about using the Studio API in the Studio API with Postman Tutorial.
Global
About Global content
Global Content allows you to create application-wide resources that can be shared and reused by any Task in your application. These resources can be variables, prompts, form types and data stores.
Global content is useful when you want to use the same resource in many different areas of your application, without the need to recreate it for each Task. Global content can be accessed by any Task in your account.
An example would be if we wanted the same greeting prompt for all of our Tasks. We could do this by creating an Application Prompt containing our greeting message and use this for all Tasks in our account.
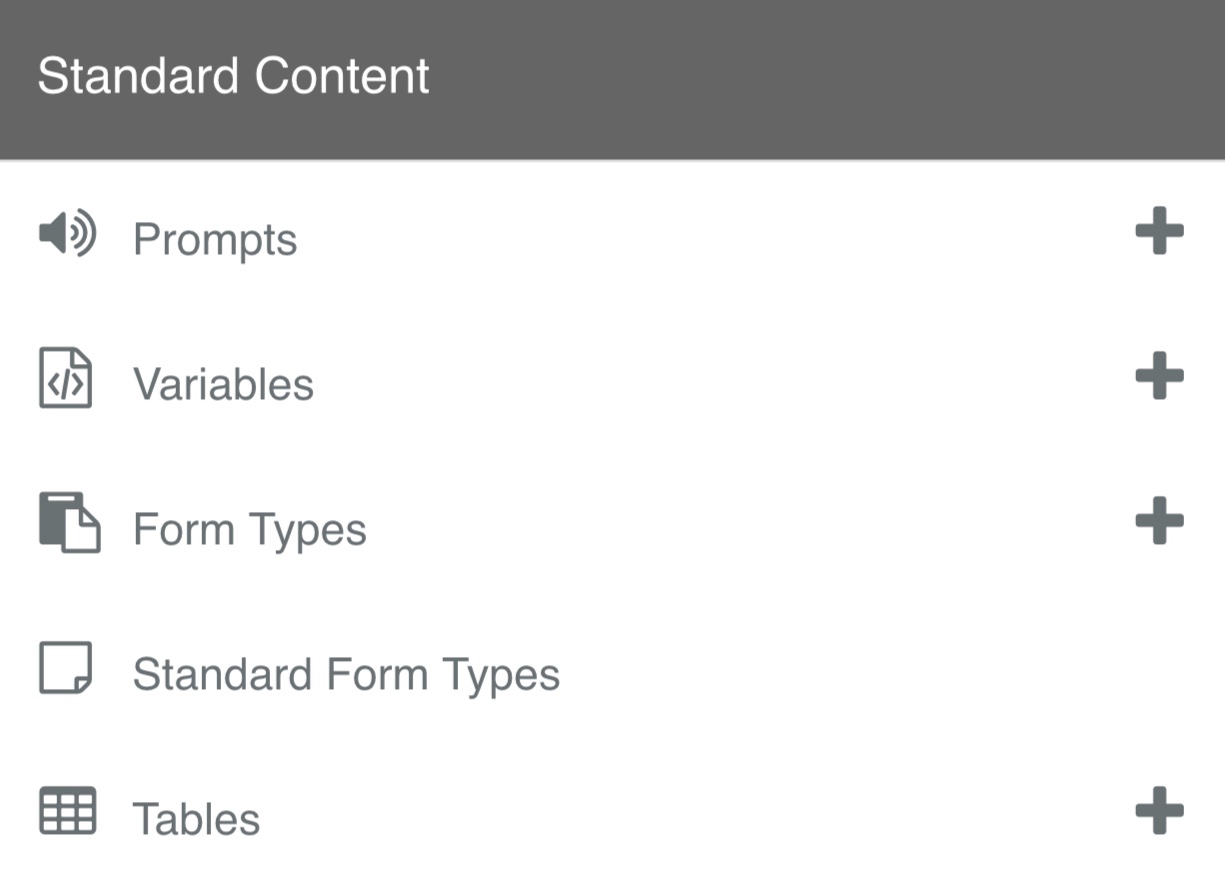
Standard Content
Standard Content refers to resources that are created at an application level. This allows them to be used and accessed by any task in your account and is useful when reusing the same resources throughout multiple tasks in your application. The following guide will explain the different Standard Content resources.
Prompts
Application Prompts are messages that are played to the caller when coupled with a prompt-related node. These prompts can be either Text-To-Speech (TTS) or a recorded audio file.
Application Prompts
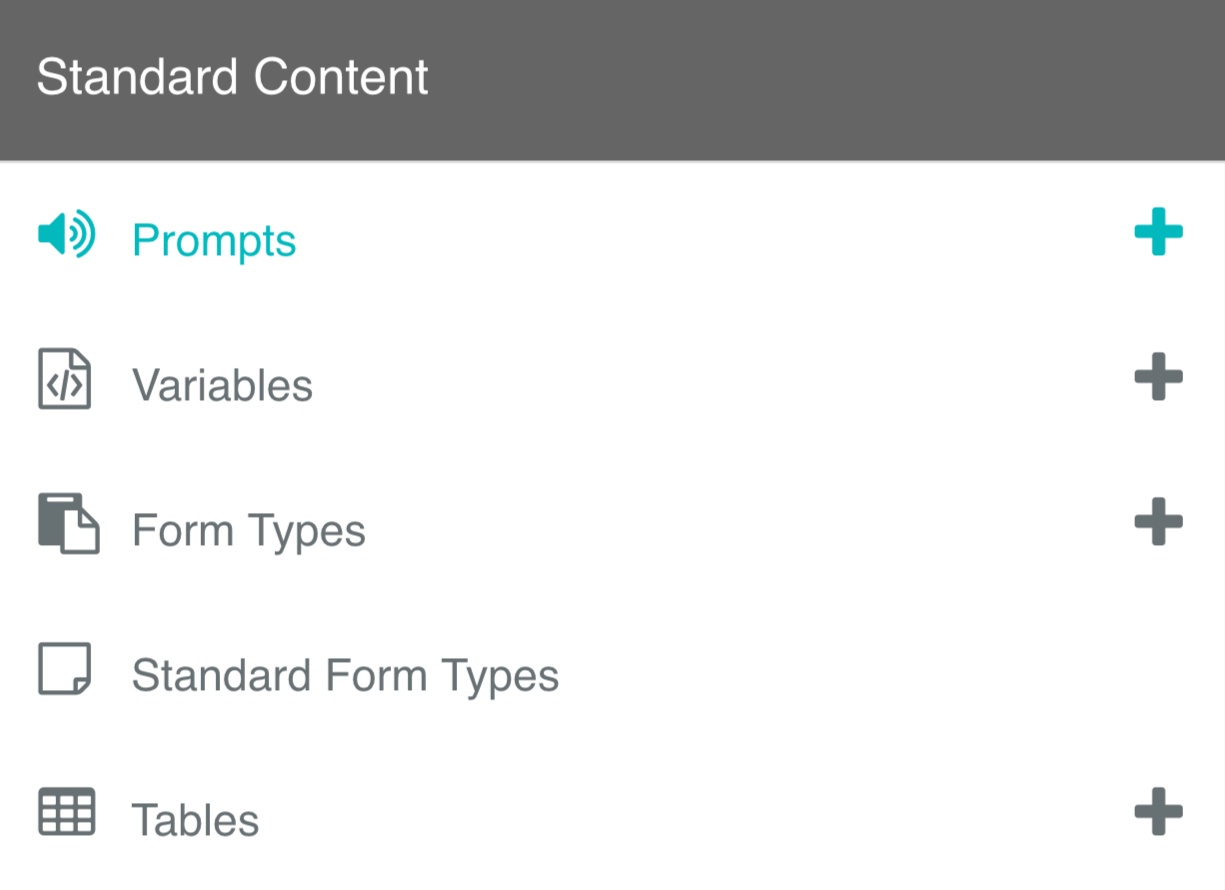
- To access the Application Prompts page, navigate to Global in the menu.
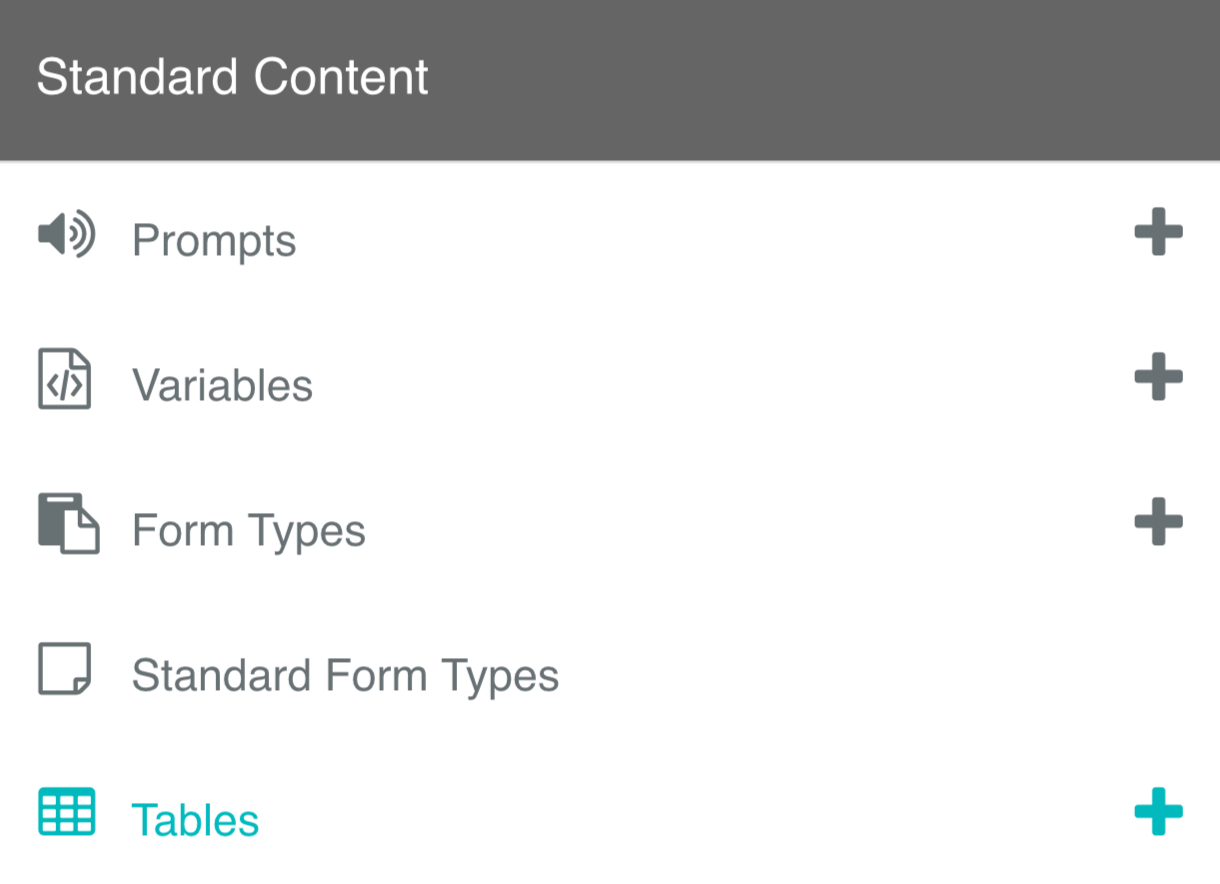
- Under Standard Content, select Prompts.
- If you have not yet added an Application Prompt then this page will appear empty.
Add Application Prompt
- To add a new application prompt, navigate to Global in the menu.
- Select the Prompts + icon.
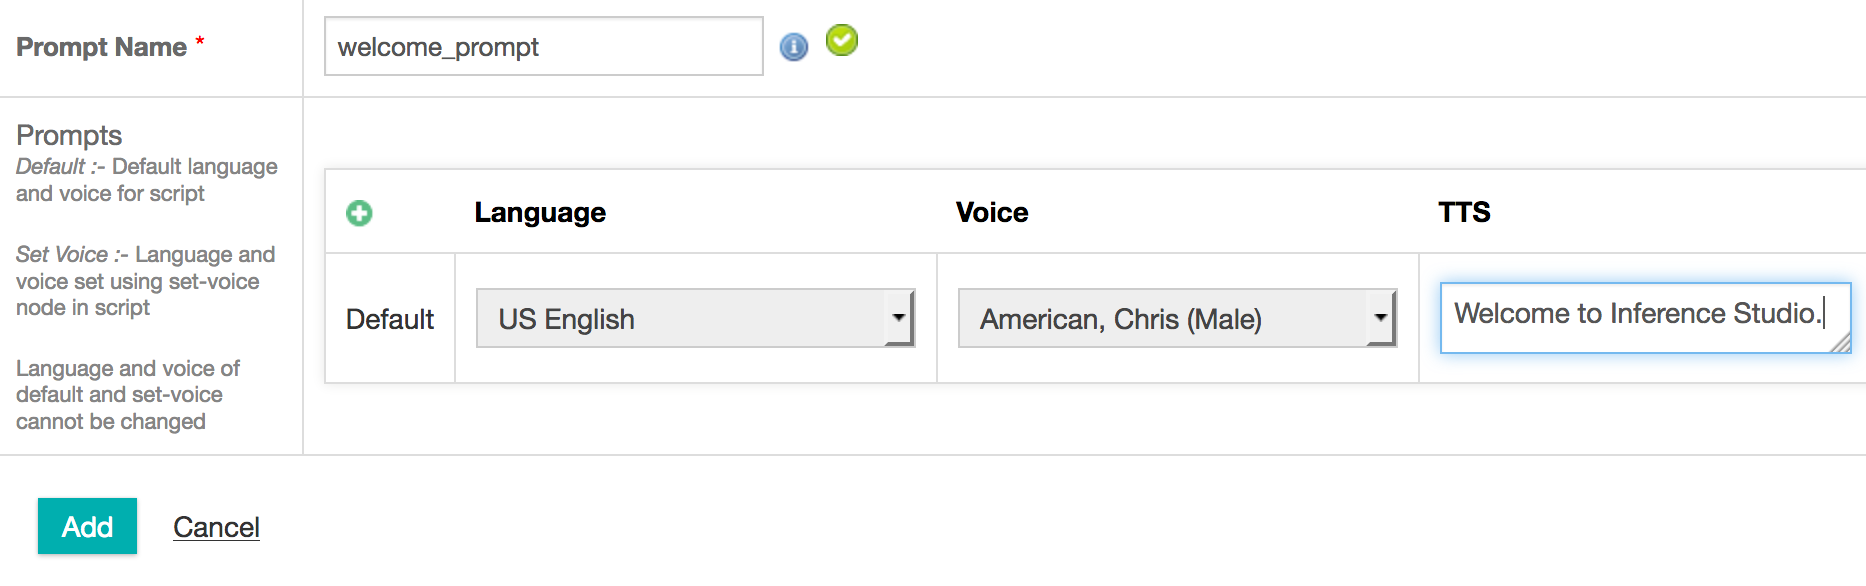
- The Add Application Prompt page will appear where you will need to fill out the prompt details.
- Provide a new Prompt Name. We have called ours welcome_message.
- From the Prompts section provide a Language from the dropdown menu. We will leave ours set to US English.
- Select a Voice from the dropdown menu. We will leave ours as the default voice.
- If you would like your prompt to use the TTS engine, you will need to provide the TTS text. We will include the text, Welcome to inference studio.
TIP
Depending on which voice type you are using will change which values you can provide in the TTS box.
If you are using a standard voice type you will be able to type in plain text or paste in SSML.
If you are using a Google Wavenet voice or specific IBM Voice types you will be able to use the advanced SSML Editor to fine-tune your prompts.
- If you would like to use an Audio File instead of TTS, you will need to select the Choose File button and upload the audio file.
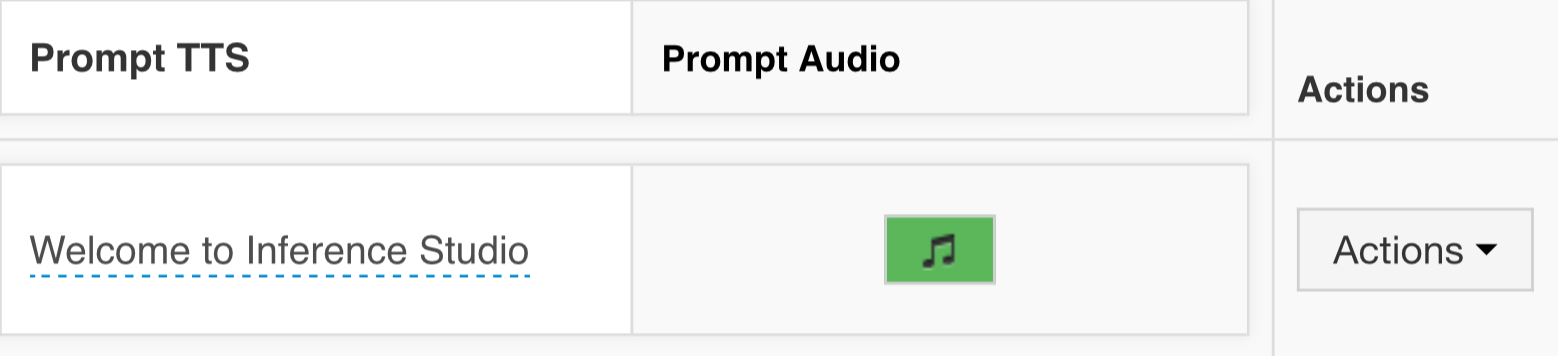
- Select Add to finish creating your prompt.
Actions
- Once you have an Application Prompt you will also be able to access the Actions menu relating to any of those prompts.
- From the GLOBAL menu, select Prompts to access the Application Prompts page.
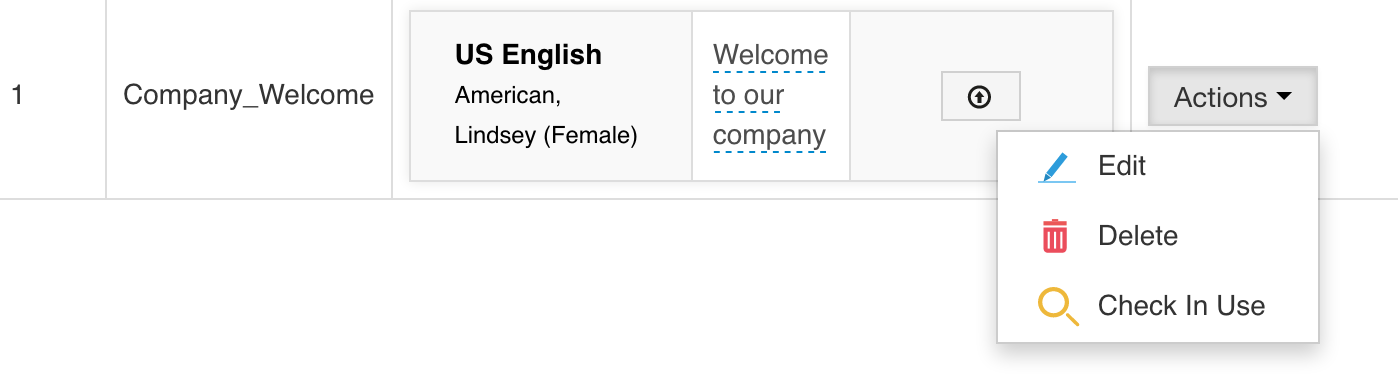
- Select the Actions dropdown menu for a selected prompt.
- The Edit action will allow you edit the prompt details in the same was as Adding an Application Prompt.
- The Delete action will permanently delete the prompt. This action is irreversible.
- The Check In Use action will search all current tasks to see which ones (if any) are using the current Application Prompt.
Variables
Application Variables (often referred to as global variables) are used to store dynamic or static data which can be accessed by any task in your application. They differ from Task Variables in that they can be used by multiple tasks without the need to create them for each task.
Application Variables
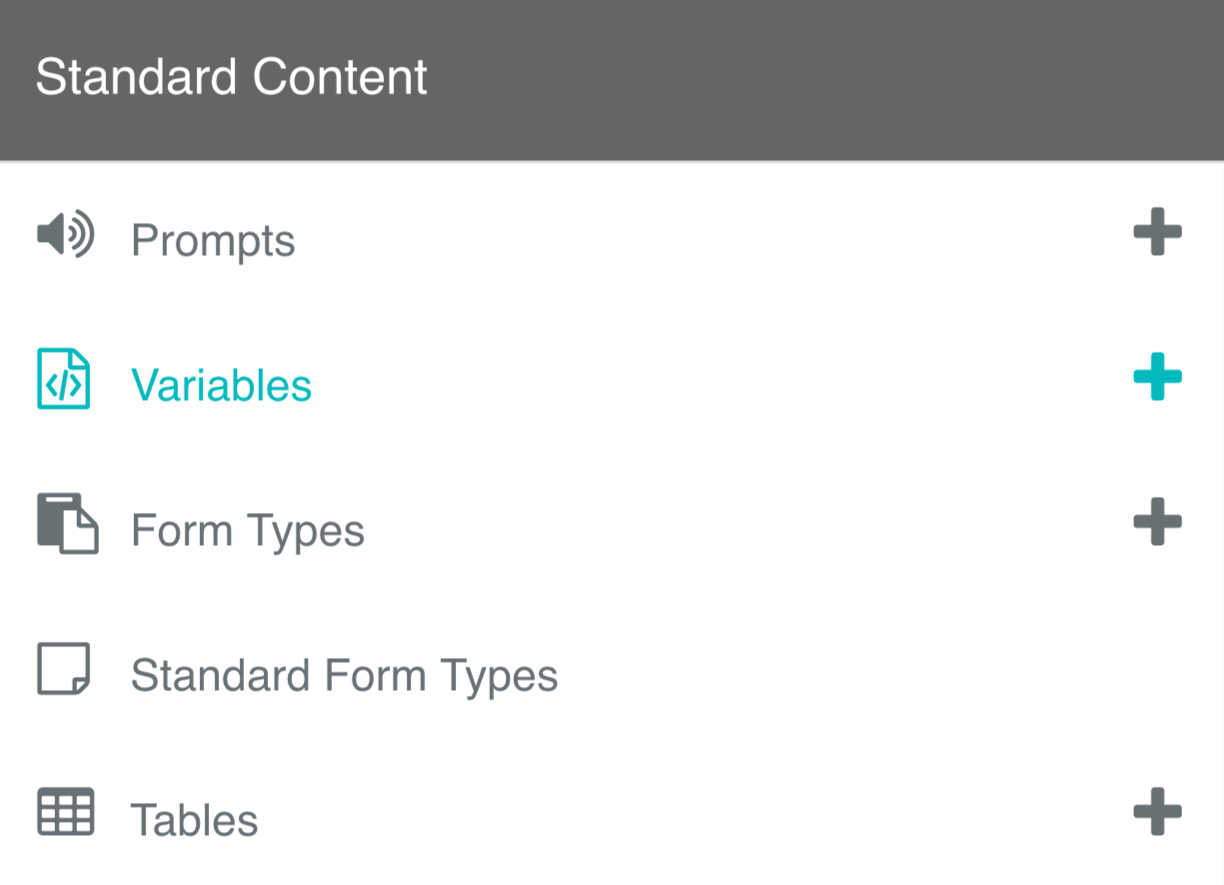
- To access the Application Variables page, navigate to GLOBAL in the menu.
- Under Standard Content, select the Variables menu title.
- If you have not yet added an Application Variable then this page will appear empty.
Add Application Variable
- To add a new application variable, navigate to Global in the menu.
- Select the Variables + icon.
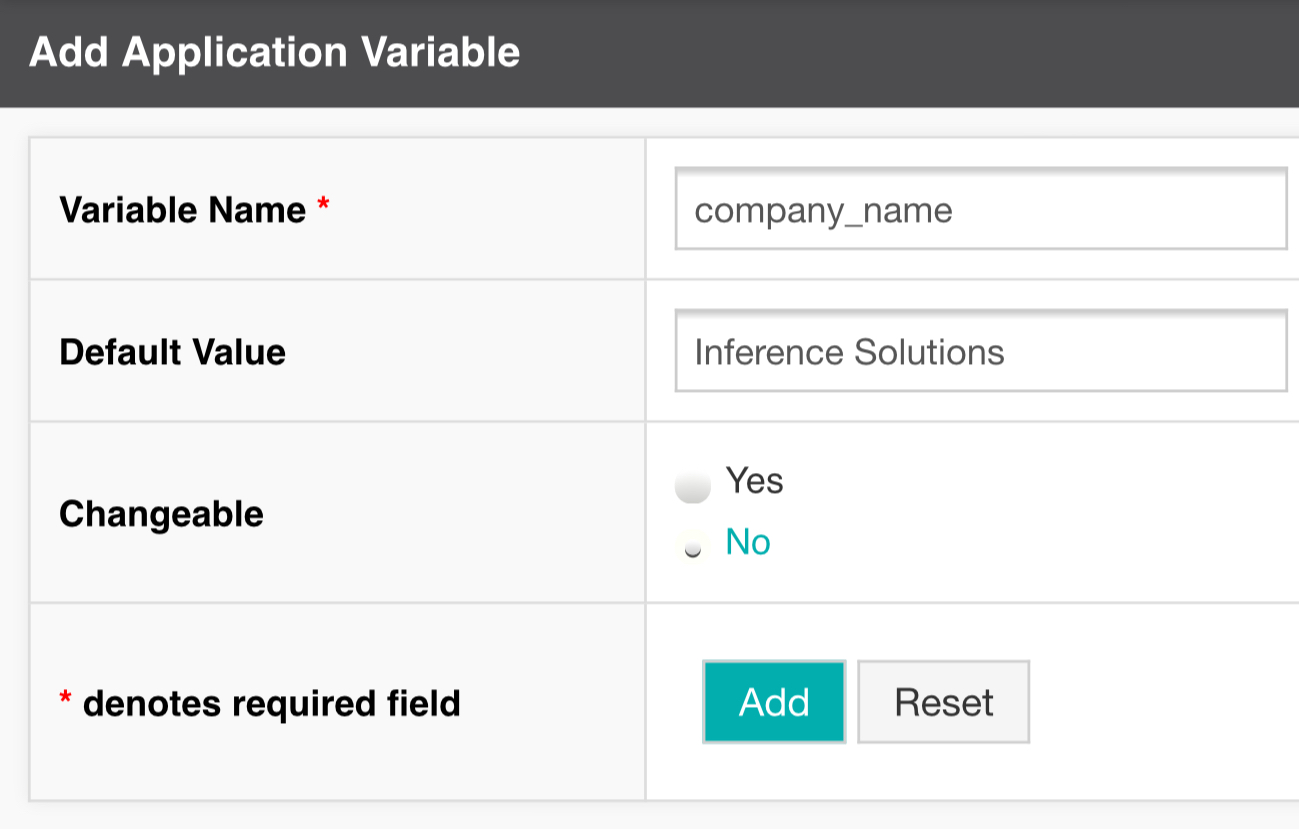
- The Add Application Variable page will appear where you will need to fill out the variable details.
- Provide a new Variable Name. We have called ours company_name.
- Provide a Default Value for your variable. We have provided the default value Inference Solutions.
- Select whether the variable is Changeable. Changeable in this instance means whether or not the value of the variable is able to modified from inside a task. i.e. can data from a callflow change the value of the variable. For this use case we have selected No as we will be using our variable at the beginning of all our tasks to introduce our company e.g. "Welcome to {Inference Solutions}" and we don't want this value to change from one call to the next. 7.Select the Add button to finish creating the application variable.
Actions
- Once you have an Application Prompt you will also be able to access the Actions menu relating to any of those prompts.
- From the GLOBAL menu, select Prompts to access the Application Prompts page.
- Select the Actions dropdown menu for a selected prompt.
- The Edit action will allow you edit the prompt details in the same was as Adding an Application Prompt.
- The Delete action will permanently delete the prompt. This action is irreversible.
- The Check In Use action will search all current tasks to see which ones (if any) are using the current Application Prompt.
Secure Variables
Secure variables store credentials in a fully encrypted manner. As soon as the variable is created, its value is encrypted and stored. You can replace the value but you cannot edit it. The value is masked everywhere in the user interface and logs. The value is only available to the Integration node during execution time, to pass credentials as part of the setup of an integration.
Form Types
Form Types work directly with the Form Node. While the Form Node already includes a range of different From Types to choose from, the Form Types page is where you can create your own custom types.
Form Types
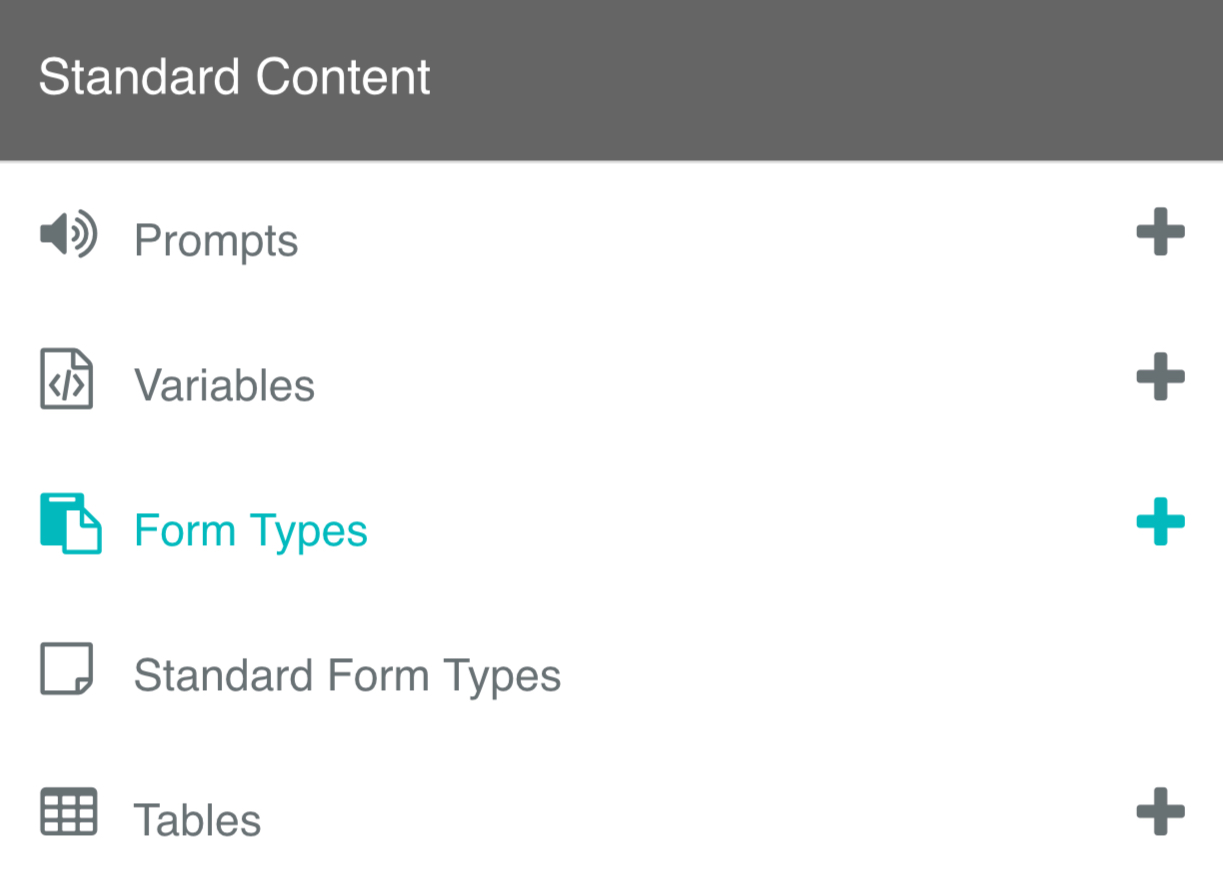
- To access the Form Types page, navigate to Global in the menu.
- Under Standard Content, select the Form Types menu title.
- If you have not yet added a custom Form Type then this page will appear empty.
Add Type
- To add a new form type, navigate to Global in the menu.
- Select the Form Types + icon.
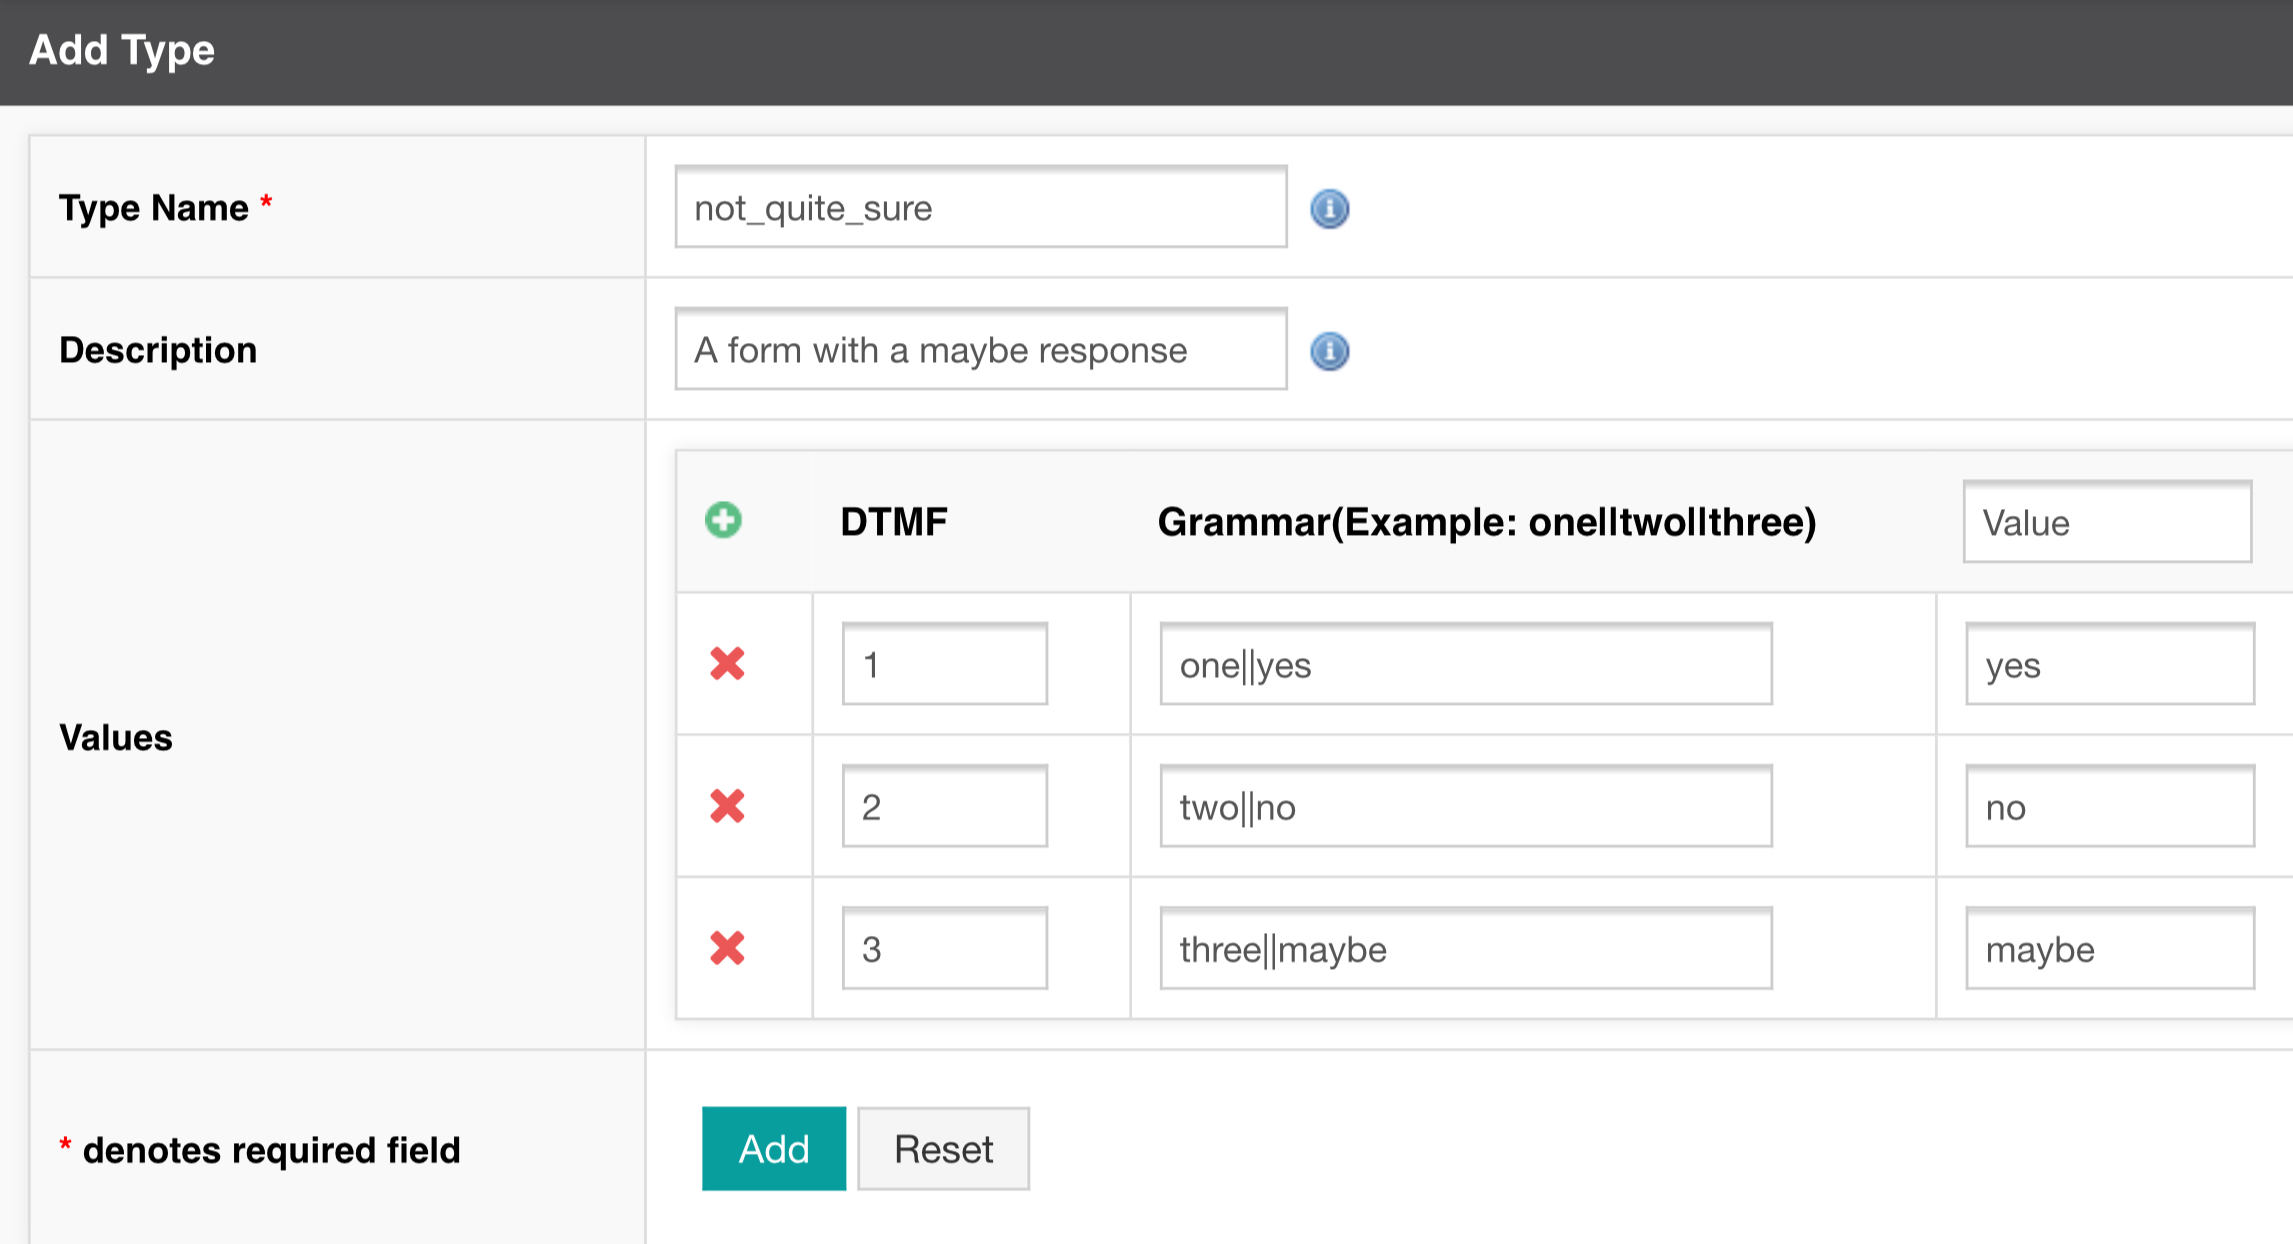
- The Add Type page will appear where you will need to fill out the type details. We will be creating a bogus form type that allows customers to provide a yes, no or maybe response.
- Provide a new Type Name. We have called ours, not_quite sure.
- Provide a Description for your form type. This is not a required field but can be helpful to understand what your form type does. We have included the description, A form including a maybe response. 6.Under the Values section you will need to provide information for the DTMF, Grammar and Value fields.
- For DTMF, we have simply provided the values 1, 2 and 3.
- For the Grammar component we have included a grammar response as either a number response relating to the DTMF option e.g. "one" or the value response "yes". If you wish to provide multiple grammar options you will need to separate each grammar component with a double pipe || character. The image below shows our final settings.
- Select Add.
TIP
Form types define closed DTMF and speech grammars. For open speech recognition, see the OpenSpeech node. The closed speech grammar language is not configurable. For more details, see Closed Speech Grammars
Actions
- Once you have added a Form Type you will also be able to access the Actions menu relating to any of those form types.
- From the GLobal menu, select Form Types to access the Form Types page.
- Select the Actions dropdown menu for a selected form type.
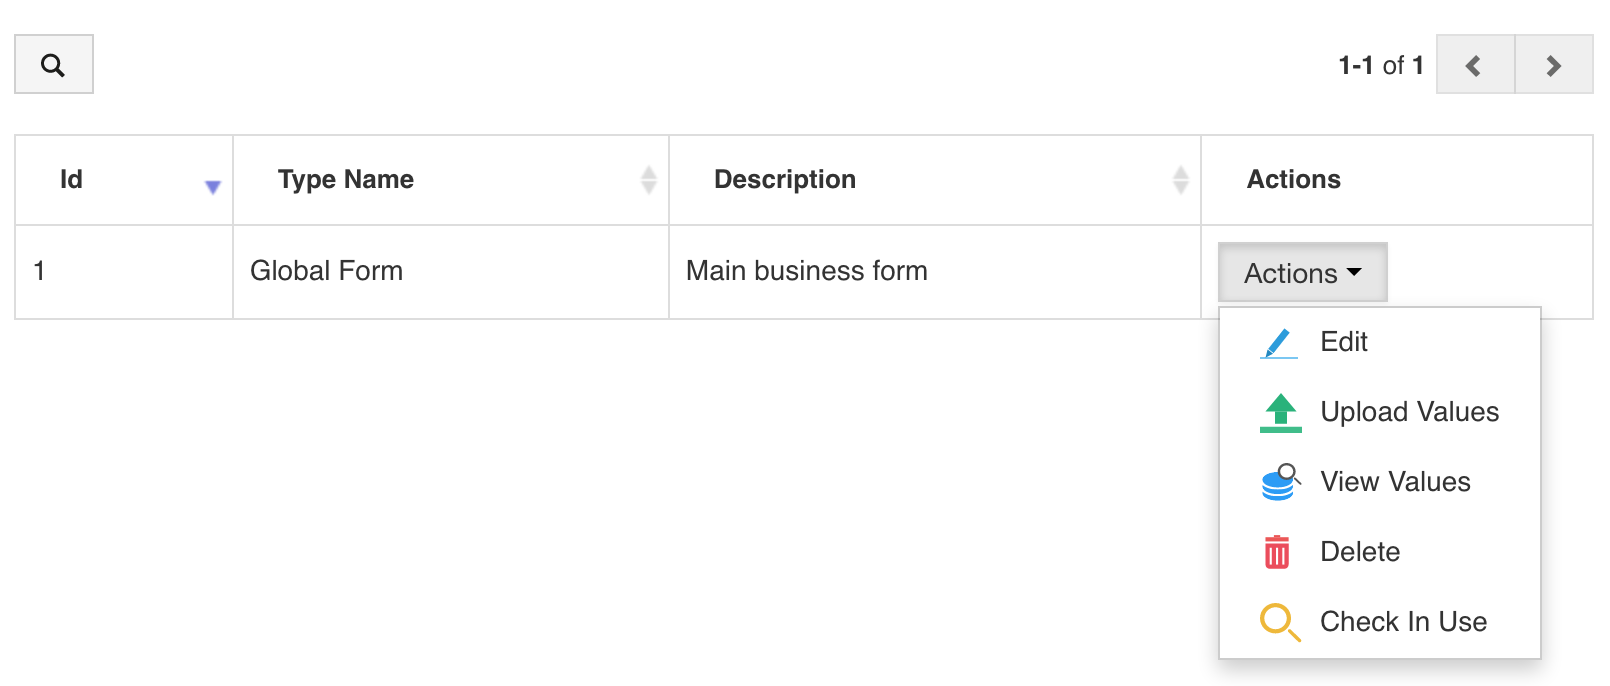
- The Edit action will allow you edit the prompt details in the same was as Adding an Form Type.
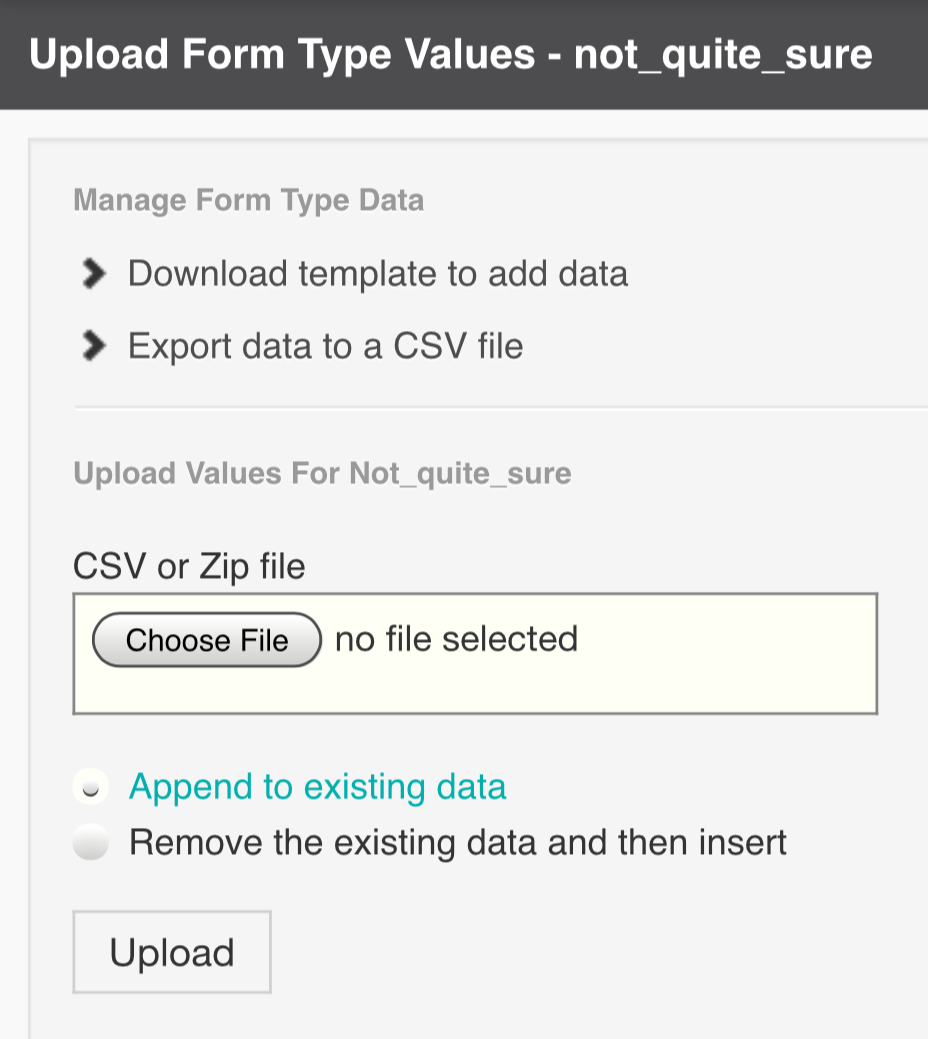
- The Upload Values action lets you add multiple values into the Form Type. It also provides a template for you to download and add values to, which you can then upload.
- The View Values action lets you see all values currently assigned to a specific form type. This is shown below.

- The Delete action will permanently delete the form type. This action is irreversible.
- The Check in Use action will search all current tasks to see which ones (if any) are using the current form type.
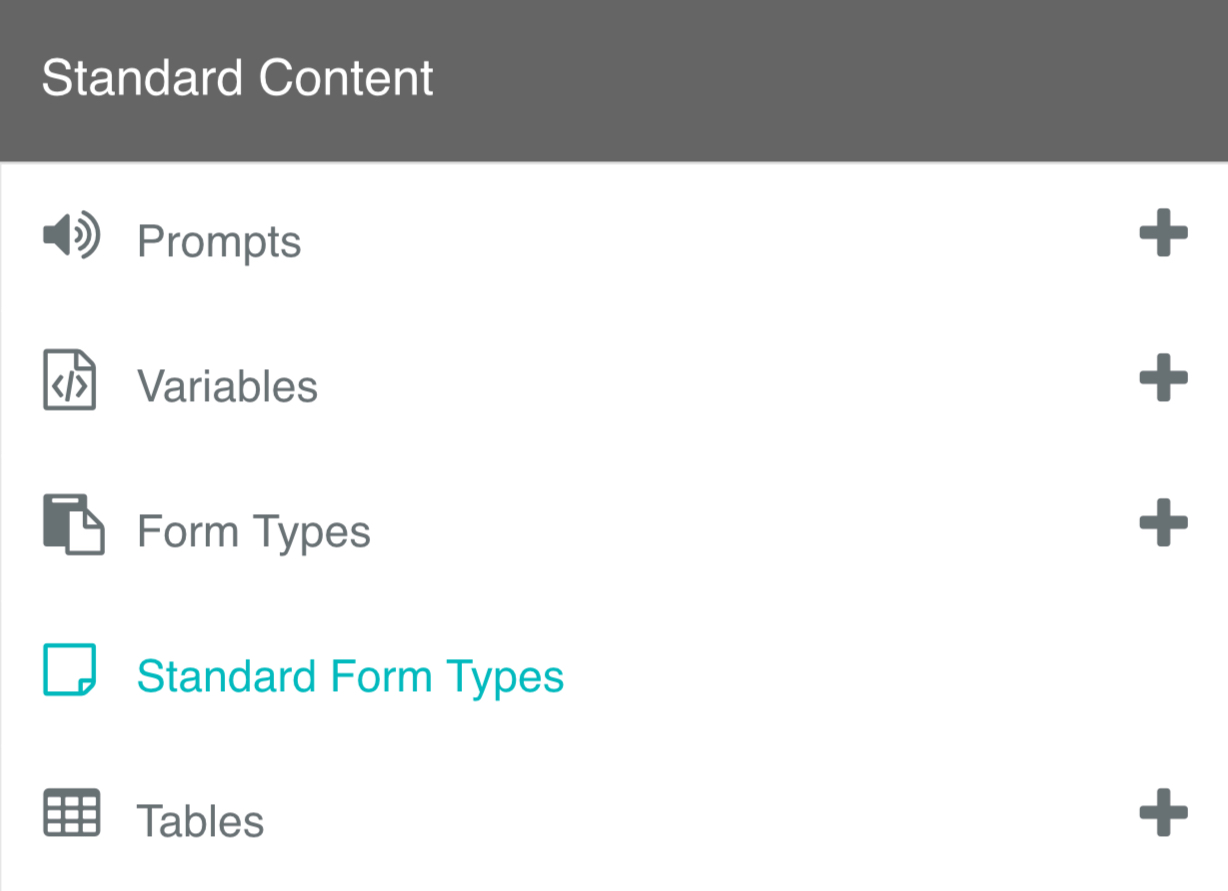
Standard Form Types
The Standard Form Types page shows all the form types that are supplied by Inference Studio by default.
- To access the Tables page, navigate to GLOBAL in the menu.
- Under Standard Content, select the Standard Form Types menu title.
These are the default form types that would be used with a Form Node.
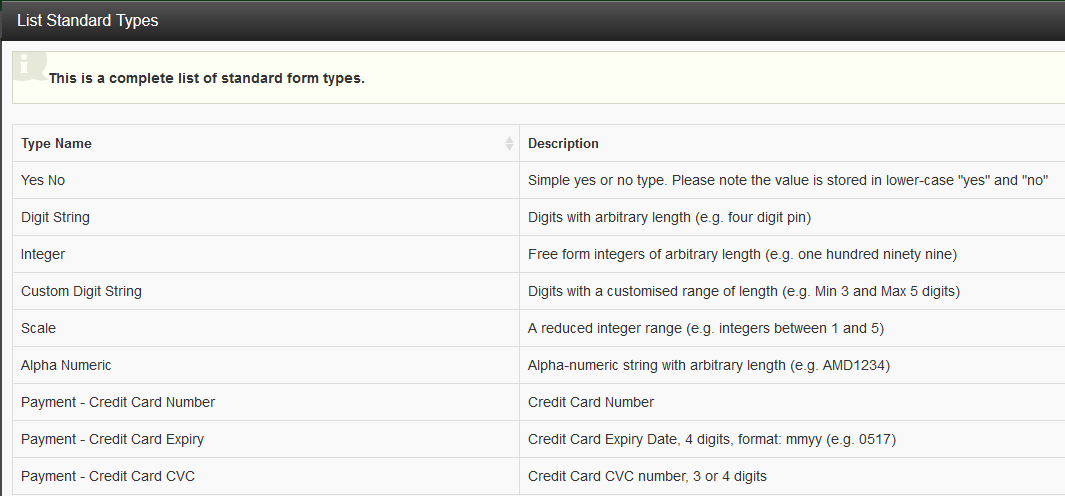
- Yes No This is for questions that require a Yes or No response.
- Scale This is for questions that require a numeric response on a scale. For example, "On a scale of 1 to 5, how likely..." You will need to specify the Start of scale and End of scale parameters.
- Custom Digit String This is for questions that require a numeric response of a specific number of digits. For example, if you wanted to capture zip codes in the United States, (e.g. 90210) you would set the Minimum No. of digits to 5 and the Maximum No. of digits to 5 also.
- Alpha Numeric This is for responses that contain both letters and/or numbers. For example, a caller providing a reference ID (A12345).
- Digit String This is for responses that contain numbers only, of any length. e.g. 12345
- Integer This is for responses that contain a single integer. e.g. 7
- Payment - Credit Card Number When using this Form Type, the Credit Card Number is automatically assigned to a Payment Variable called "card_number". This is to enforce PCI compliance. The value of last 4 digits of Credit Card Number will also be atomically assigned to a Payment Variable called last_4_digits_of_card_number.
- Payment - Credit Card Expiry When using this Form Type, the value of Credit Card Expiry is automatically assigned to a Payment Variable called card_expiry in the format: mmyy, e.g. 0517 . This is to enforce PCI compliance.
- Payment - Credit Card CVC When using this Form Type, the value of Credit Card CVC is automatically assigned to a Payment Variable called card_cvc. This to enforce PCI compliance.
TIP
You cannot modify standard form types. If you want to create a custom form type you can learn how to do that with Form Types.
Open Form Types
Open Form Types work directly with the Open Form node Open Form Types provide an ability to interact with Google Dialogflow agents via a streaming interface. This means that you can send caller utterances directly to your Dialogflow agent without having to transcribe it first.This reduces the delay between prompts and makes the interaction more natural.
There are two ways to use Open Form Types. You can define your own Open Form Type and connect it to your Dialogflow agent or you can use the pre-built Open Form Types that have been provided as part of Studio offering. To learn how to define your own Open Form Type please follow the tutorial here. The pre-built Open Form Types are called as SYSTEM Open Form Types.
In order to authorize Studio to access your Dialogflow agent requires the regional Studio identities to be granted access to the Dialogflow API Client role.
TIP
UK: inference@uk-prod.iam.gserviceaccount.com
US: inference@us-prod-219700.iam.gserviceaccount.com
AU: inference@au-prod-228822.iam.gserviceaccount.com
CA: inference@ca-prod-238800.iam.gserviceaccount.com
BR: inference@br-prod-331605.iam.gserviceaccount.com
Open Form Type (SYSTEM)
The SYSTEM Open Form Types are pre-configured Dialogflow agents that are supplied by Inference Studio by default. To access the SYSTEM Open Form Types, navigate to GLOBAL in the menu and select Open Form Types (SYSTEM) menu title. We currently support three pre-built Open Form Types.
- Date - To capture any form of date input and return in the system friendly YYYY-MM-DD format.
- Yes/No - Detects Yes or No responses.
- Currency - Recognise all currencies.

Tables
The Global Tables page lets you create data tables on an application level, which can then be used within Tasks.
- To access the Tables page, navigate to Global in the menu.
- Under Standard Content, select the Tables menu title.
- If you have not yet added a Table then this page will appear empty.
Add Table
- To add a new Table, navigate to Global in the menu.
- Select the Tables + icon.
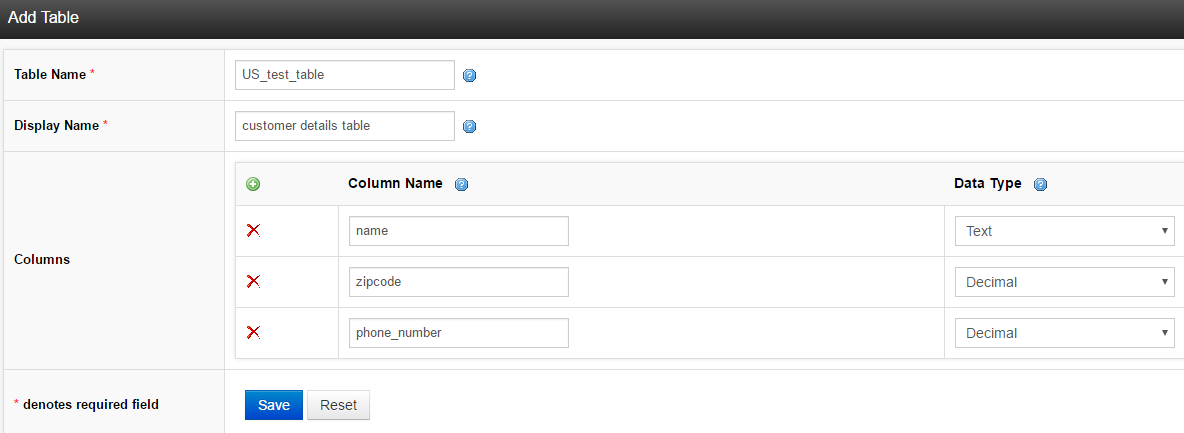
- The Add Table page will appear where you will need to fill out the table details.
- Provide a new Table Name. We have called ours, US_test_table.
- Provide a Description for your table. This is not a required field but can be helpful to explain the your data table. We have included the description, customer details table.
- Under the Columns section, you will need to provide a Column Name for each column you would like your data table to have. We have included the column names: name , zipcode and phone_number.
- You will also need to select a Data Type for each column. These can either Text or Decimal. We will select Text for our name column, and decimal for our zipcode and phone_number columns as they relate to numeric values.
- Select Save.
Actions
- Once you have added a Table you will also be able to access the Actions menu relating to any of those tables.
- From the GLOBAL menu, select Tables to access the Tables page.
- Select the Actions dropdown menu for a selected table.
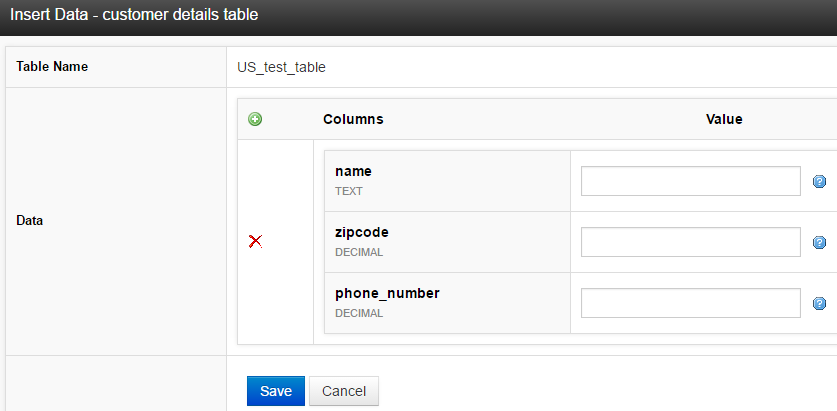
- The Insert Data action lets insert columns into the table.
- The View Data action lets you view all data that has been recorded to the table from your tasks.
- The Upload Data actions allows you to upload data to the table. You can also download a template .csv file to populate with your data. The upload file must be in CSV format or Zip format.
- The Edit action allows you to edit the table structure (not the data) of any selected table in the same way was Adding a New Table.
- The Delete action lets you delete a table. This action is irreversible.
Data & Report
The Data & Report section in studio is where data that is collected from tasks, is collated and then used for populating reports.
Data Stores
What is a Data Store?
The Data Store is an application-wide controller that allows you to track and generate reports on key data captured by your call flow. It is used in conjunction with the Data Store node.
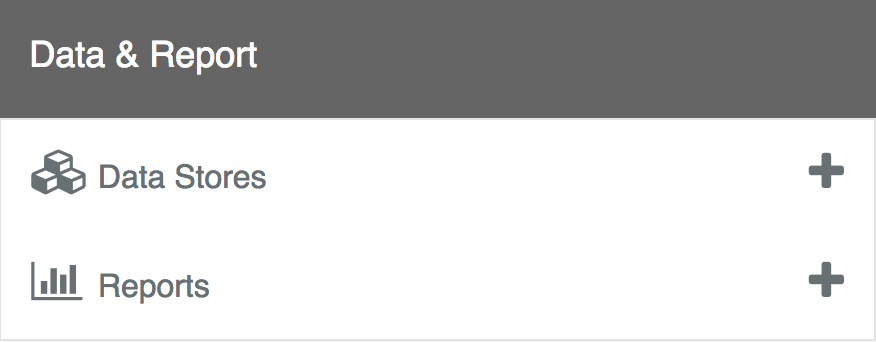
Data Stores
The Data Stores page is the dashboard containing all your Data Stores.
From here you have access to all your current Data Stores as well as the Actions menu. The Actions Menu allows you to Insert, View and Upload data to your Data Store. It also allows you to edit and delete existing Data Stores.
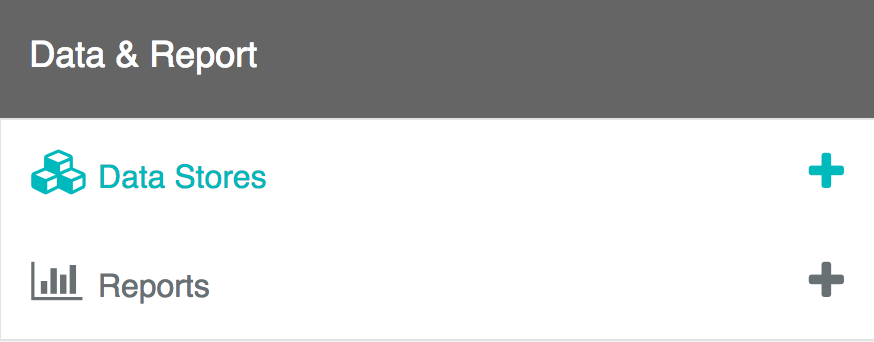
Creating a Data Store
- From the Studio Menu, navigate to Global .
- Under the Data & Report section, select the Data Stores + icon. The Add Data Store window will appear.
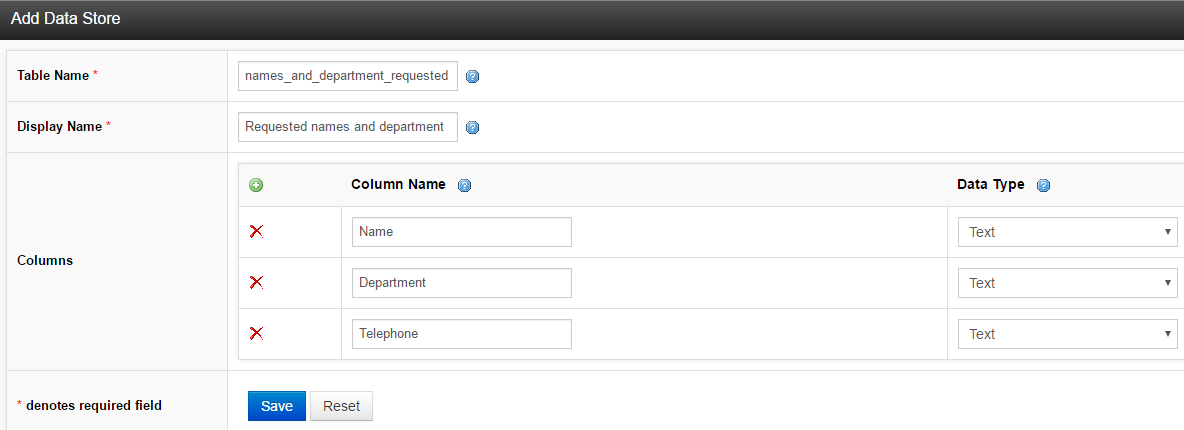
- From the Add Data Store window, you will need to provide a Table Name and Display Name for the Data Store. Make sure the Table Name and Display Name you choose describes the data being collected. You will need to be able to identify it easily when you create the Data Store Node later on. We have called our Table Name, names_and_department_requested, and our Display Name, Requested names and department.
Studio 6.0
Long text type available in Studio 6.0 + - Under the Columns section, you will to provide a Column Name for each type of data you would like to capture. You will also need to select the Data Type from the dropdown menu to choose what type of data the data will be saved as. You can choose between six datatypes:
- Text (up to 255 characters)
- Long Text (up to 65535 characters)
- Number (signed integer +-2147483648)
- Decimal (13 scale and 3 digits precision)
- Float (IEEE single precision float)
- Audio.
- To add additional Columns to your data store, select the green + icon. We have created the Column Names: Name, Department and Telephone and have chosen to store these as Text Data Types.
- Select Save.
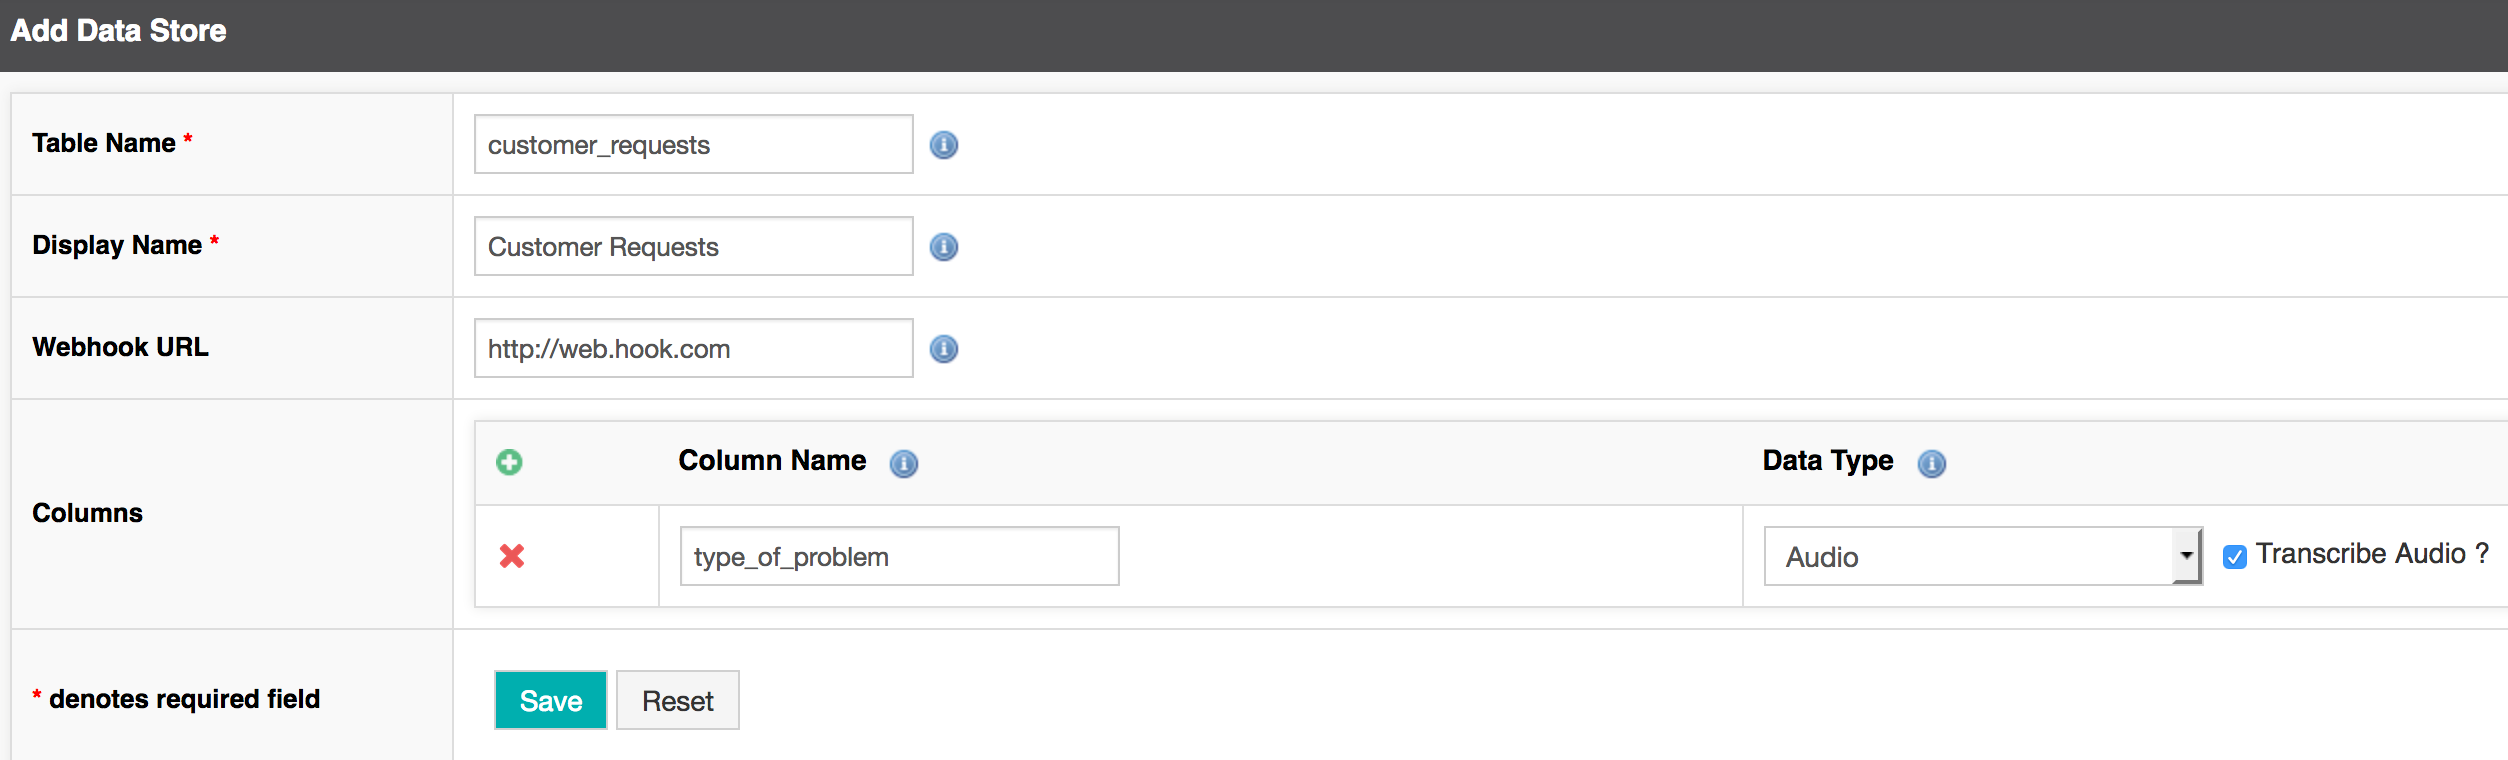
Voice Transcription
When you save audio to a data store you can have Studio automatically transcribe the recorded audio into text. Audio files can provided via a Record Node during a callflow or by uploading an Audio file. To activate transcription:
- Create a new Data Store.
- Select the Audio Data Type.
- A checkbox labelled Transcribe Audio? will appear. Select the checkbox to activate transcription.
- The Webhook URL also allows you to POST the transcribed data to any external service such as a CMS.
Note: When posting to the Webhook URL the following data will be sent.
- Data Store ID
- Row ID
- Public URL of the audio file
- The audio transcription text
Accessing information in a Data Store
Information is typically written to data stores by a Data Store node. If you have not already designed one or more Data Store Node for your call flow, you can learn about how to do that in the Data Store Node reference.
- To view the data that you have captured navigate to GLOBAL from the top menu.
- Under the Data & Report section, select the Data Stores title. The Data Stores window will appear. All the Data Stores you have created will be listed
- Select the Data Store you wish to view.
- Review and search data within the studio interface;
- or export to Excel or CSV.
TIP
CSV exports are in UTF-8 character encoding and you will need to specify this within any tool you use to load the CSV. In the case of loading CSV in Microsoft Excel, you must use the text import tool as explained here.
Reports
Reports are graphical representations of your task data. Although it is possible to build a report on data in a log table, the real power of Reports is when using it in conjunction with Data Stores.
Reports
- Navigate to GLOBAL in the top menu.
- Select the Reports title.
- From the Reports page you will be able to see all current reports. If you are yet to create a report, this page may appear empty.
Creating a Report
- Navigate to GLOBAL in the top menu.
- Select the Reports + icon.
- Select a Log Table from the dropdown menu. This is the data store you would like to create a report for.
- Select the Next button.
- The Report Creator Wizard will appear to guide you through creating your report.
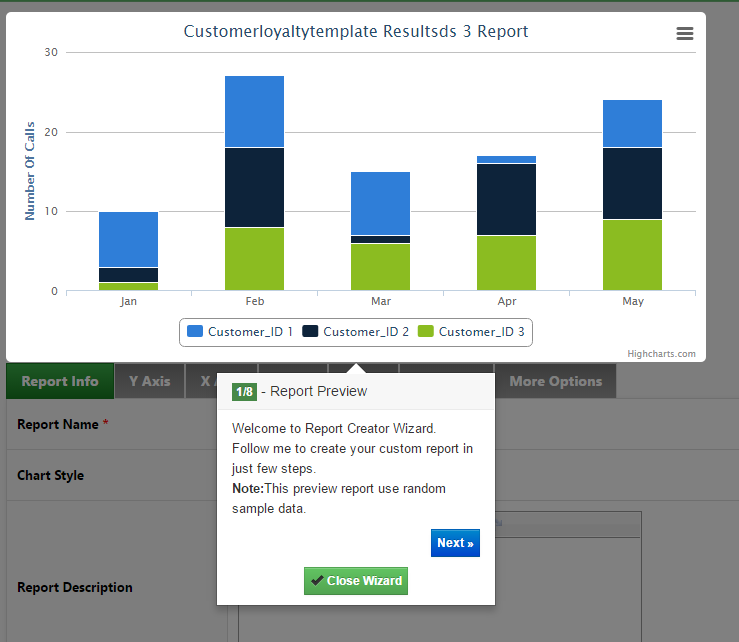
TIP
The data displayed in the Report Creator Wizard is 'dummy data' to give you an idea on how your report may look. It is not representative of your actual data.
Report Creator Wizard
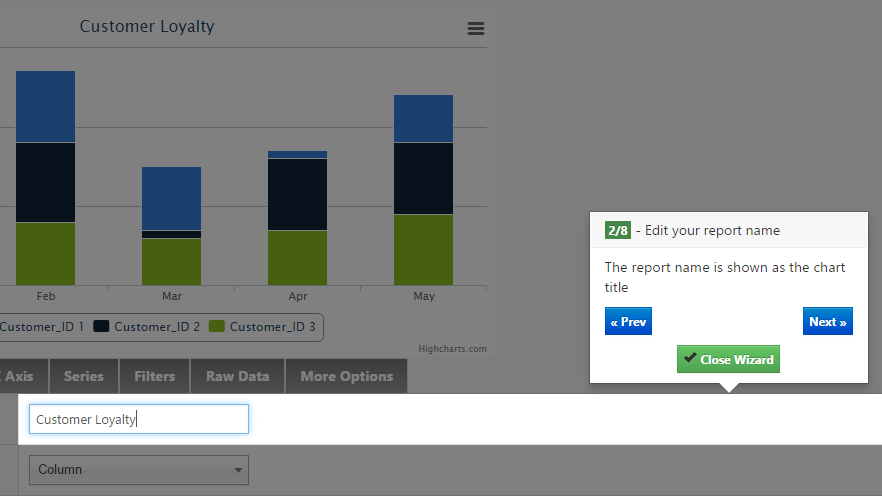
- Edit your report name. We will ours Customer Loyalty. Select Next.
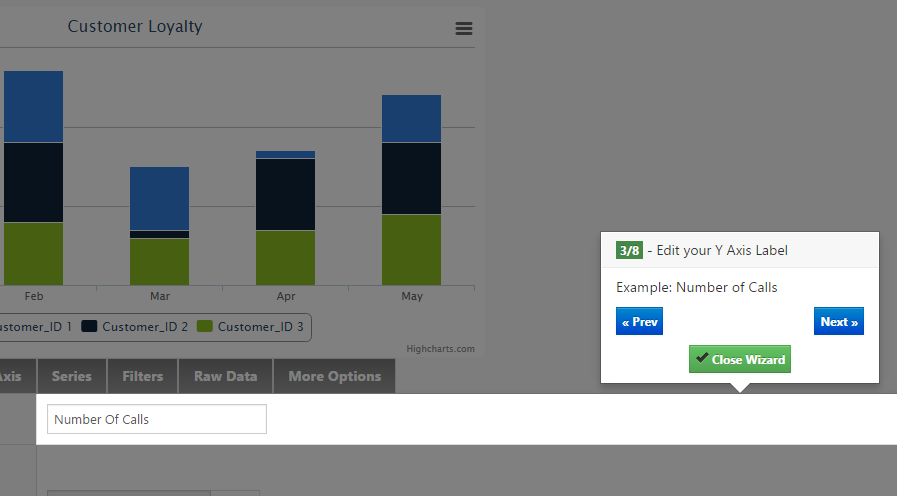
- Edit your Y Axis Label. We will call ours, Number of Calls. Select Next.
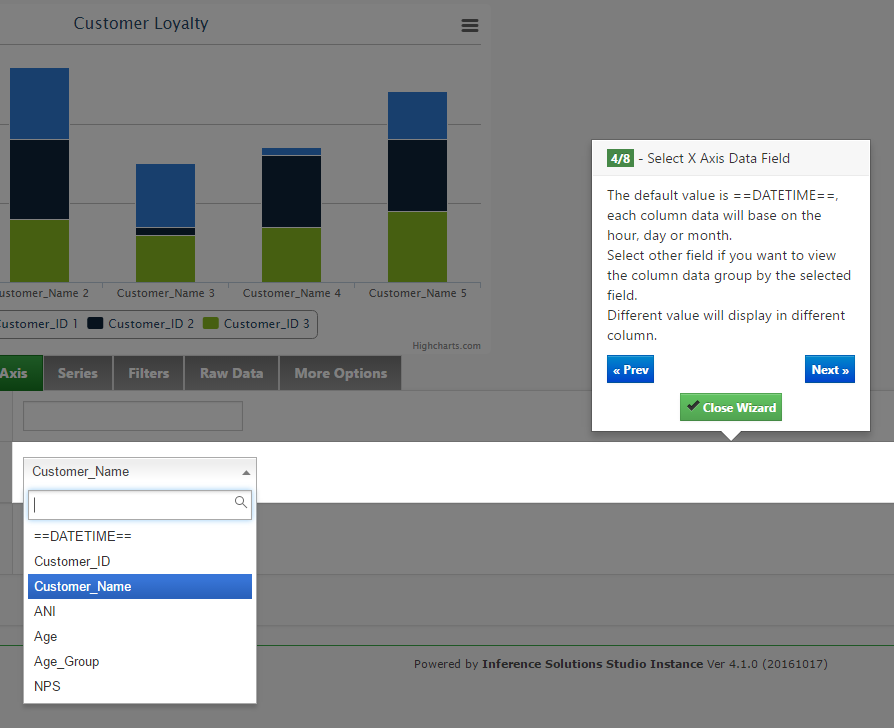
Specify the X-Axis Data Field. This is what will appear across the bottom of your chart. The default option is ==DATETIME==, this will plot calls on a time-of-day basis. The dropdown menu shows different options for your X-Axis data. We will leave ours as the default. Select Next.
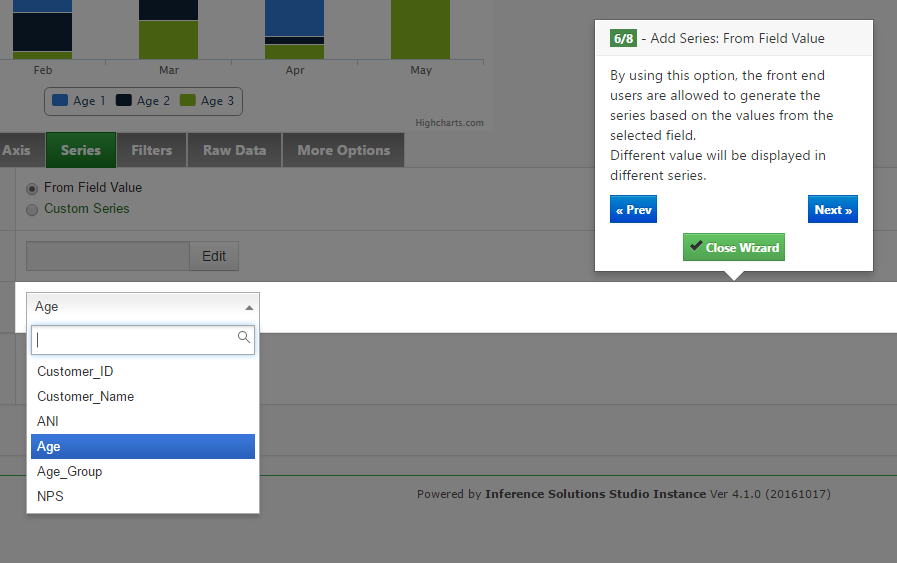
Now need to specify the data Series we want to plot. In this case we can just use the values in our Data Store, so we select From Field Value. Select Next.
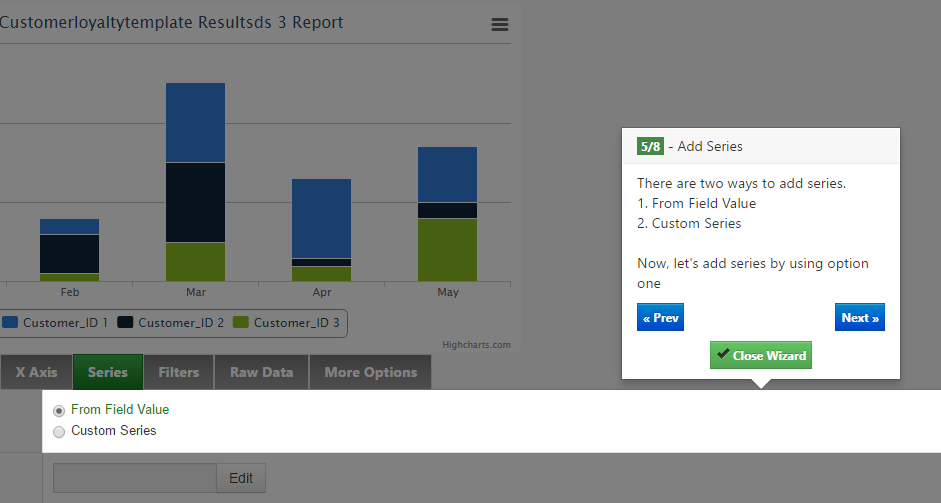
Next you can sort report values based on specific Field Values. We will select the Series Data Field, Age. This will sort columns by age. Select Next.
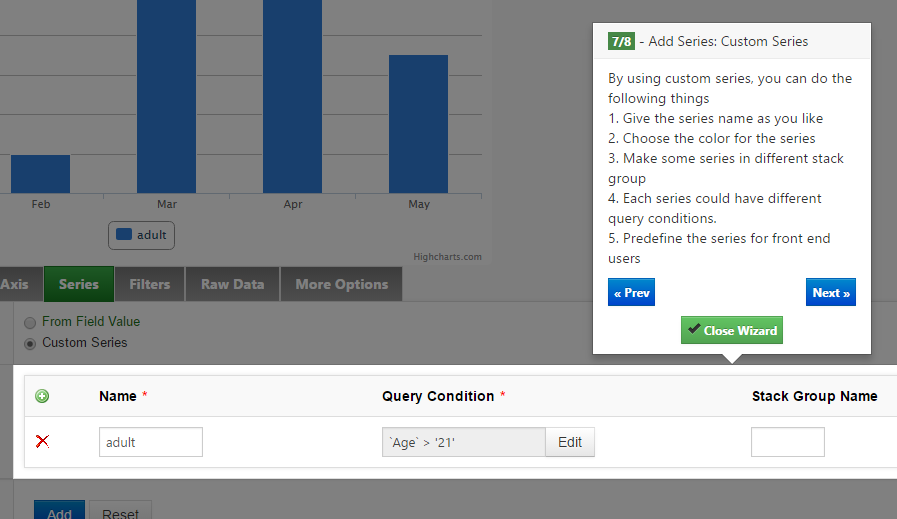
Finally, you can filter reports based on custom query conditions. The Custom Series option will require you to provide a series Name as well as a Query Condition. The Query Condition is made using the Expression Builder. Learn more about using the Expression Builder. We will name ours, adult, and add the Query Condition, Age > 21. In this case, the report will filter data based on what data meets the query condition. i.e. the report will only show customers over 21 years of age. You also provide a Stack Group Name and custom Color. Select Next.
This will complete the Wizard.
Select Close Wizard.
Finally, select Add. Your report will be created and you will be taken to the Reports page.
Actions
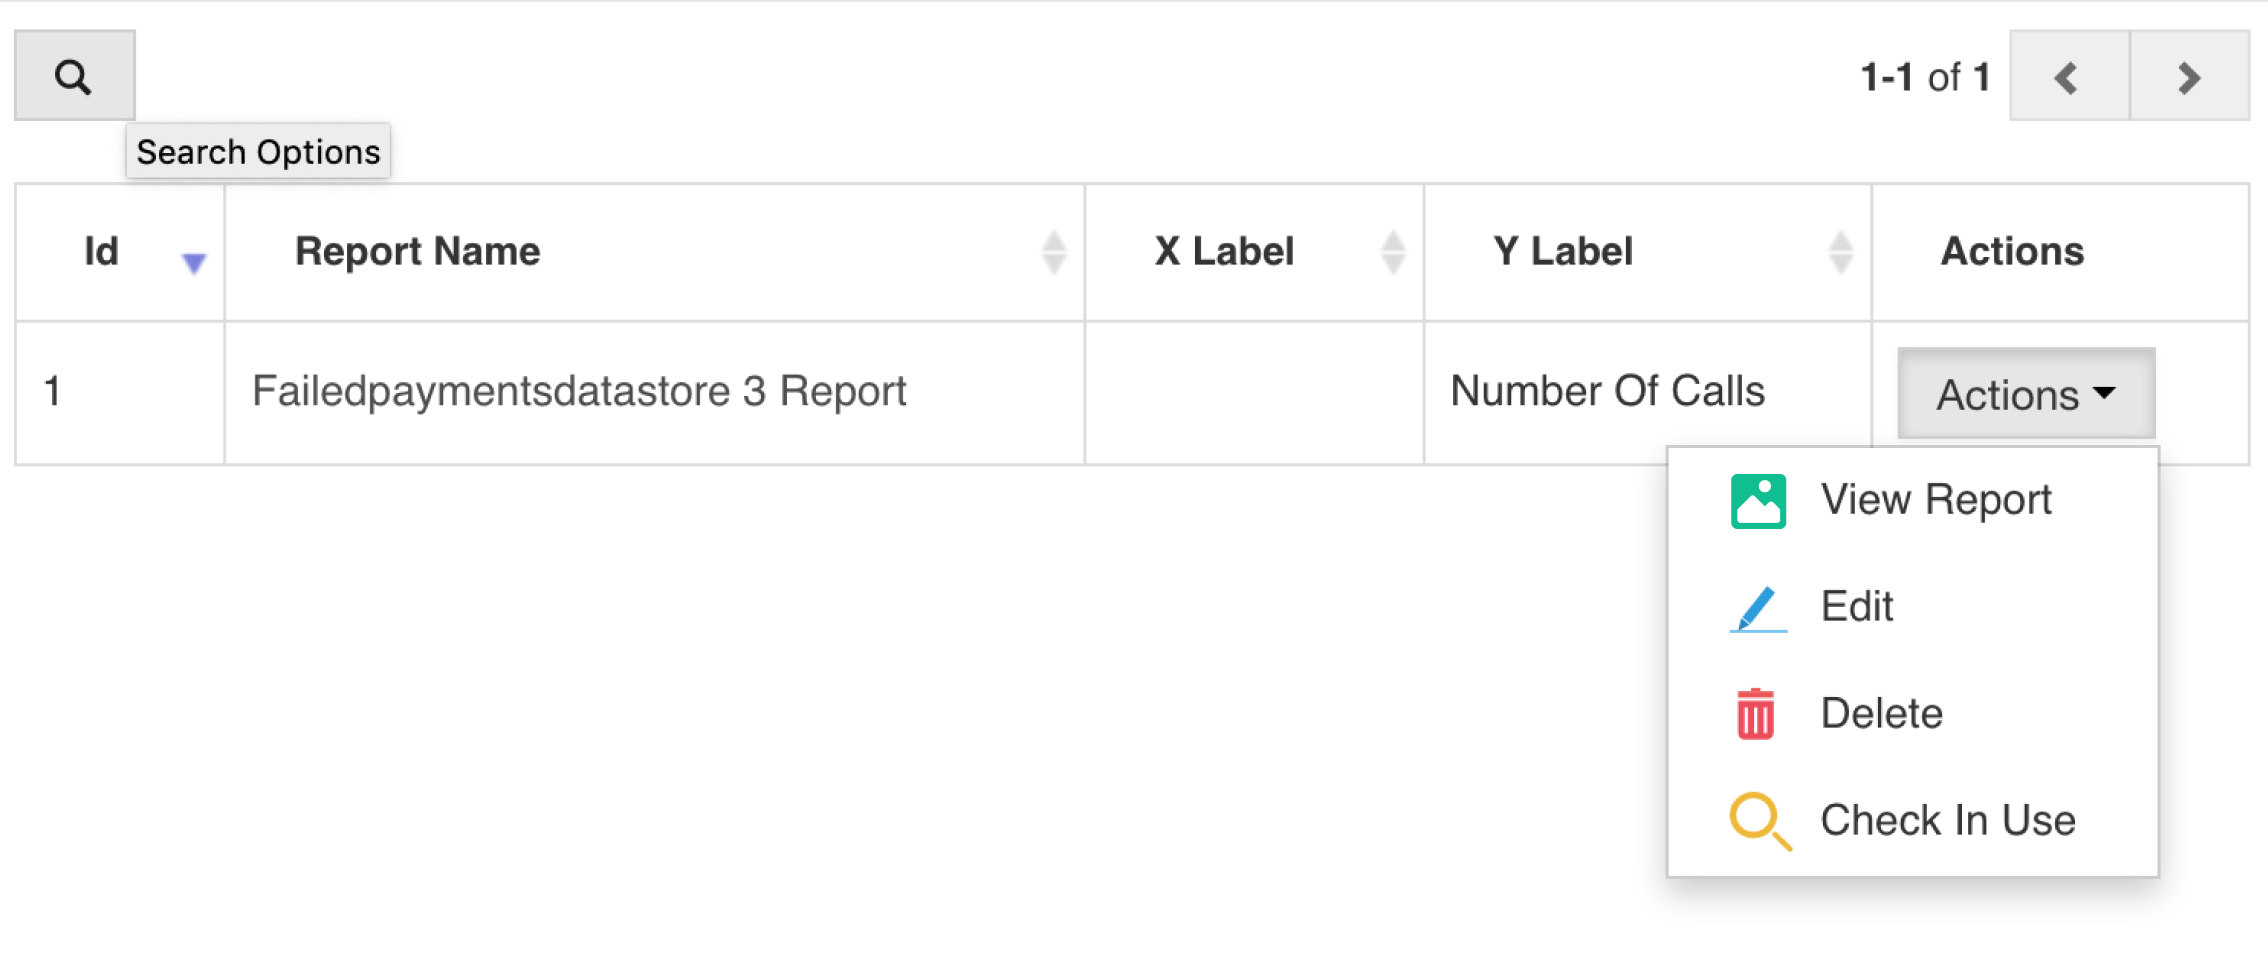
- From the Reports page you have access to the Actions dropdown menu for each report.
- The View Report action will let you see the graphical chart for your report. Here you can filter results via a range of different options, as well as customize the look of your report.
- The Edit action will let you modify the details of a report, in the same way as a Creating a Report.
- The Delete action will permanently delete a report. This action is irreversible.
- The Check in Use action will provide a list of all tasks that are currently using this specific report. What this means, is which tasks are pushing data to a Data Store that this report is based on. (The Task pushes data to a Data Store, and the Report uses the data from that Data Store to populate its report.)
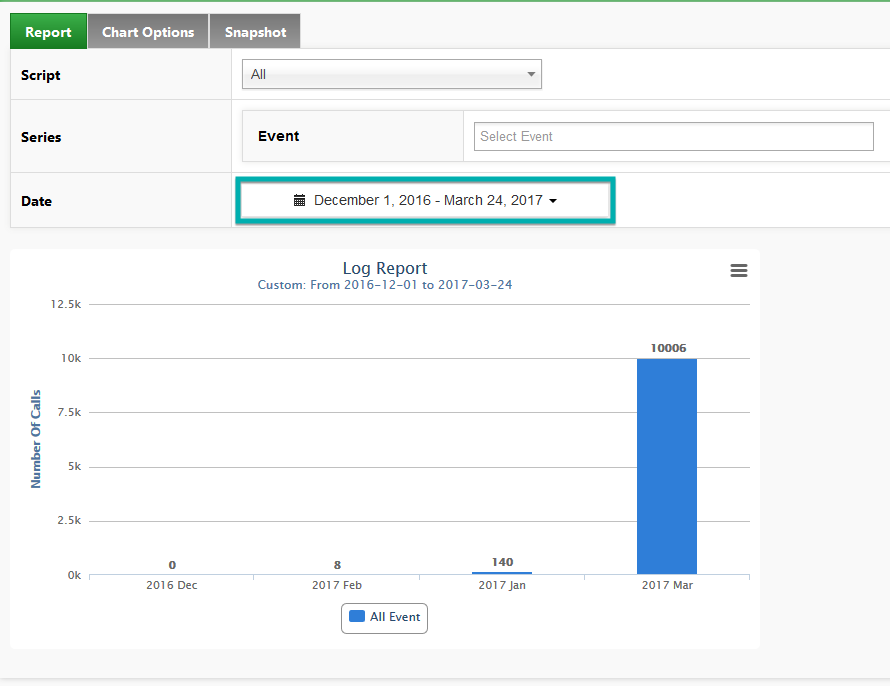
Snapshot
Any time you are viewing a specific report you can create a Snapshot. A Snapshot is a report for a specified selection of data. Snapshots are useful in that they can be sent via email directly from Studio.
To create a snapshot:
From the Reports page, navigate to the report you would like to create a snapshot for and select the Actions dropdown menu.
From the Actions dropdown menu select View Report.
From the Log Report page, select the parameters for the data you would like to view. In this case we will change the Data range to the Last 3 months.
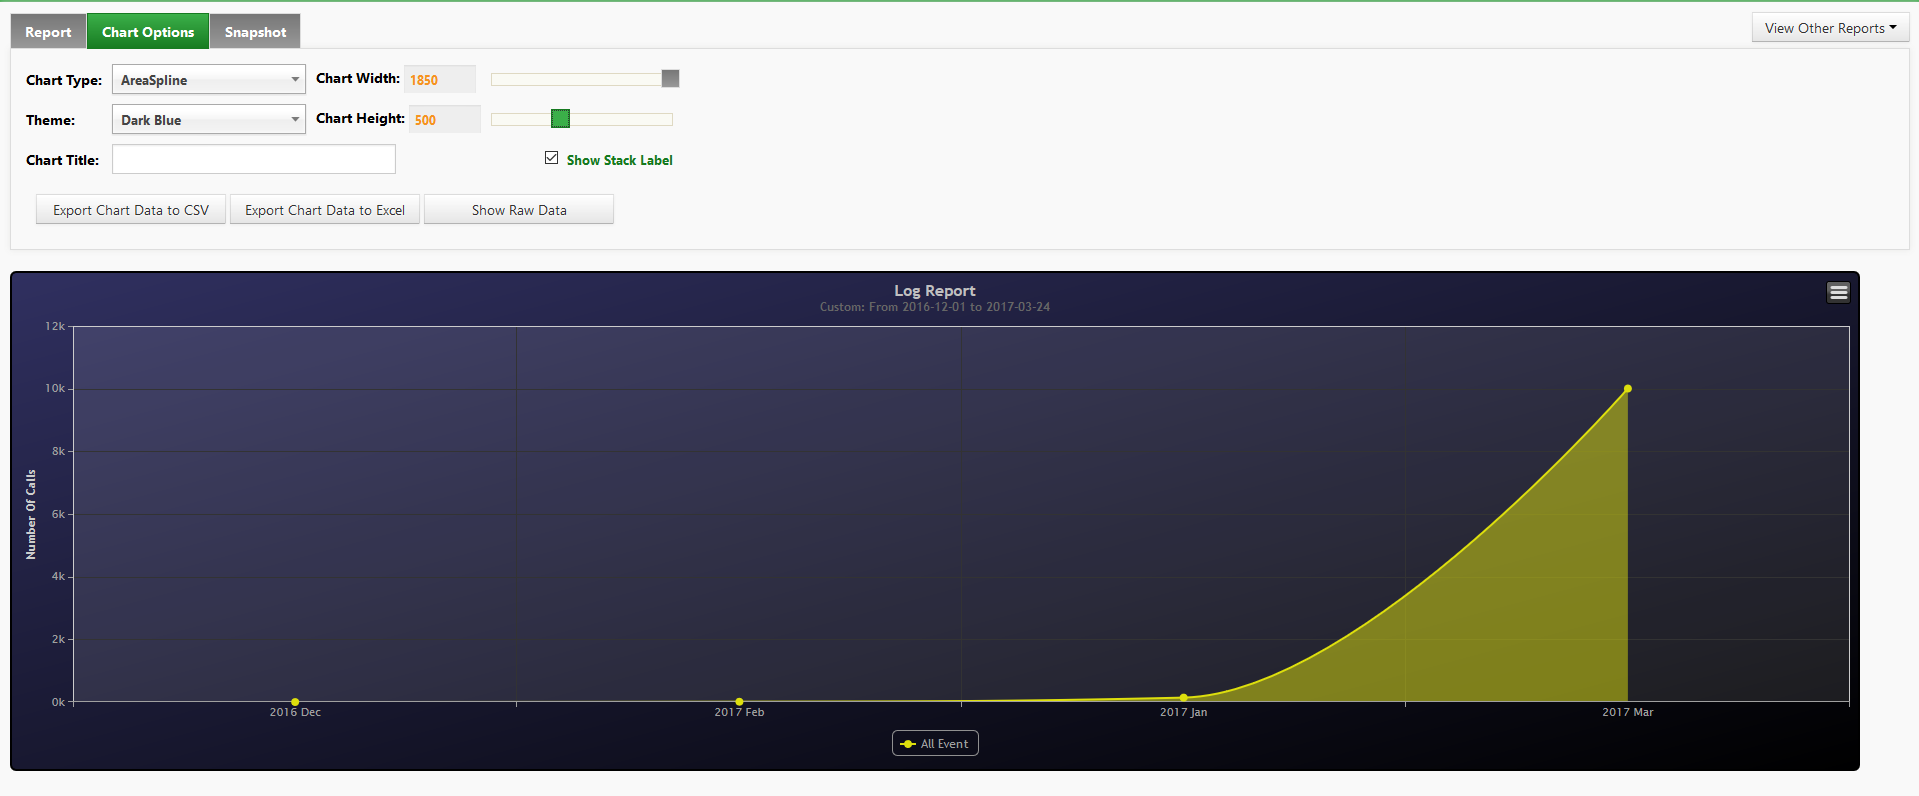
From the Chart Options tab you can make any visual changes to your chart. We will change our Chart Type, Theme and Dimensions to help the our data visualization.
Select the Snapshot tab.
Here we will save our current chart as a New Snapshot and name it Number_of_calls.
Select the Save As Snapshot button.
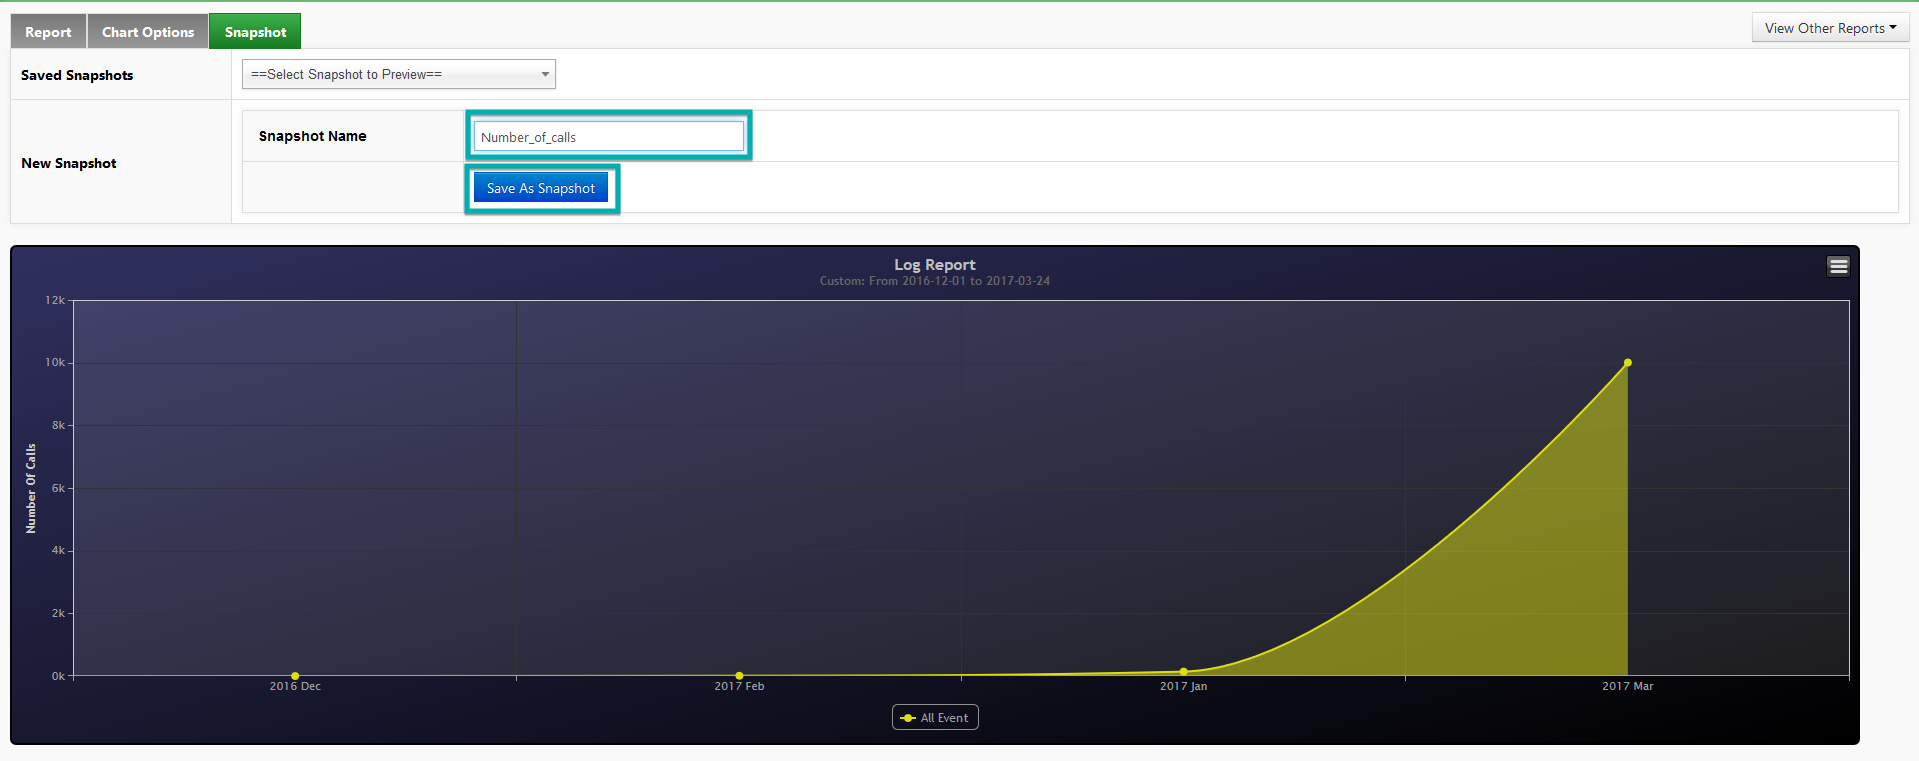
You will see the Snapshot saved confirmation.

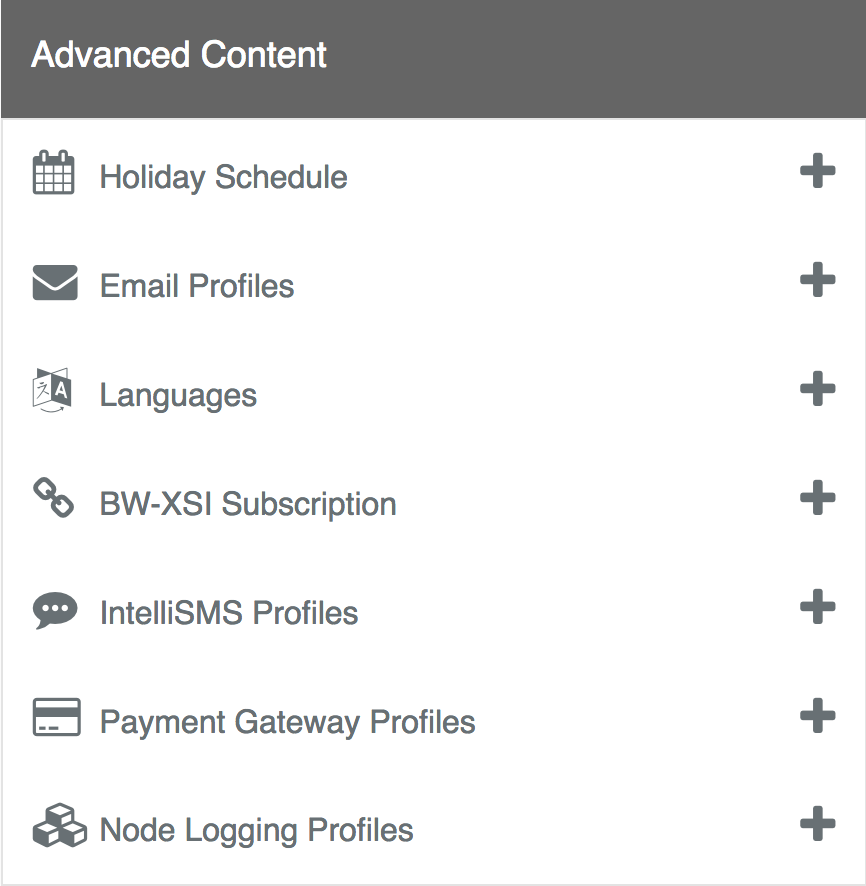
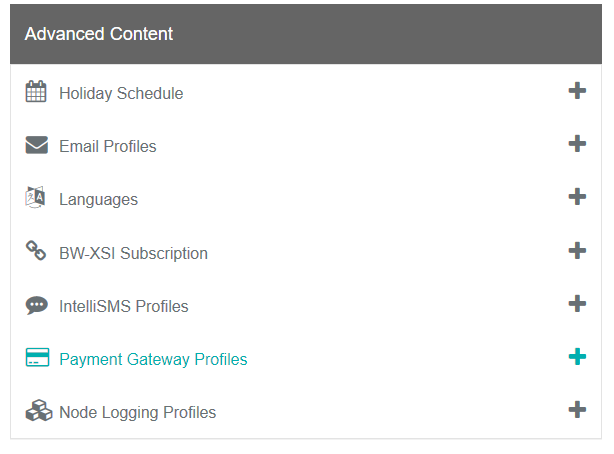
Advanced Content
Advanced Content refers to resources that are created at an application level. This allows them to be used and accessed by any task in your account and is useful when reusing the same resources throughout multiple tasks in your application.
The following guide will explain the different Advaced Content resources.
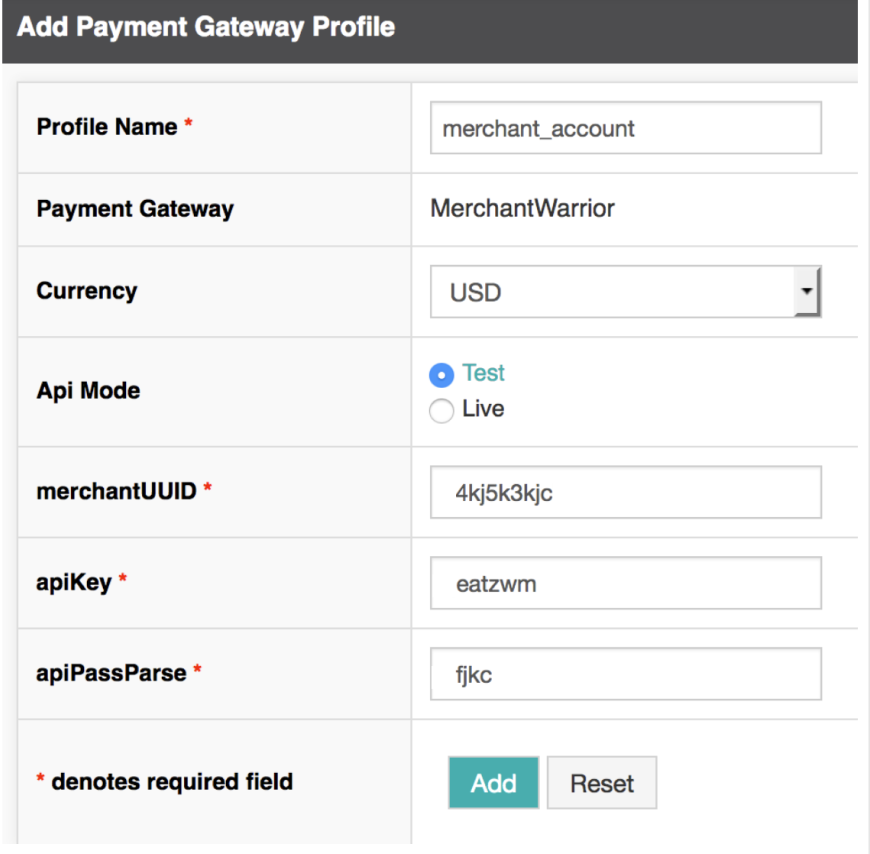
Payment Gateway Profiles
The Payment Gateway profile contains details for your Credit Card merchant account, including credentials and transaction currency, and is used by the Payment Process node.
Multiple payment profiles are often maintained to allow testing. In the payment providers test, development or sandbox environment you can conduct transactions with test credit cards. No payment settlment will be made. In the payment provider's production environment, you should perform live proving once satisfied with your application. This will require real credit cards and payment settlement will occur.
Studio supports the following public payment gateways at present.
- Merchant Warrior
- eWAY Payments
- Fat Zebra
- Authorize.net (US Only)
- Worldpay
- Worldpay Corporate
- Pay Trace
- First Data (Pay Ezeey)
- Westpac PayWay
- Trust Commerce
- NMI
- Cybersource
- Worldpay eCommerce
- Stripe
- Paymetrics
- PayNearMe
- Bluepay
- CardConnect
- Zuora
- Payware
- NLR
- Meridian
- SiteLink
- Adyen
Payment Gateway Features
The table below shows a breakdown of which payment processing features are available on the current gateways supported in Studio. This will be updated each time a new payment gateway is added.
| Gateway | Authorize & Capture | Authorize only | Tokenization | Configurable Schema | Payment Reversal/Refund | ACH |
|---|---|---|---|---|---|---|
| Adyen | ✔️ | ❌ | ❌ | ❌ | ❌ | ❌ |
| Authorize.net | ✔️ | ❌ | ✔️ | ✔️ | ✔️ | ❌ |
| Bluepay | ✔️ | ✔️ | ✔️ | ✔️ | ✔️ | ✔️ |
| CardConnect | ❌ | ❌ | ✔️ | ✔️ | ❌ | ❌ |
| Cybersource | ✔️ | ✔️ | ❌ | ✔️ | ✔️ | ❌ |
| CyberSource SOAP | ✔️ | ❌ | ✔️ | ✔️ | ❌ | ❌ |
| eWay | ✔️ | ❌ | ✔️ | ❌ | ✔️ | ❌ |
| Fat Zebra | ✔️ | ❌ | ✔️ | ❌ | ❌ | ❌ |
| First Data (Pay Ezeey) | ✔️ | ✔️ | ✔️ | ✔️ | ✔️ | ❌ |
| Merchant Warrior | ✔️ | ❌ | ❌ | ❌ | ✔️ | ❌ |
| Meridian | ✔️ | ❌ | ❌ | ❌ | ❌ | ✔️ |
| NLR | ✔️ | ✔️ | ❌ | ✔️ | ❌ | ❌ |
| NMI | ✔️ | ✔️ | ❌ | ✔️ | ❌ | ✔️ |
| Paymetrics | ❌ | ❌ | ✔️ | ❌ | ❌ | ❌ |
| Pay Trace | ✔️ | ✔️ | ✔️ | ✔️ | ✔️ | ❌ |
| PayNearMe | ❌ | ❌ | ✔️ | ❌ | ❌ | ❌ |
| Payware | ✔️ | ❌ | ❌ | ❌ | ❌ | ❌ |
| Sitelink | ✔️ | ❌ | ❌ | ❌ | ❌ | ❌ |
| Stripe | ✔️ | ✔️ | ✔️ | ✔️ | ✔️ | ❌ |
| Trust Commerce | ✔️ | ✔️ | ❌ | ✔️ | ✔️ | ❌ |
| Westpac PayWay | ✔️ | ❌ | ❌ | ✔️ | ❌ | ❌ |
| Worldpay | ✔️ | ✔️ | ✔️ | ❌ | ✔️ | ❌ |
| Worldpay Corporate | ✔️ | ❌ | ✔️ | ❌ | ❌ | ❌ |
| Worldpay eCommerce | ✔️ | ✔️ | ✔️ | ✔️ | ✔️ | ❌ |
| Zuora | ❌ | ❌ | ✔️ | ✔️ | ❌ | ❌ |
Configuring a Payment Gateway in Studio
To configure a new payment gateway:
From Global in the top menu select Payment Gateway Profiles + button.
Select your merchant and fill in the necessary fields. Each payment gateway has specific fields. Select Add to finishing setup.
TIP
- For Authorize.net, your API Login ID is found under Account | Settings | Security Settings | API Credentials & Keys. From there you can also generate a new transaction key by providing the answer to your account secret question.
TIP
Please note, for all Payment Profiles Studio will accept only 4 digit expiry dates in the format (MM/YY)
Configurable Schema
Certain payment gateways allow you to set a configurable schema. This allows you to pass in aditional parameters when credit card payments are processed.
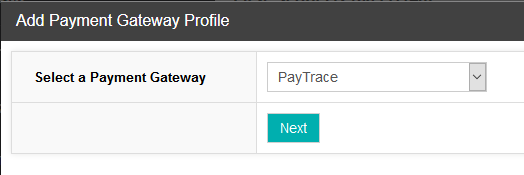
- From the top menu select Global > Advanced Content > Payment Gateway Profiles + icon.
- Select a Payment Gateway from the dropdown menu and click Next. In this example we will select PayTrace as they allow configurable schema.
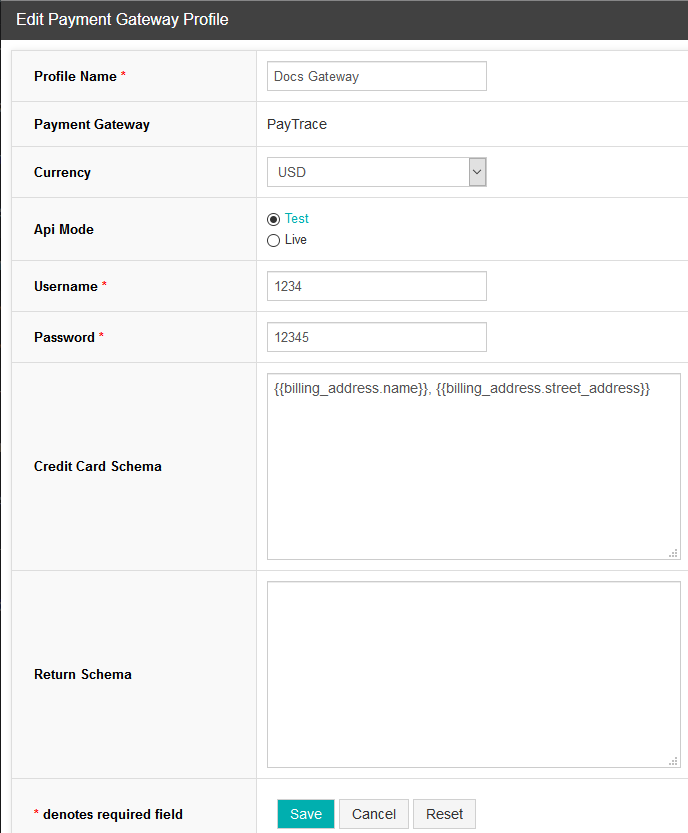
- Provide a name for the custom gateway.
- Select a currency.
- Provide the username and password for your merchant account.
- In the credit card schema text box, use the curly braces
{{to input custom fields. If you wish to input multiple fields you can do by separating them with a comma,. - Click Save.
Node Logging Profiles
Node logging profiles contain the credentials for the DB you are using to store the node logging data.
Studio 6.0
Amazon Aurora destination available in Studio 6.0 +Studio supports
- Google Firebase Realtime Database
- Amazon Aurora RDS MySQL compatible edition
You will require details for an existing database before creating the associated logging profile.
Adding a Node Logging Profile
- Under Global in the top menu, select the Node Logging Profiles + icon.

- Select a Log Gateway and click Next.
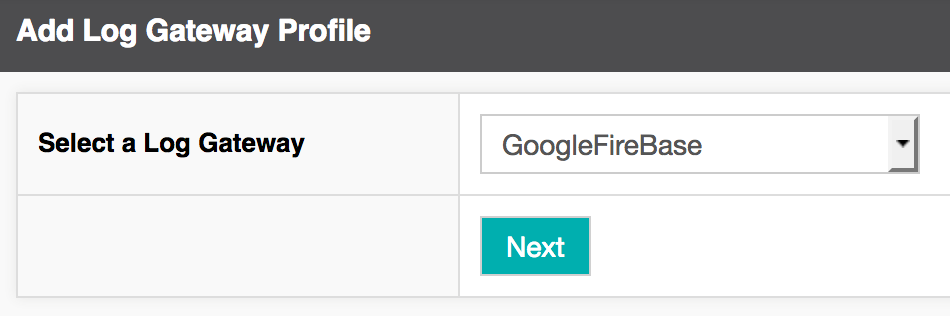
- Provide your database details and select Add.
Details for Google Firebase
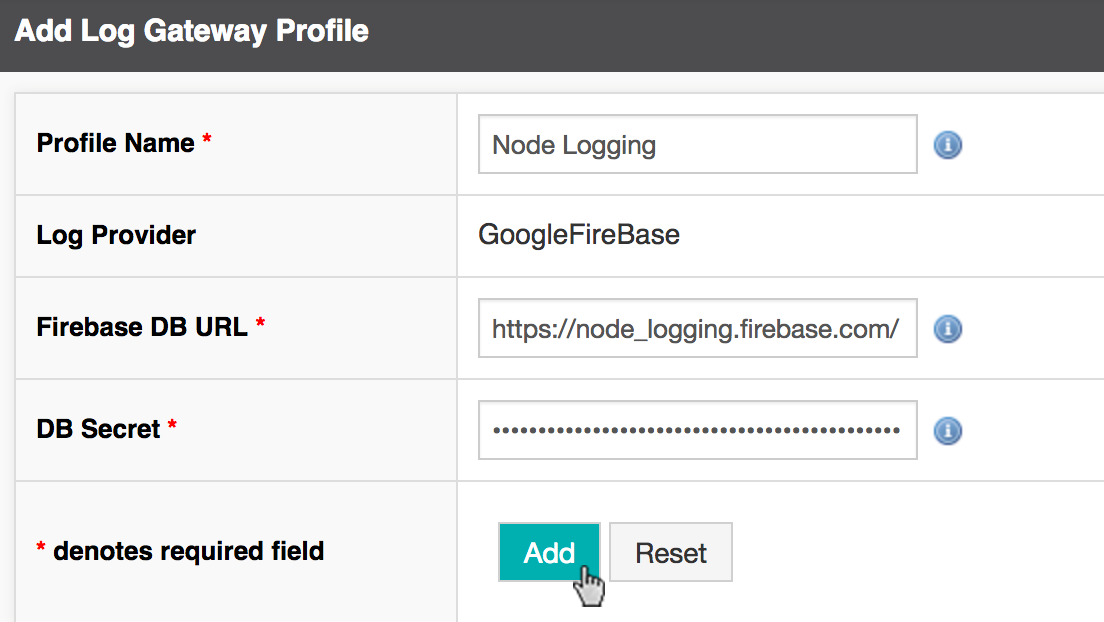
For Google Firebase Realtime Database, the Firebase DB URL is found within the Firebase Console under Develop | Database | Data and will be of the form https://projectname.firebaseio.com/. You can append further directories to the URL to control the location of logging within the real time database.
The service account credentials are typically managed in Google Cloud Console. The service account must have the role "Firebase Rules System". Service account credentials can be accessed in JSON format from IAM & Admin | Service accounts.
Details for Amazon Aurora RDS
Studio 6.0
Amazon Aurora destination available in Studio 6.0 +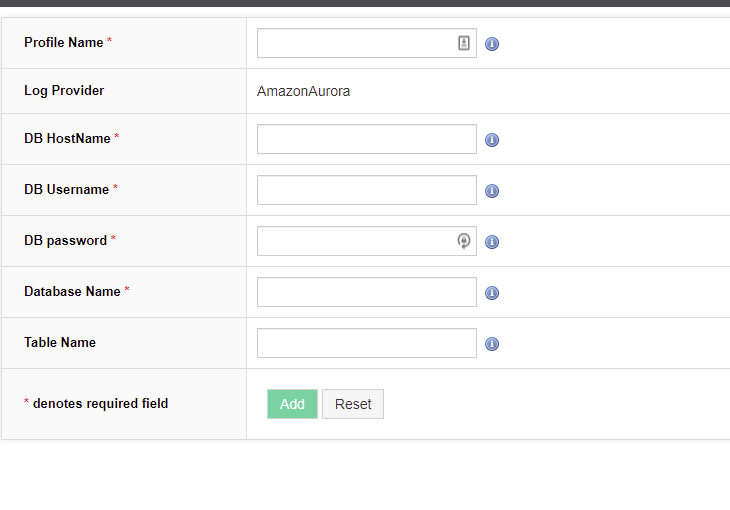
For Amazon Aurora RDS the DB Hostname is found in the database instance connectivity and must be a publicly reachable writable endpoint. The username and password must grant write access to the database name specified and within AWS can be managed within the RDS service or be associated with AWS IAM. If Studio can successfully connect to the database then it will create the table with the required structure and all required configured columns. If a table name is not provided then the name nodelog is used. If the table already exists then the data insertion will succeed only if it is of the required structure, so let Studio create the table.
One mechanism to ensure public reachability of the endpoint is to ensure the VPC has DNS resolution and DNS hostnames enabled, and to configure security groups for the VPC and RDS services to allow Inference whitelist IP addresses. Please also check that the launch wizard has not configured a database security group limiting access to just the IP address of the client used to create the database.
Activating Node Logging
Once a profile has been added you will be able to activate it as a setting for any Task.
- Either create a new task, or Edit a task's settings.
- At the bottom of the task details page switch the Node Logging toggle to active.
- Once the settings are saved, log data will now be sent to your all node logging profiles whenever the task runs.
- Alternatively, select one or more profiles and save, and log data will only be sent to the selected profiles.
Which Nodes support Node Logging?
The list below shows which nodes support logging as of Studio 5.1 as well as what data they can log.
All nodes listed here have these Default log items:
- instance_id
- node id
- node type
- timestamp
- UUID
- Node name
- Group_id
Additional log data for specific nodes is listed below:
Calendar Node:
- Child_node_id
Comment Node:
- Default node items
Day Time:
- Child_node_id
Decision:
- Child_node_id
Distribute:
- Child_node_id
Form:
- child_node_id
- confidence
- inputmode
- utterance
Goto:
- Default node items
Integration:
- Response code
Log:
- All logged data
Menu:
- child_node_id
- confidence
- inputmode
- utterance
Payment Process:
- Response code
Play Prompt:
- Default node items
forMe Add To Queue:
- API response code
QforMe Check Waiter:
- API response code
Send Email:
- Default node items
Start:
- ANI
- DNIS
- Service number
- Task name
Table Lookup:
- DB lookup values
Variable:
- Variables contained in node`
DNIS Pool
AA DNIS pool is a collection of phone numbers stored in Studio for the purpose of forwarding calls to a call center. DNIS pool provides the ability to assign a unique DNIS when transferring a call to a call center. DNIS pool is useful when making a Screenpop Transfer. DNIS pool is offered as a global content item for each account.
- Select Gloal from the top menu > Advanced Content > DNIS Pool + icon.
- Provide a Pool Name and Display Name.
- From the Option section, you can select whether you would like to add numbers via a range.
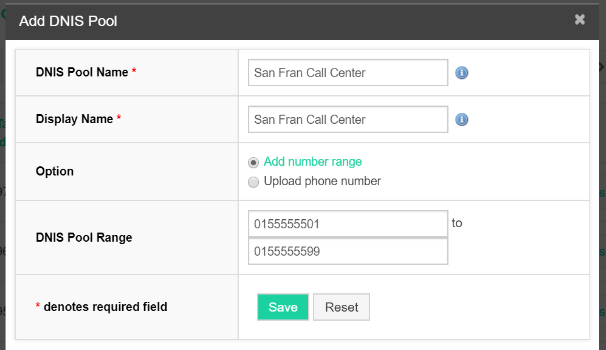
- Or via a CSV upload of your phone number list.
Campaign
About Campaigns
Campaigns are the integrated outbound dialer in Inference Studio. The flexibility of Campaigns is that an outbound campaign can either be a Voice Task or Messaging Task.
There are also two types of Inference Campaigns:
List-Based Campaigns - A -Based campaign is used to execute outbound calls based on a supplied list of recipients. This campaign type is configured to execute automatically, based on a specified schedule.
On Demand Campaign - Driven via the RESTful API.
The Campaign menu also provides access to Campaign Settings and Reports tools.
List-Based Campaigns
The List-Based Campaigns page is the dashboard containing all your current List-Based campaigns.
A List-Based campaign is used to execute outbound calls based on a supplied list of recipients. This campaign type is configured to execute automatically, based on a specified schedule.
From this page you have access to the Actions menu where you can carry out a number of different functions relating to your campaigns.
TIP
If this is a new account, you will need to Add a new campaign before you can apply actions to it.
List-Based Campaigns
To access the List-Based Campaigns page:
- Navigate to Campaign in the top menu.
- Select the List-Based Campaigns title.
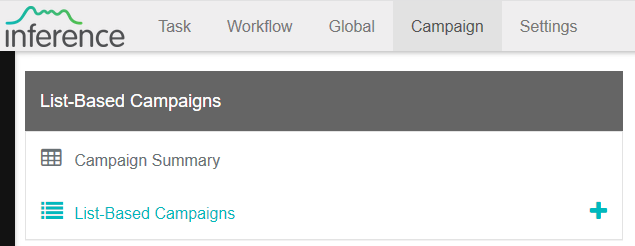
- You will be taken to the List Campaigns page. From here you can see a summary of all current list-based campaigns.

Creating a List-Based Campaign
WARNING
A Campaign will need to be mapped to an existing Inference Studio Task. If you have not created a Studio Task you will need to do this first before creating a List-Based Campaign.
- Navigate to Campaign in the top menu.
- From the List-Based Campaigns section, select the + icon.
Add List-Based Campaign Details
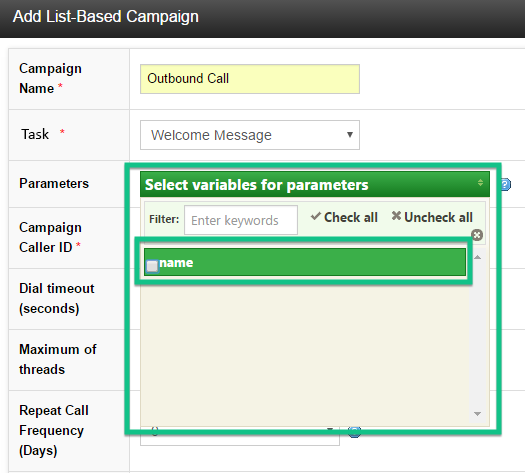
- Provide a Campaign Name. We have called ours 'Outbound Call'.
- Select the Task you would like the campaign to use from the dropdown menu. We have selected the task 'Welcome Message'.
- If the Task you select requires you to pass in parameters, you will need to select these parameters from the Parameters dropdown menu. Our 'Welcome Message' task has a 'name' variable that we want to pass in to our campaign so will select it here.
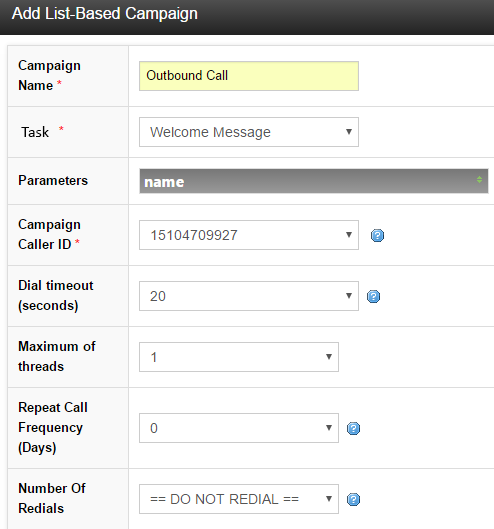
- From the Campaign Caller ID section you will need to choose the caller ID. This is required for callback so customers know which service has dialed them. Any service numbers associated with your account will be available here.
- Select a Dial Timeout period from the dropdown menu. This is the time in seconds that the campaign will call for before terminating. We have left ours at the default 20 seconds.
- Choose Maximum of Threads from the dropdown. This is the maximum number of calls that can be made concurrently. You will need to select at least 1 thread to perform an outbound call. We have set ours to 1.
- Choose the Repeat Call Frequency (Days) from the dropdown menu. This is the number of days in a row a campaign will run for. We have left ours at the default of 0, as we only want to run the outbound call once.
- Select the Number of Redials for outbound calls from the dropdown menu. We have selected == DO NOT REDIAL ==.
Below you can see a screenshot of our settings so far.
- The final section is the Campaign Schedule. From here you select all the days of the week, as well start and end times for your outbound calls.
- You will also need to select an After Hours Action from the dropdown menu. You can choose for the campaign to either Pause or Stop.
TIP
For example, if we had a campaign schedule to dial 100 different service numbers, but by end of business hours (5pm) the campaign had only dialed 80 of the numbers; the campaign would trigger the After Hours Action. If we had selected Pause, the campaign would wait until the next scheduled opening time and then continue to dial starting from where it left off the day before. If we had selected Stop, it would simply discard those last 20 numbers and begin at the next scheduled opening ours dialing from the first service number in the list.
- Select Add. You will then be taken to the Campaigns page where you will see the new campaign has been added.
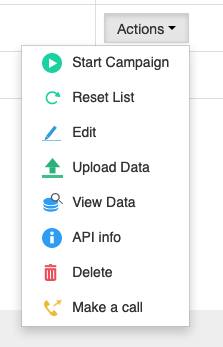
Actions
The Actions dropdown menu gives you access to the various features and options for your -Based Campaigns.
We will now walk you through these various Actions.
Starting a Campaign
- From the Actions menu select Start Campaign.
- The Campaigns page will reload and you will notice that the campaign Status is now set to Pending, with the start time set for 9:00 am the following day. The status will depend on the schedule you set when creating your campaign and will change to Active when it is currently running.

Stopping a Campaign
If any time you wish you manually stop a campaign that is Active or Pending you can do so from the Actions menu.
- From the Actions menu select Stop Campaign.
Reset List
Reset list allows you to re-run a campaign that has previously completed. This saves you needing to upload a new list each time you want to run a campaign.
- From the Actions menu select Reset List for the completed campaign.
- You will be prompted to confirm. Data relating to the campaign previously running, such as Number of Retries and Status will be reset.
- You will then receive confirmation that the list has been reset. You can then start the campaign as normal.
Edit
- From the Actions menu select Edit for the campaign you wish to edit. This will allow you to edit task and schedule settings for the current campaign in the same way as creating a new list-based campaign.
Upload Data
Before a List-Based Campaign can be properly executed, you will need to supply it with a list of telephone numbers.
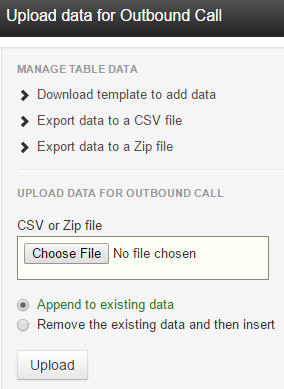
The Upload Data action is divided into two areas.
Manage Table Data: Allows you to download a .csv template to add service numbers to. It also allows you to export your data as either a .csv or zip file.
Upload Data For Outbound Call: Allows you to upload your service number data via a .csv file.
Manage Table Data
- Select > Download template to add data. This will download a .csv file to your computer.
- Modify this file with your outbound telephone number list, separated by a new line after each telephone number. Ensure 'phone_number' and 'name' remains on the first line of the file. You don't have to provide any name data but it is there as an option. The Screenshot below shows both named and unnamed service numbers within the .csv file.
- At the bottom of the page you will need to select whether you would like to Append to existing data or Remove the existing data and then insert.
- If you wold like to export your data, you can do this via > Export Data to a CSV File or > Export Data to a Zip File links.
An example .csv call list, using the provided template is shown below.

Upload Data For Outbound Call
- Select the Upload button and choose the .csv file containing your call list. If there are any errors in your file, you will be prompted to retry. Check your .csv data to ensure it conforms to the correct standard and try Upload again.
View Data
If you have already imported data into your campaign, you will be able to view this data.
- From the Campaigns page select the campaign you would like to view the data for.
- From the Actions dropdown menu, select View Data.
TIP
If no data is available for the campaign, you will be presented with an error indicating that no data exists..
The View Data screen shows the current Phone Numbers, campaign Status and other relevant information.

API info
You are able to perform a series of remote actions on -Based Campaigns via the APIs. These actions are:
- Upload phone numbers and passed parameters.
- Start and stop a campaign.
- Change the campaign schedule and after hours action.
The API info page provides all the information you will need in order to use each of these APIs.
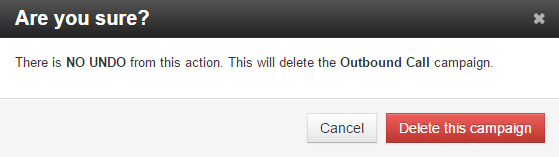
Delete
If you want to delete a campaign:
- From the Campaigns page, select the campaign you want to delete.
- From the Actions dropdown menu, select Delete.
- A prompt will appear to notify you this delete is permanent and there is no way to undo.
- Select Delete this Campaign.
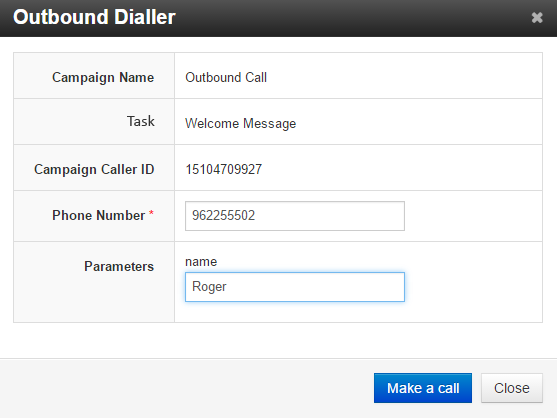
Make a Call
The Make a Call action is used for testing purposes. Essentially it lets your campaign dial out to a specified number and pass in any required parameters. The common use case would be to call your own number and test that the task associated with the campaign is working as expected.
- From the Campaigns page, select the Campaign you want to use.
- From the Actions menu, select the Make a Call option.
- A prompt will appear with a brief overview of the current campaign.
- Provide the Phone Number you would like to call.
- Provide information for the Parameters field, if required. Our task requires a name parameter as part of our prompt so will have provided the name Roger.
- Select Make a Call.
Campaign Summary (List-Based)
The Campaign Summary is useful because it provides you with an overall view of your campaigns, sorted by day, week, month and year.
The refresh frequency is used to automatically refresh the page content. Change this value and click 'Change' to increase or decrease the frequency that your Campaign Summary will refresh. The default is 60 seconds.
Change the scope of your summary. Select Today, This Week, This Month or This Year to show relevant summary data for those time periods.
Alternatively, you can customize the sample period based on your own requirements, either by supplying a single date, or by supplying a date range using Start Date and End Date.
From our weekly overview we can track the success of our current campaign by looking at the Answered, Sent, Not Answered and Total.
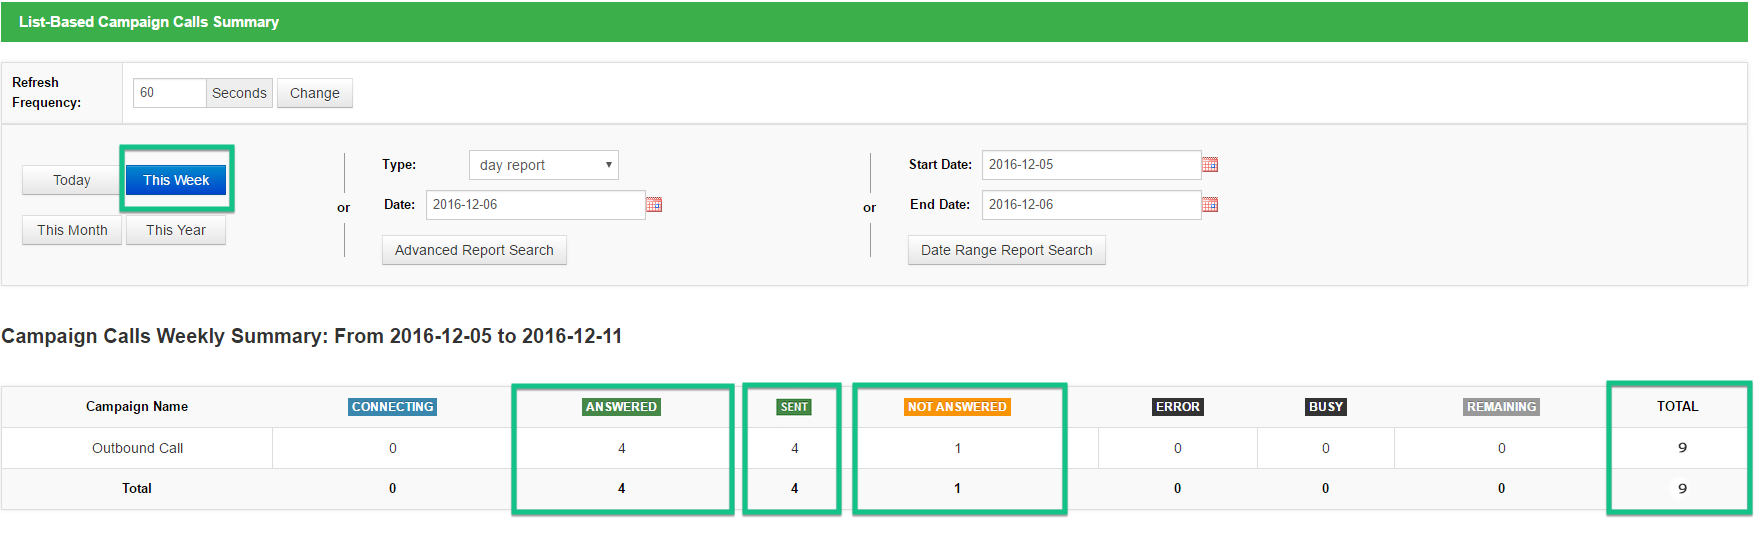
- Answered/Not Answered refer to Voice tasks.
- Sent refers to Messaging tasks.
On-Demand Campaigns
The On-Demand Campaigns page is the dashboard containing all your current On-Demand Campaigns.
An on-demand campaign is used to execute outbound calls based the RESTful API requests.
From this page you have access to the Actions menu where you can carry out a number of different functions relating to your campaigns.
TIP
If this is a new account, you will need to Add a new campaign before you can apply actions to it.
On-Demand Campaigns
To access the On-Demand Campaigns page:
- Navigate to Campaign in the top menu.
- Select the On-Demand Campaigns title.
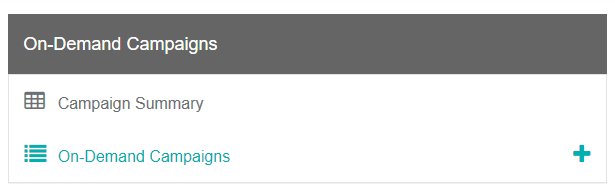
Creating an On-Demand Campaign
- Navigate to Campaign in the top menu.
- From the On-Demand Campaigns section, select the + icon.
Add On-Demand Campaign Details
- Provide a Campaign Name. We have called ours 'Outbound Call'.
- Select the Task you would like the campaign to use from the dropdown menu. We have selected the task 'Welcome Message'.
- If the Task you select requires you to pass in parameters, you will need to select these parameters from the Parameters dropdown menu. Our 'Welcome Message' task has a 'name' variable that we want to pass in to our campaign so will select it here.
- From the Campaign Caller ID section you will need to choose the caller ID. This is required for callback so customers know which service has dialed them. Any service numbers associated with your account will be available here.
- Select a Dial Timeout period from the dropdown menu. This is the time in seconds that the campaign will call for before terminating. We have left ours at the default 20 seconds.
- Choose Maximum of Threads from the dropdown. This is the maximum number of calls that can be made concurrently. You will need to select at least 1 thread to perform an outbound call. We have set ours to 1.
- Choose the Repeat Call Frequency (Days) from the dropdown menu. This is the number of days in a row a campaign will run for. We have left ours at the default of 0, as we only want to run the outbound call once.
- Select the Number of Redials for outbound calls from the dropdown menu. We have selected == DO NOT REDIAL ==.
- The final section is the Campaign Schedule. From here you select all the days of the week, as well start and end times for your outbound calls.
- You will also need to select an After Hours Action from the dropdown menu. You can choose for the campaign to either Pause or Stop.
TIP
For example, if we had a campaign schedule to dial 100 different service numbers, but by end of business hours (5pm) the campaign had only dialled 80 of the numbers; the campaign would trigger the After Hours Action. If we had selected Pause, the campaign would wait until the next scheduled opening time and then continue to dial starting from where it left off the day before. If we had selected Stop, it would simply discard those last 20 numbers and begin at the next scheduled opening ours dialling from the first service number in the list.
- Select Add.
- As soon as you create a new On-Demand Campaign you will be provided with the API settings below the Save button.
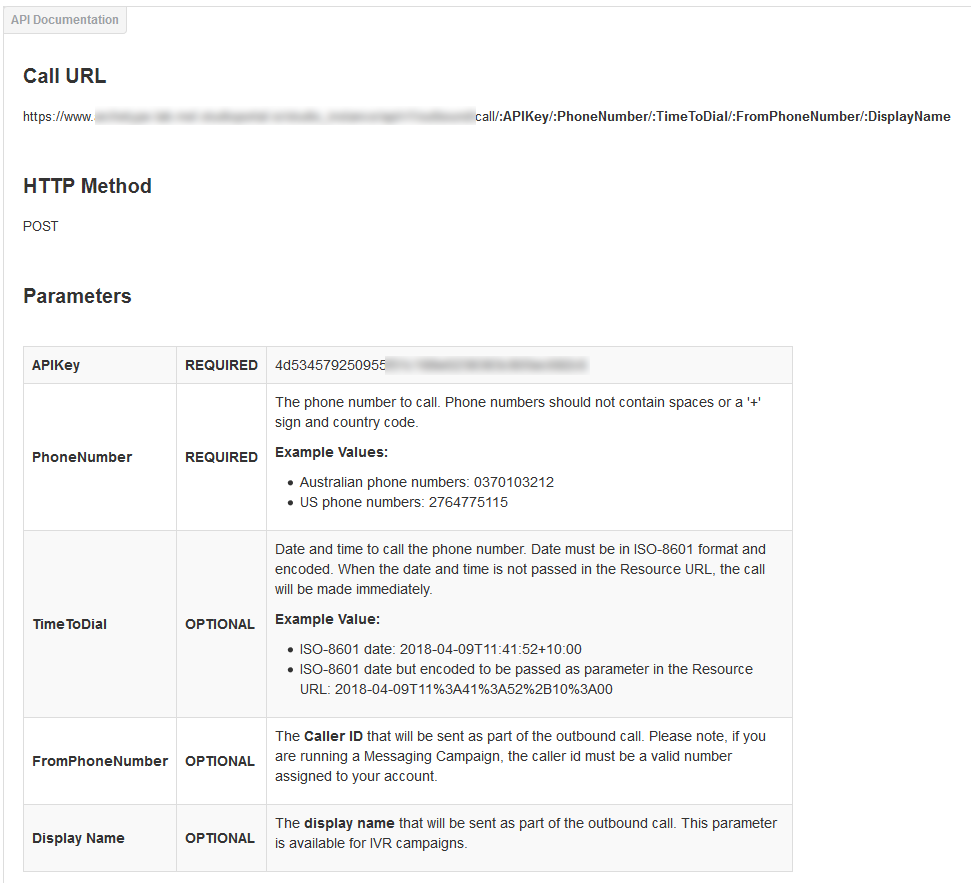
- Select Save to finish creating the campaign.

Actions
The Actions dropdown menu gives you access to the various features and options for your On-Demand campaigns.
We will now walk you through these various Actions.
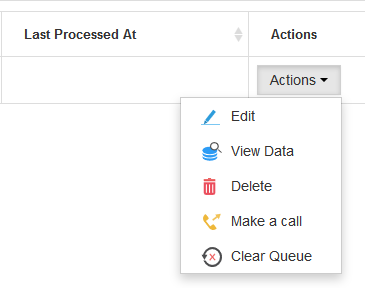
Edit
- From the Actions menu select Edit for the campaign you wish to edit. This will allow you to edit task and access API settings for the current campaign, in the same way as creating a new On-Demand Campaign. Learn more about Creating an On-Demand Campaign.
View Data
If you have already imported data into your campaign, you will be able to view this data.
- From the On-Demand Campaigns page select the campaign you would like to view the data for.
- From the Actions dropdown menu, select View Data.
WARNING
If no data is available for the campaign, you will be presented with an error indicating that no data exists.

The View Data screen shows the current Phone Numbers, campaign Status and other relevant information.
Delete
f you want to delete a campaign:
- From the Campaigns page, select the campaign you want to delete.
- From the Actions dropdown menu, select Delete.
- A prompt will appear to notify you this delete is permanent and there is no way to undo.
- Select Delete this Campaign.

Make a call
The Make a Call action is used for testing purposes. Essentially it lets your campaign dial out to a specified number and pass in any required parameters. The common use case would be to call your own number and test that the task associated with the campaign is working as expected.
- From the Campaigns page, select the Campaign you want to use.
- From the Actions menu, select the Make a Call option.
- A prompt will appear with a brief overview of the current campaign.
- Provide the Phone Number you would like to call.
- Provide information for the Parameters field, if required. Our task requires a name parameter as part of our prompt so will have provided the name Roger.
- Select Make a Call.
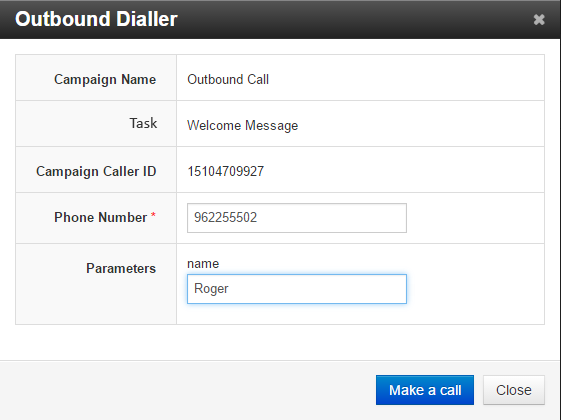
Campaign Summary (On-Demand)
The Campaign Summary is useful because it provides you with an overall view of your campaigns, sorted by day, week, month and year.
The refresh frequency is used to automatically refresh the page content. Change this value and click 'Change' to increase or decrease the frequency that your Campaign Summary will refresh. The default is 60 seconds.
Change the scope of your summary. Select Today, This Week, This Month or This Year to show relevant summary data for those time periods.
Alternatively, you can customize the sample period based on your own requirements, either by supplying a single date, or by supplying a date range using Start Date and End Date.
From our weekly overview we can track the success of our current campaign by looking at the Answered, Not Answered and Total Calls.
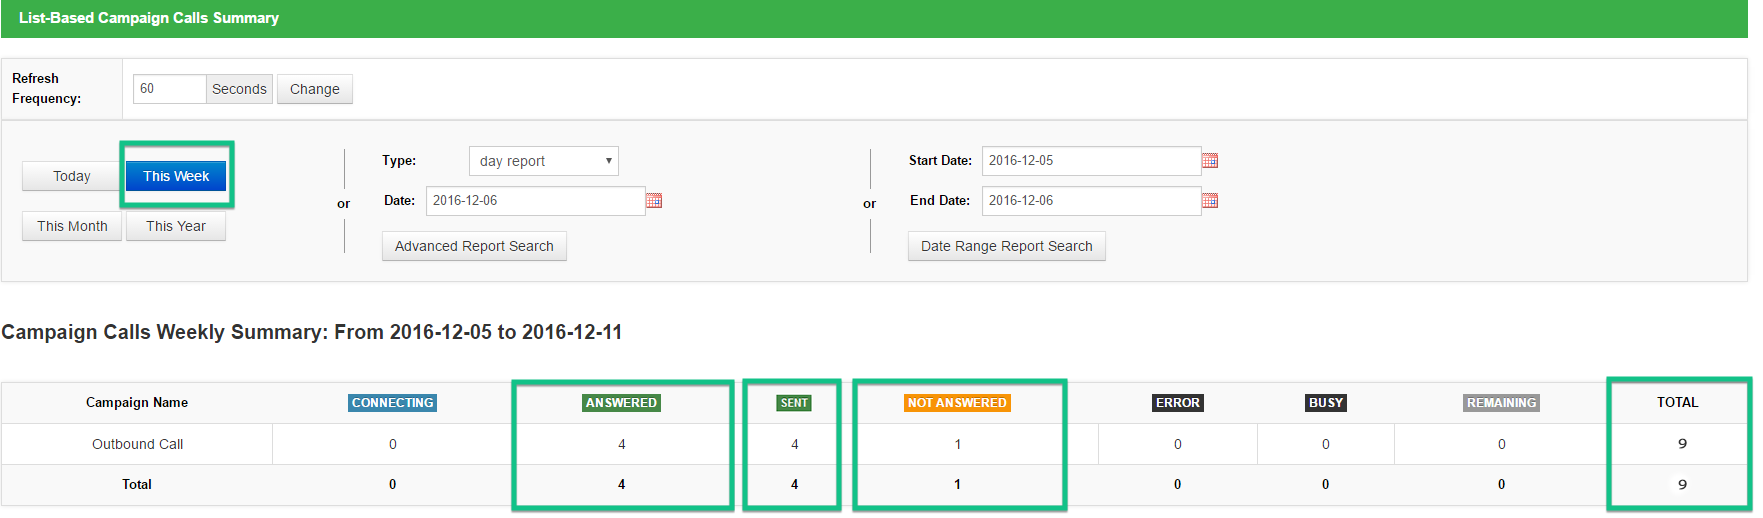
Answered/Not Answered refer to Voice tasks. Sent refers to Messaging tasks.
Campaign Settings
Access the Campaign Settings by:
- Selecting Campaign from the top menu.
- Navigate to the Campaign Settings section, select Campaign Settings.
Global Dialling Hours
Global dialling hours are used to define when your Campaign is allowed to place calls relative to the local server time of your Inference Studio server.
WARNING
Exercise caution when creating automated outbound campaigns, as opposed to on-demand campaigns, as your connect task may place calls to your recipients at inappropriate times.
Configuration
The Configuration tab allows you to enable or disable the No Repeat Call Switch. If this option is set to 'ON', your Campaign will NOT redial unsuccessful list recipients. If set to 'OFF', your Campaign will automatically reattempt to call service numbers that did not answer, until either that call is successful or the campaign ends.
Once you have made changes to Campaign Settings, select Save to commit your changes.
Reports
There are many reporting options to accurately see how your campaigns are performing.
Reporting is available for:
- Log Data - Inference Studio tasks can be configured to send data to the a data log store at certain points during a callflow. This can be useful in a number of ways, such as recording user input or capturing call data such as call duration etc.
- Call Attempts & Answer Rate - Your campaigns can potentially reach a vast audience, reporting options are available to allow you to see how successful campaigns are.
- Answer Rate - The Answer Rate reporting lets you see how campaigns are performing throughout different times in the day.
Each of these reporting options will now be covered in more detail.
Log Detail
Viewing Log Data
The Log Data page allows you to view this data.
- Navigate to Campaign in the top menu.
- From the Reports section, select Log Data.
- This will take you to the All Logs page.
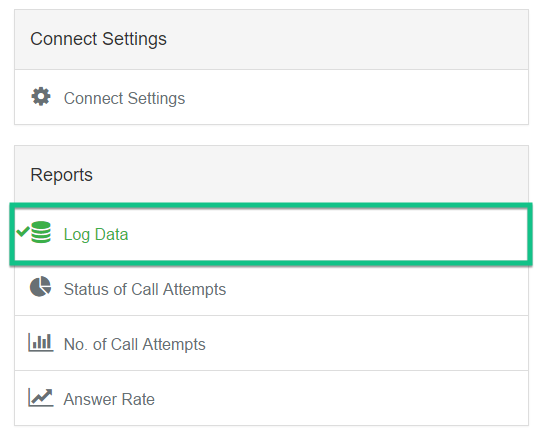
From this page you can view all of the Log Data. This data can be filtered using the search options. These include filtering your search results based on Status, Logged Time, Phone Number, Campaign Type, Campaign ID and Log Information.
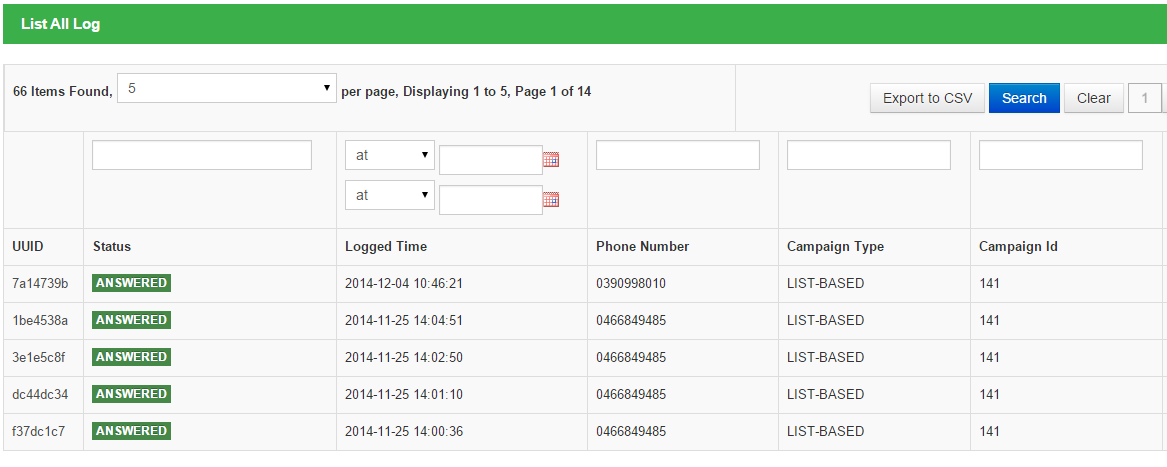
Log Data fields explained
- UUID This is the unique identified for the log record.
- Status This value will indicate the status of the call associated with this log.
- Logged Time Time that record was added to the log database.
- Campaign Type Indication of the type of Campaign. This value will be either On-Demand or -Based.
- Campaign ID The ID of the Campaign that posted the log result.
- Log Information Custom log information added by your task
Exporting Data
- To export Log data, select the Export to CSV button at top right of the screen.
- The log data will automatically downloaded to your system as a .csv file.
Status of Call Attempts
- Navigate to Campaign in the top menu.
- Select Status of Call Attempts.
Viewing Data
- From the main Report tab, you will see a pie chart for the Status of Call Attempts Report.
- By Default, the campaign is set to All Campaigns. To change this, select an individual campaign from the dropdown menu. You will be able to choose between both -Based and On-Demand campaign types. The chart will update immediately.
- By Default, the report Date is set to Today. You can select specific dates & date ranges from the dropdown menu. The chart will update immediately.
- Refresh Frequency is how often your browser will be updated with any new data. You can change this by entering a new time (in seconds) and selecting the Change button.
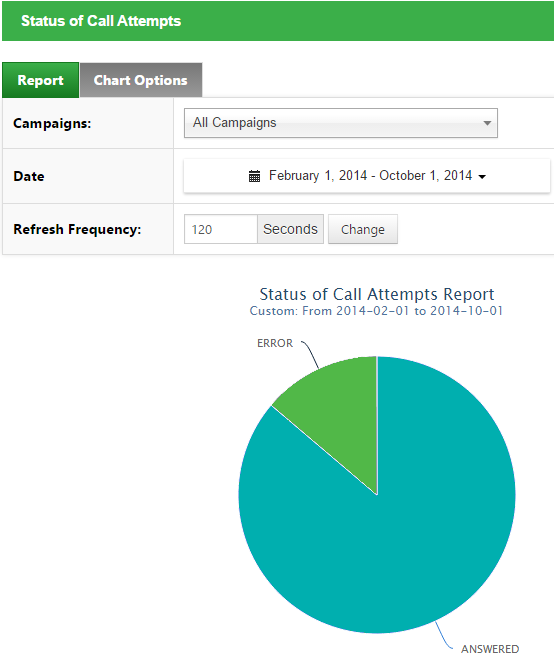
Outputting Charts
If you would like to save and output a chart:
- Select the button with 3 horizontal lines, to the top-right of the graph.
- From the dropdown menu, choose to either Print the chart or Download the chart in a number of different image formats.
Chart Options
You can select a range of different options to change the appearance of your chart.
Select the Chart Options tab.
Chart Type
From the Chart Type section, select a new chart type from the dropdown menu. Studio includes the following chart types: Column, Bar, Line, Spline, Area, AreaSpline, Scatter and Table. The chart type will update immediately.
Theme
From the Theme section, select a new theme from the dropdown menu. The chart will update immediately. Themes provide alternative color schemes for your reports.
Chart Title
Provide a Chart Title by filling in the text box. The chart will update immediately.
Sizing
To define a custom width and height for your chart use the corresponding sliders.
Export Data
To export the data associated with your chart, select either the Export Chart Data to CSV or Export Chart Data to Excel buttons.
Answer Rate
- Navigate to Campaign in the top menu.
- Select Answer Rate.
Viewing Data
- From the main Report tab, you will see a column chart for the Answer Rate report.
- By Default, the campaign is set to All Campaigns. To change this, select an individual campaign from the dropdown menu. You will be able to choose between both -Based and On-Demand campaign types. The chart will update immediately.
- By Default, the report Date is set to Today. You can select specific dates & date ranges from the dropdown menu. The chart will update immediately.
- Refresh Frequency is how often your browser will be updated with any new data. You can change this by entering a new time (in seconds) and selecting the Change button.
Outputting Charts
If you would like to save and output a chart:
Select the button with 3 horizontal lines, to the top-right of the graph. From the dropdown menu, choose to either Print the chart or Download the chart in a number of different image formats.
Chart Options
You can select a range of different options to change the appearance of your chart.
Select the Chart Options tab.
Chart Type
From the Chart Type section, select a new chart type from the dropdown menu. Studio includes the following chart types: Column, Bar, Line, Spline, Area, AreaSpline, Scatter and Table. The chart type will update immediately.
Theme
From the Theme section, select a new theme from the dropdown menu. The chart will update immediately. Themes provide alternative color schemes for your reports.
Chart Title
Provide a Chart Title by filling in the text box. The chart will update immediately. Select the Show Stack Label checkbox if you would like to label each element in the chart.
Sizing
To define a custom width and height for your chart use the corresponding sliders.
Export Data
To export the data associated with your chart, select either the Export Chart Data to CSV or Export Chart Data to Excel buttons.
No. of Call Attempts
- Navigate to Campaign in the top menu.
- Select No. of Call Attempts.
Viewing Data
- From the main Report tab, you will see a column chart for the No of Call Attempts Report.
- By Default, the campaign is set to All Campaigns. To change this, select an individual campaign from the dropdown menu. You will be able to choose between both -Based and 3. On-Demand campaign types. The chart will update immediately.
- By Default, the report Date is set to Today. You can select specific dates & date ranges from the dropdown menu. The chart will update immediately.
- Refresh Frequency is how often your browser will be updated with any new data. You can change this by entering a new time (in seconds) and selecting the Change button.
Outputting Charts
If you would like to save and output a chart:
Select the button with 3 horizontal lines, to the top-right of the graph. From the dropdown menu, choose to either Print the chart or Download the chart in a number of different image formats.
Chart Options
You can select a range of different options to change the appearance of your chart.
Select the Chart Options tab.
Chart Type
From the Chart Type section, select a new chart type from the dropdown menu. Studio includes the following chart types: Column, Bar, Line, Spline, Area, AreaSpline, Scatter and Table. The chart type will update immediately.
Theme
From the Theme section, select a new theme from the dropdown menu. The chart will update immediately. Themes provide alternative color schemes for your reports.
Chart Title
Provide a Chart Title by filling in the text box. The chart will update immediately. Select the Show Stack Label checkbox if you would like to label each element in the chart.
Sizing
To define a custom width and height for your chart use the corresponding sliders.
Export Data
To export the data associated with your chart, select either the Export Chart Data to CSV or Export Chart Data to Excel buttons.
Campaigns and voicemail systems
Outbound voice campaigns can make use of Call progress analysis (CPA) and answering machine detection (AMD) to attempt to determine if the campaign has reached a person or has been answered by voicemail. This allows tasks to tailor behaviour appropriate to the answerer. Support for voicemail system detection is controlled through the Beep and Machine Detection options configured on the task settings for the task associated with the campaign (see edit task settings).
Beep Detection controls whether the task transfers control to an event handler on detecting the beep tone typical of many voicemail services.
Machine Detection controls whether the task transfers control to an event handler on detecting an the spoken greeting typical of voicemail services. Most voicemail has a greeting that continues for greater than approximately three seconds, unlike the typical "Hi this is Jenny" greeting of a person answering the phone.
If both are enabled, one handler will preempt the other. For residential voicemail systems, typically call progress analysis will transfer control to the Machine Detection event handler, which if it does not disconnect, may then be pre-empted some seconds later by beep transfering control to the Beep Detection handlers. On cell phone voicemail systems the prompt is typically played as early media, meaning that only the beep is detected on answer.
TIP
Tasks configured with these settings will have the event handlers MACHINE_DETECTION and BEEP_DETECTION created as initially empty canvas. These event handlers must have additional nodes such as play prompt added if voicemail messages are desired to be left, otherwise the call will simply hang up (due to the implicit hang-up behaviour of studio when no further nodes are left to process).
One common approach is to play a voice mail specific message with a prompt node within the BEEP_DETECTION handler then disconnect, while the main canvas may include forms or other input nodes intended to interact only with live callers.
Settings
The Settings module provides access to Studio System Settings as well as API settings via the Web Configurator & API Documentation.
System Settings
General Inference Studio platform settings can be administered via System Settings, such as Studio layout configuration, reporting time of day thresholds and default task options.
Web
The Web tab allows modification of the default number of task entries that will appear in Inference Studio.
- Navigate to Settings from the top menu, and select the System Settings title. This will take you to the Edit Settings page.
- From the Web tab, use the No. of entries to show per screen dropdown menu to select a predefined value.
- Select Save to commit changes.
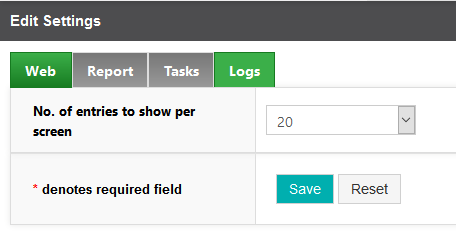
Report
The Report tab allows modification of reporting time of day thresholds.
- Select the options to define the time ranges that your reports should be run for.
- Select Save to commit changes.
TIP
Example
Every business is different and so are the respective reporting time periods. If you only need to capture reporting data between 9am and 6pm, Tuesday to Friday and you do not need to capture data outside of these hours, these options will allow you to define those limits. You can also specify reporting blackout time ranges using the Disable Report Hour Start/End.
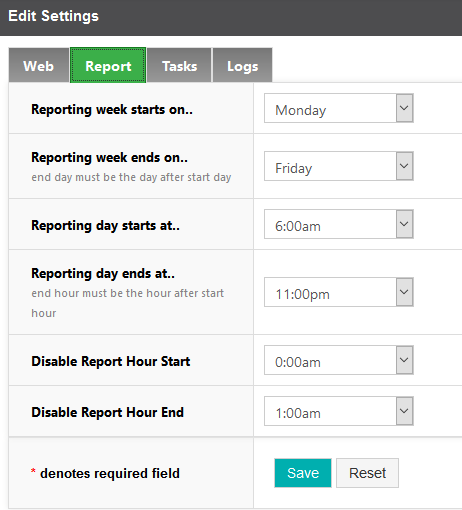
Tasks
Inference Studio can be configured to allow operator transfer individually for each task. This general setting allows you to enable/disable that functionality for your tasks.
Choose the appropriate option and select Save to commit changes.

Logs
The Logs section allows you to define how long you want Studio to store log data for. Make a selection and select Save.
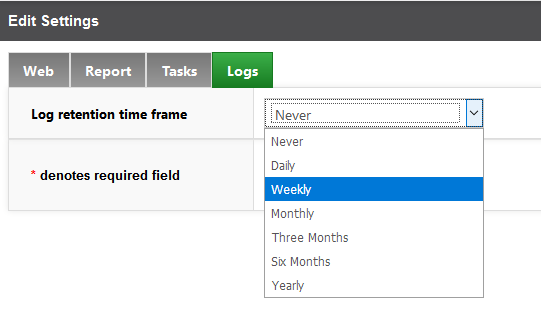
Profile Settings
- From the Portal Management System select Home > Accounts > Accounts from the top menu.

- Select the Actions button for the account you wish to edit and select Edit.

- Edit Account is divided into two main section tabs. Setting and Password Policy.
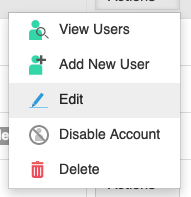
Setting
As a Service Provider you will be able to edit an accounts various settings such as Purchased Sessions and Burst Sessions.
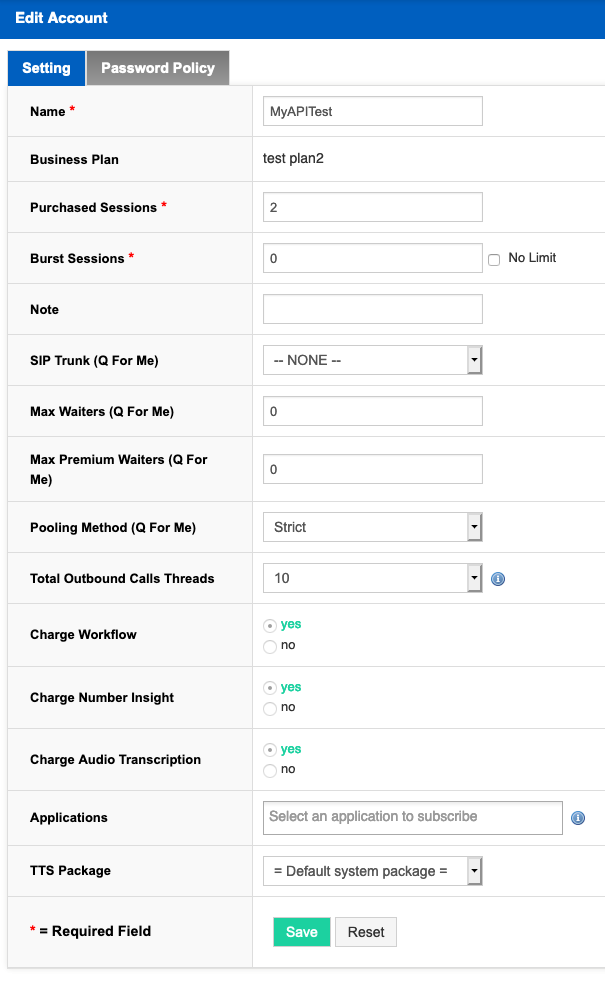
Password Policy
The Password Policy page allows you to set password rules for a chosen account. By default there will be no rules for an account and they are free to choose any password they like. This page has various options you can set to either Yes to enforce or No.
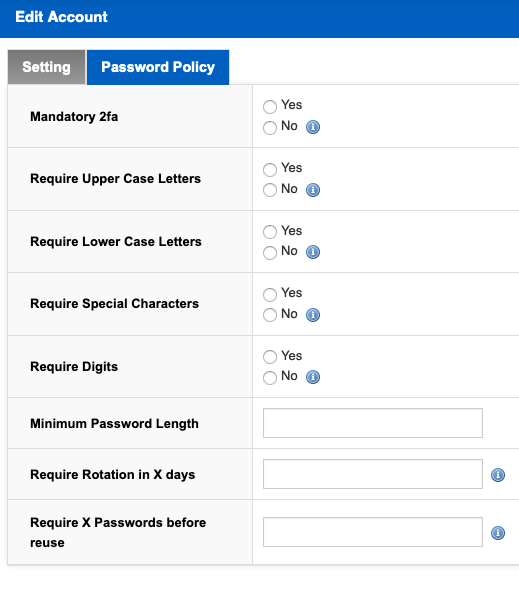
Manadtory 2fa
This enforces 2-Factor Authentication on all passwords using the Google Authenticator
Require Upper Case Letters
Enforces Upper Case Letters.
Require Lower Case Letters
Enforces Lower Case Letters.
Require Special Characters
Enforces Special Characters !"#$%&'()*+,-./:;<=>?@[\]^_`{|}~
Require Digits
Enforces the use of numbers.
Minimum Password Length
Enforces a minimum password length measured by number of characters.
Require Rotation in X days
Enforces password to be changed by the account user every X number of days.
Require X Passwords before reuse
Enforces new password changes to not include previously used passwords for X number of previous passwords.
Password Policy user flow
Once any changes have been made to an Account's password policy, the user of the account will be prompted to adhere to this polciy at their next login. Note: Policy changes will NOT forcibly log an Account User out of their account. Below is an example user flow once a password policy has been set.
- User logs into their account and we will be prompted to change their password. This new password will neeed to adhere to the new policy rules and validation messages will direct the user on this e.g. Password must contain a special character.
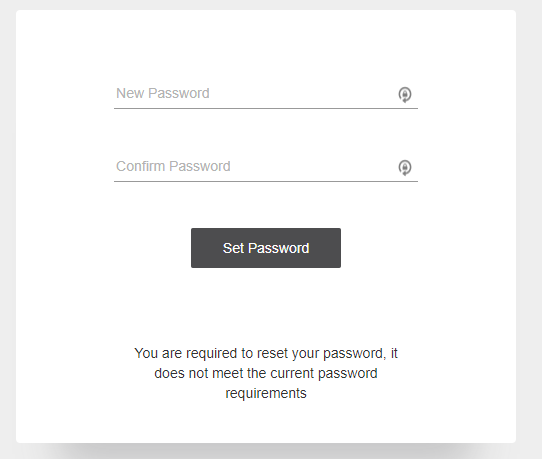
If 2fa was enabled then an Account User will be prompted to set up 2 Factor Authentication and then directed to setup the new password. The screenshot below shows a user being walked through on setting up 2fa using the Google Authenticator.
Once the Account User's new password has been successfully set under the current password policy they will be able to login to Studio.
SSML Editor
Studio 6.1
SSML Editor was introduced in Studio 6.1. Currently only supported in Google Chrome and Microsoft Edge browsers.The SSML Editor is a graphical interface for editing SSML (Speech Synthesis Markup Language). It allows you to fine-tune and modify text-to-speech prompts by allowing an easy way to control speech parameters such as pitch, volume, emphasis and timing.
TIP
Only specific IBM voices allow SSML editing and are labeled as transformable. In addition to this, the en-US_AllisonVoice also allows ExpressiveSSML which can be used to produce expressive synthesised speech in various speaking styles such as upbeat, apologetic etc. Learn more about expressive SSML. Note: ExpressiveSSML syntax is supported within the Studio SSML Editor.
- You can access the SSML Editor any time you are providing TTS/SSML for a prompt such as a Play Prompt node or creating a Global Prompt and are using a Google Wavenet or IBM voice type. To access, click the TTS text box. The SSML editor will appear.
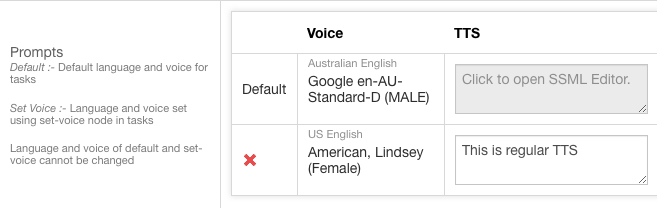
From the SSML Editor screen you will see the main text box as well as the various dropdown menus on the right hand side. These dropdowns give you access to the various functions you can apply to the text.
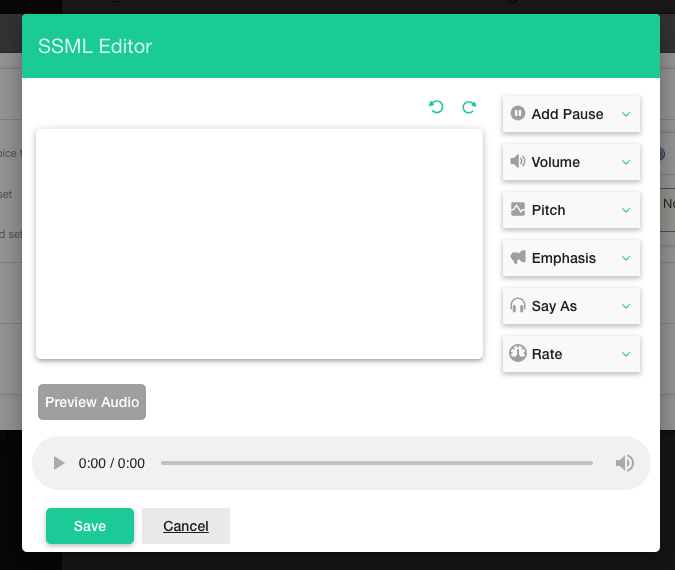
You can input plain text as well as variables using the
{{syntax. We will provide the example text and then use the editor to add emphasis to the word 'this'.
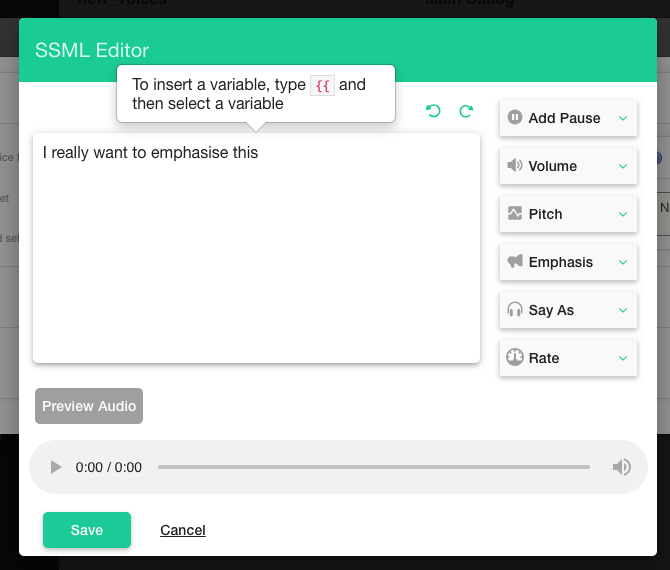
- Begin by selecting the word 'this', then clicking the Emphasis dropdown menu.
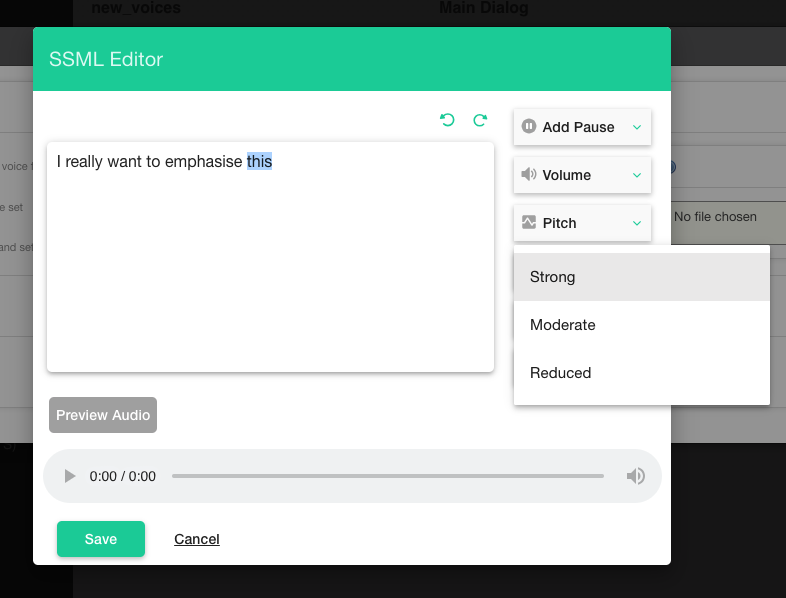
- Select Strong. You will see the
Emphasis level='strong'SSML added to the selected word.
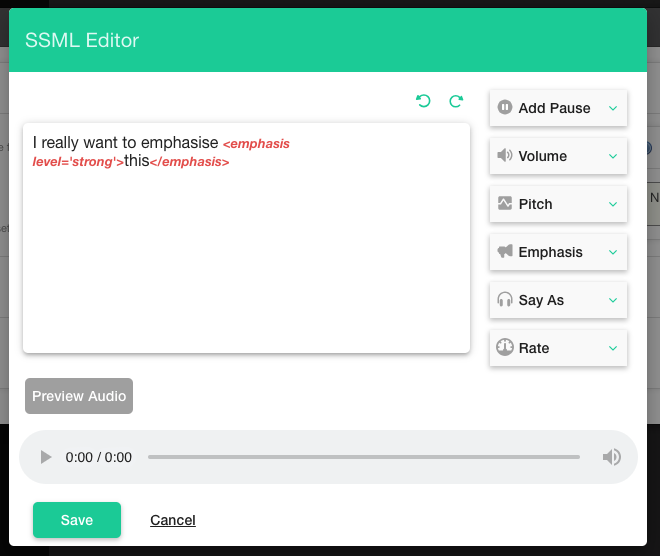
TIP
It's worth noting that if you would like to use additional SSML tags that are not supported by the graphical editor, you can manually type/paste these directly into the editor. For information on which SSML is supported click here.
- At any time you can click the Preview Audio button to hear an example of the audio. Once you are happy with the audio click Save.
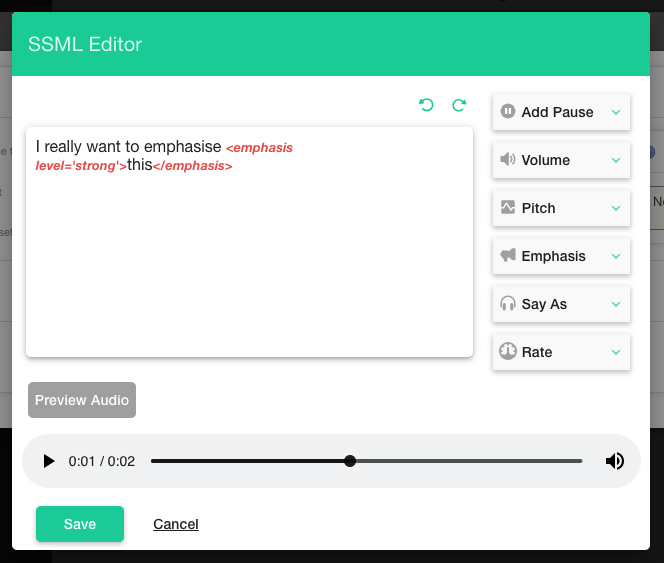
TIP
Please note: Preview Audio will not play variable values.
Expression Builder
Studio 6.0
Studio 6.0+ now provides a new Math Operation inside the expression builder - Random Number Generator. Simply select the Random Number function and set a Min & Max number for the function.Studio 6.0+ also supports Premium Operations inside the expression builder such as Get Number Type.
What is the Expression Builder?
The Expression Builder allows you to create logical and mathematical expressions through a graphical interface. Any time you are adding logic inside a node this will be done through the Expression Builder.
The Expression Builder interface
Regardless of where you access the Expression Builder inside Studio, the interface is the same, so it is useful to familiarize yourself with the interface.
- Below is the Expression Builder in it's empty state i.e. no logic has been applied and no expressions have been created.
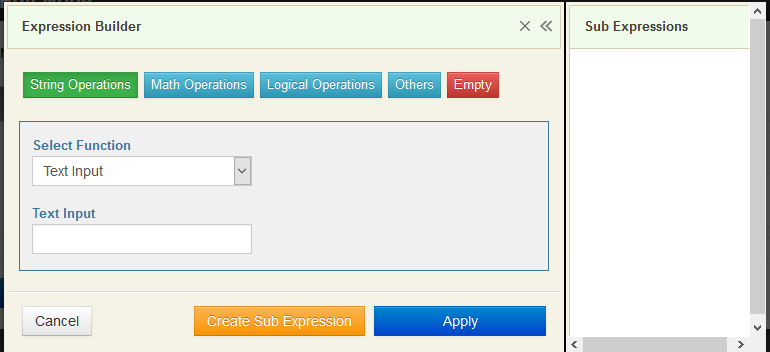
- The Sub Expression sidebar displays any sub expressions you create. This is very helpful as it allows you to keep track of which sub expressions you have created. It also lets you directly edit any of these expressions due to errors or changes in logic.
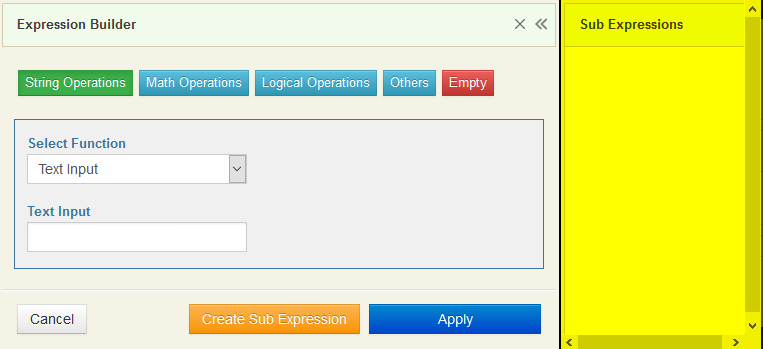
- Once you have created a sub expression it will appear in the top preview window, to give you an idea of the current logic you are working on. The example below shows a simple mathematical expression of 1 + 1. You can view this clearly in the top display window. You can also see the expression is displayed in the Sub Expressions sidebar.
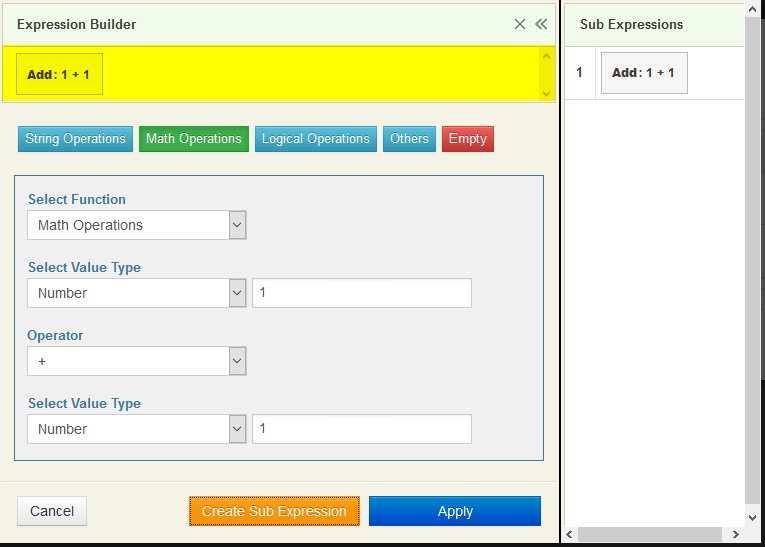
- You can toggle the Sub Expressions sidebar open or closed, by selecting the double arrows icon.

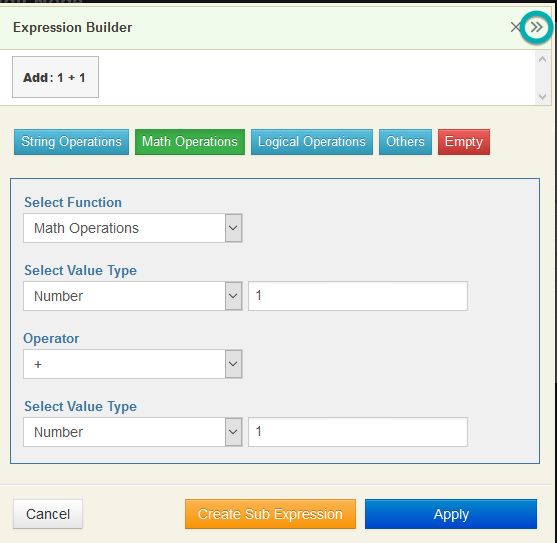
Using the Expression Builder
Suppose we want to play a prompt to a customer with an amount of money due .e.g. "The total amount due is $5000".
This might be achieved by retrieving a variable with the value 5000 and simply adding the text "The total amount due is $" to the front of it. It's worth noting that in the real world this variable would probably be created dynamically through some sort of database lookup, but for the sake of this example, we will just create this value manually.
Let's get started.
- Create a variable, which we will call Total_amount_payable.
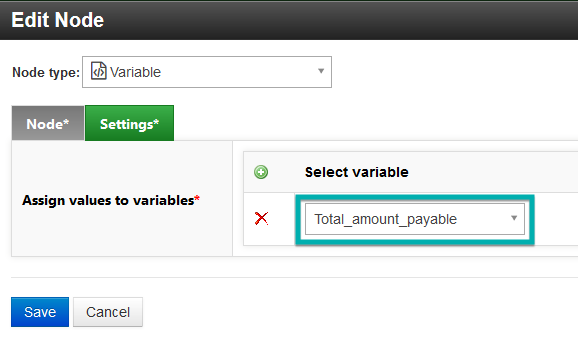
- From the Variable value, select the Edit button. This will take you to the Expression Builder.
- Select the String Operations button.
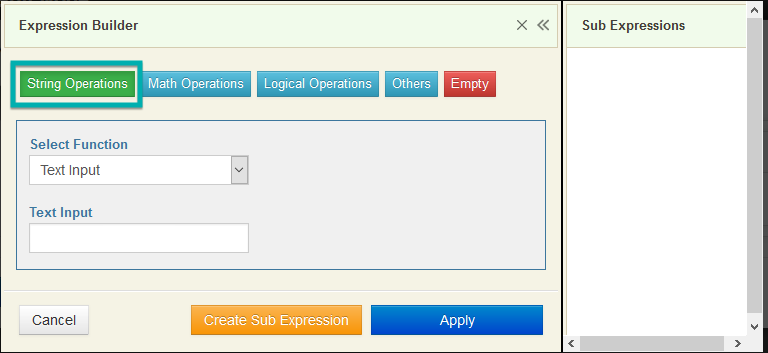
- From the Select Function dropdown, select Text Input.
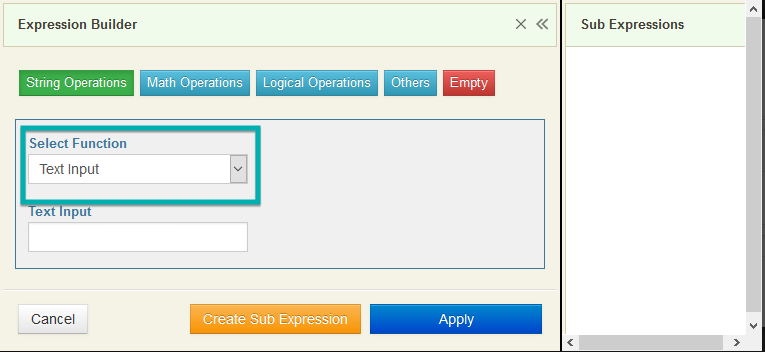
- In the Text Input field we will put the value 5000.
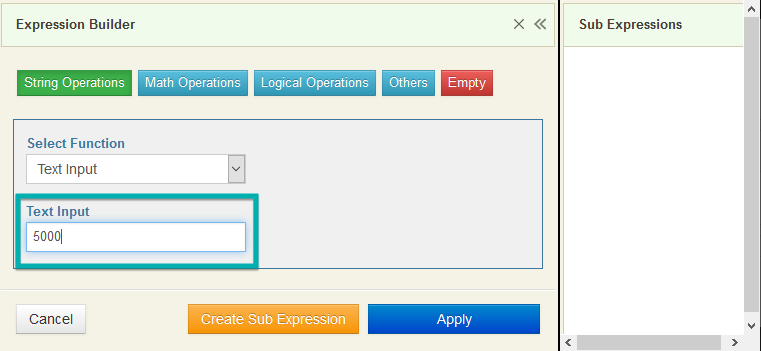
- Select the Create Sub Expression button.
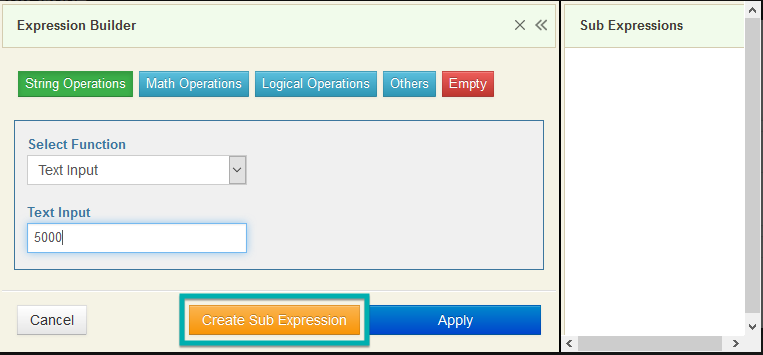
- The expression you just created will now be shown in the top preview window. You can see that the new sub expression is also shown in the Sub Expressions side panel. The side panel lets you reference any sub expressions you make. It also lets you edit any of these sub expressions by simply selecting them and applying the changes.
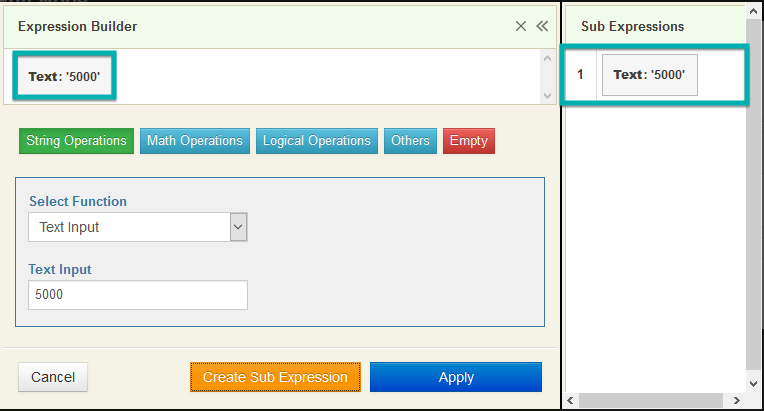
Concatenating string values
- Now that we have a variable containing the value 5000, we can now use the Expression Builder to concatenate our main text "The total amount due is $" to it.
- Select the String Operations button.
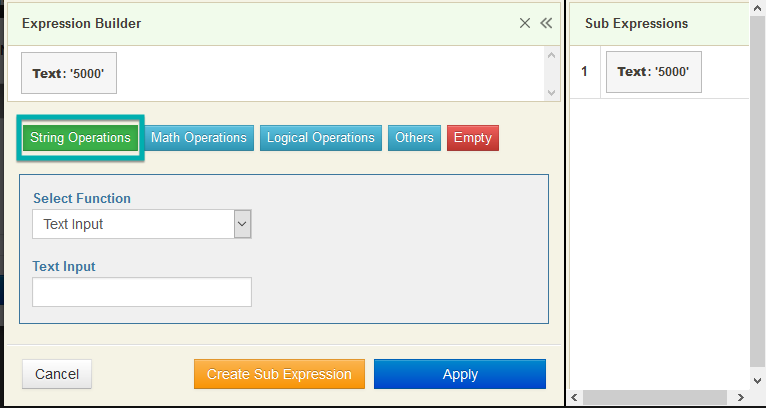
- From the Select Function dropdown, select Concatenate String.
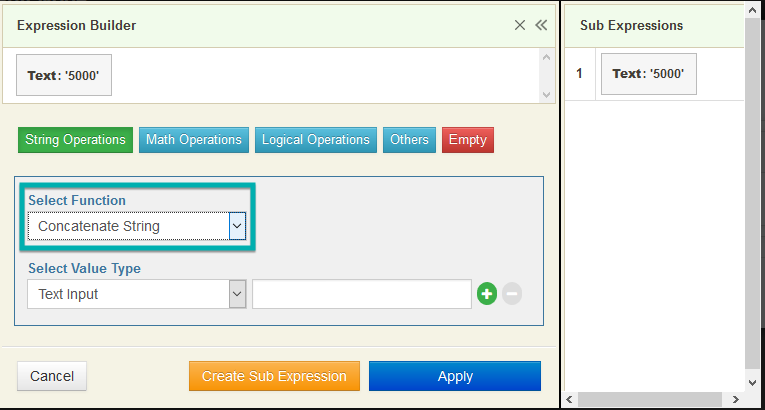
- From the Select Value Type dropdown select Text Input and type the text "The total value due is $".
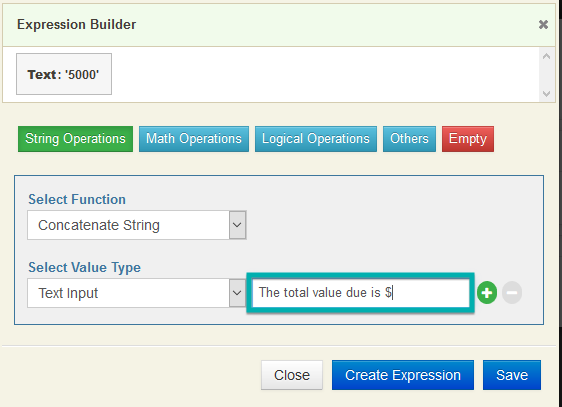
- Select the + icon to add a new string operation line.
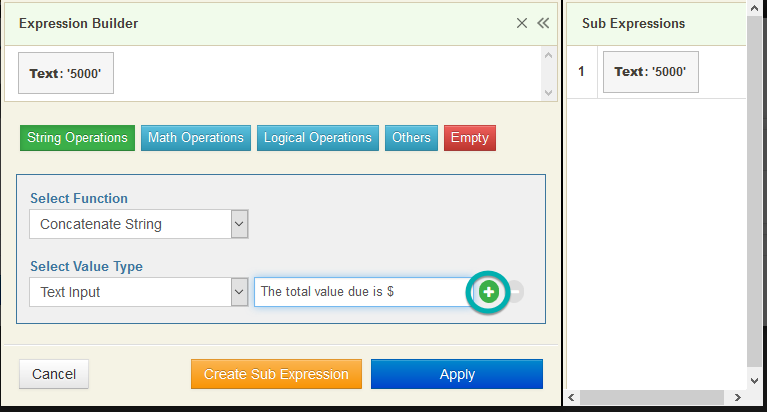
- From the Select Value type, select Sub Expression.

- Click in the text field and you will see the Sub Expression we created earlier Text:5000. Select this sub expression and then select the Create Sub Expression button.
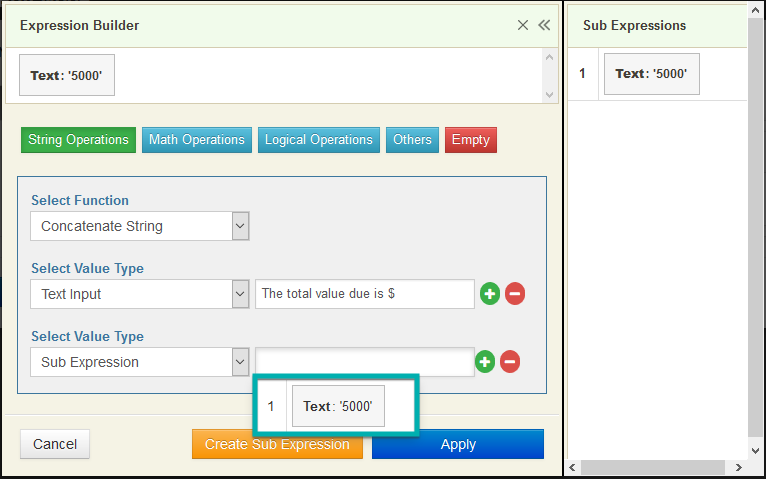
- In the preview window you will now see the final expression which will result in the text" The total value due is $5000".
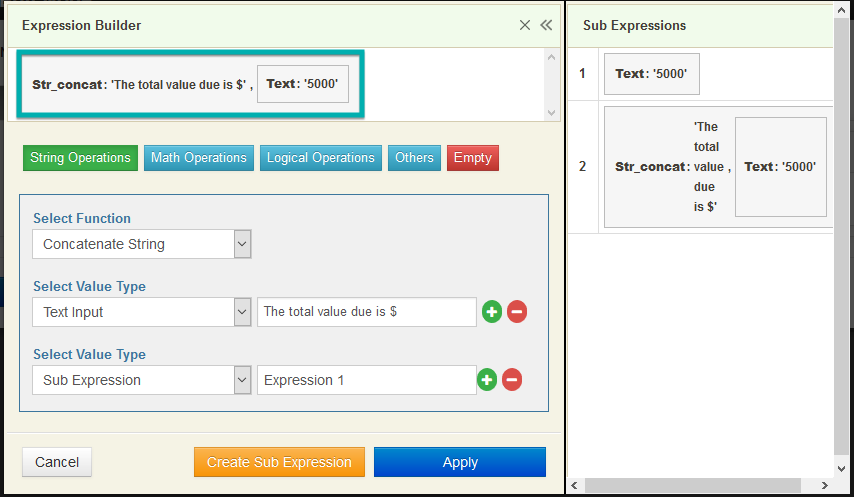
- Finally, select Apply to add the final expression into your variable.
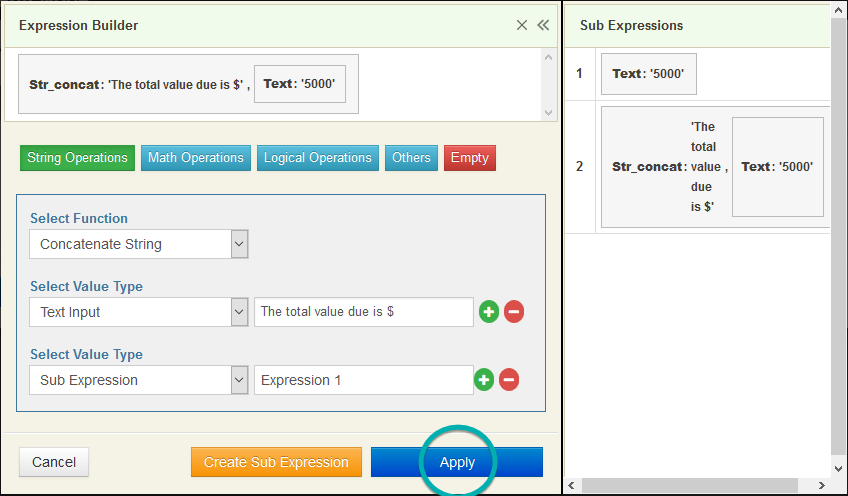
- The Total_amount_payable variable containing our complete expression.

Expression Builder Functions
String Operations
| Function | Notes |
|---|---|
| Get String Length | The length of the string in characters. There is an open defect as Studio currently returns bytes, not characters |
| Convert to Uppercase | Converts all "C" locale alphabetic characters to uppercase, so for instance dash (-) umlaut-a (ä) will not be changed |
| Convert to Lowercase | Converts all "C" locale alphabetic characters to lowercase, so for instance dash (-) and umlaut-A (Ä) will not be changed |
| Trim String | Strips whitespace from the beginning and end of a string. Whitespace includes space, tabs, new line, carriage return, the NUL-byte and vertical tabs. |
| Get Sub String | Returns the portion of value specified by index and length parameters. If index is non-negative, the returned string will start at the indexed position counting from zero. If index is negative, the returned string will start at the indexed position from the end of the string. If length is given an positive the string returned will contain at most that number of characters. If length is ommitted the substring starting from index until the end of the string will be returned. If length is given and negative then that many characters will be omitted from the end of the string. |
| Replace String | Replace all occurrences of the find string with the replace string |
| Concatenate String | Join strings |
| Search String | Find the position of the search string within the subject string |
| Get Email From String | Extract the first user@domain formatted string found |
| Get Number From String | Extract the first sequence of digits found |
Working with Dates and Times
To store dates and times:
- Create a variable that you want to store the date/time
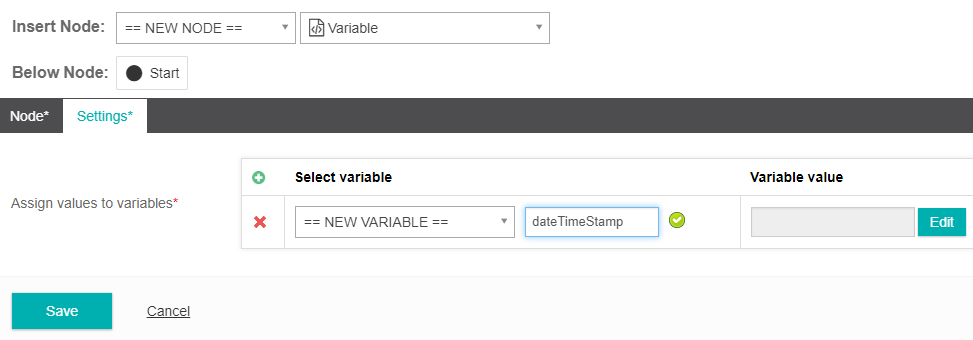
- From the Variable value, select the Edit button. This will take you to the Expression Builder.
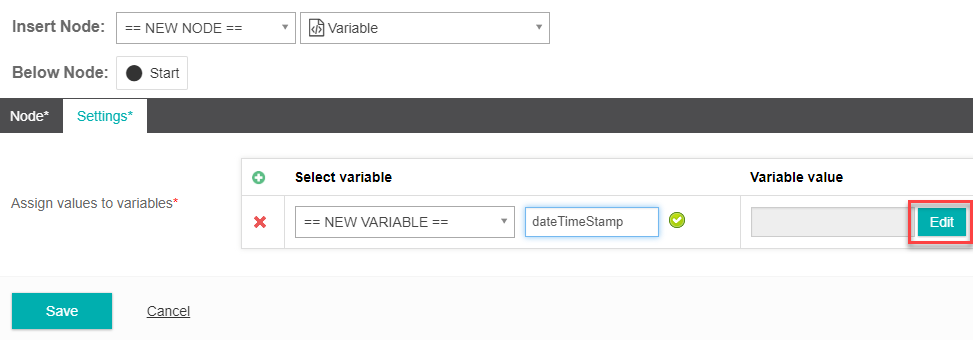
- Select the Others button.
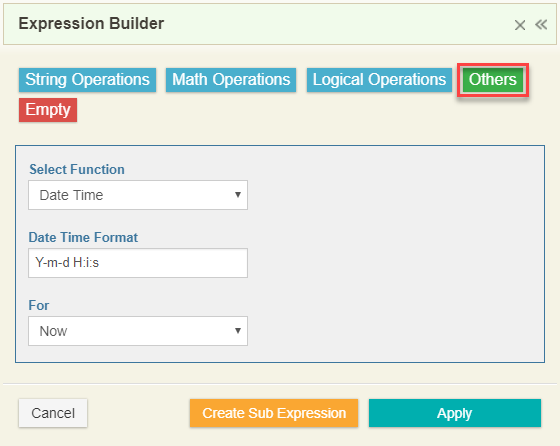
By default, the Date Time Format is Y-m-d H:i:s. You may rearrange or omit these characters to build the format you require. Special characters may also be added, but may affect Text to Speech. Please note: all times and dates are at least two digit. For example, January 1st would be 01-01.
| Type | Character | Result | Notes |
|---|---|---|---|
| Default | Y-m-d H:i:s | 2018-01-24 15:34:56 | |
| Year | Y | 2018 | Four digit year |
| y | 18 | Two digit year | |
| Month | M | Jan | Name abbrieviation |
| m | 01 | Month number | |
| Day | D | Wed | Name abbrieviation |
| d | 01 | Day of the month | |
| S | th | Ordinal number suffix | |
| Hour | H | 15 | Hour in 24-hour notation |
| h | 03 | Hour in 12-hour notation | |
| Minute | i | 34 | |
| Second | s | 55 | |
| AM or PM | A | PM | |
| a | pm | ||
| Time zone | P | -05:00 | Based on account settings |
| Epoch time | U | 1516826095 | Seconds since midnight Jan 1 1970 UTC |
| Examples | m/d/y | 01/26/18 | US date notation with slashes |
| M ds, Y | Jan 24th, 2018 | US date with ordinal notation | |
| h:i A | 03:34 PM | 12 hour time with AM/PM |
Array Operations
Studio arrays can be arbitrarily deep objects, for instance an array or list of records, each record itself containing keys with values, but some keys potentially containing additional lists (of records). Each array function can be provided a sequence of index values and/or key values to allow traversal to find a subset of the array or a specific value.
| Function | Notes |
|---|---|
| Get Array Length | Returns the number of members of the array, qualified optionally by additional indices or keys. If the qualifiers reference a specific record, its length is the number of keys it has. If the qualifiers reference a list, its length is the number of entries. |
| Get Element From Aray | Extracts the specific referenced value |
Premium Operations - Get Number Type
The Get Number type is a Premium Operation in the expression builder that let's you detect which type of phone a person called on.
An example of this would be to run the Get Number operation on logged date.
- From a Log node, select the Event Type.
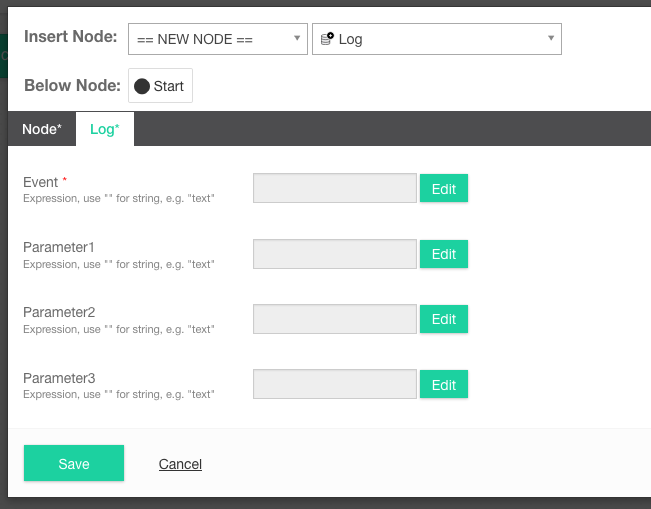
- In the expression builder, click Premium Operations.
- From the Select Function dropdown, select Get Number Type.
- In the Select Value Type, choose either a Variable, Sub Expression or Text field.
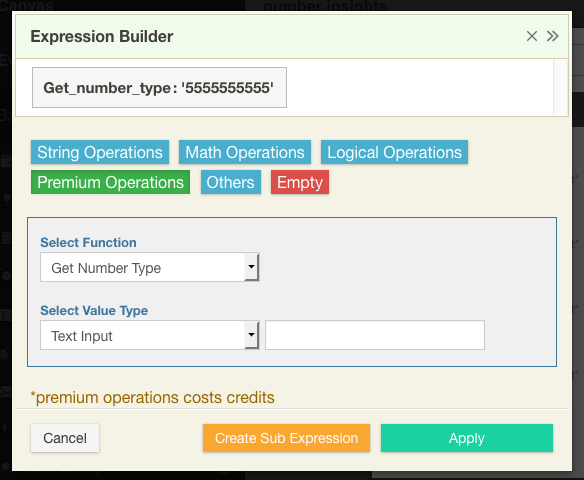
- When a call is made, navigate to Task > Task Level > Logs. You will see in the Event column the phone type used in the call. These will be landline, virtual or mobile. If you see a -1 entry, this means that none of these devices were used.
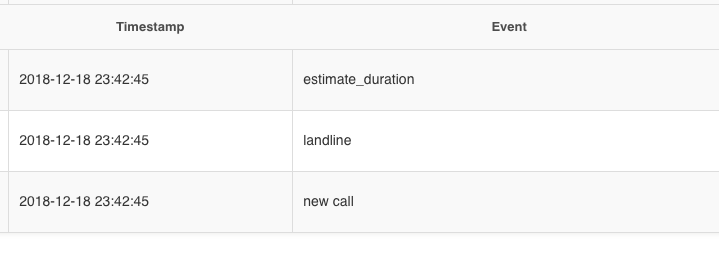
Speech recognition grammars
The menu node and form types via the form node both rely on closed speech recognition grammars. Speech recognition with these nodes relies on the grammars to define what is possible input. Input that cannot be matched to the grammar is considered to not match, and will trigger the "no match" handler. Matches must be complete. Multiple options can be associated with a given match, separated by "||", for instance "sales||purchasing||re order"
The grammar has an associated language. With Studio, the grammar language is not configurable, and is set to the default language of the region the PoP is deployed in, that is
- US (North America): en-US
- Australia: en-AU
- UK: en-UK
The speech recognition engine uses the language associated with the grammar to determine the sounds of the words to be matched. It is readily possible to use phonetic spelling in grammar specification, for instance "fronsay" to obtain a match against the French word français.
It is recommended that acronyms, abbrieviation and punctuation is avoided and expanded to the spoken form, for instance
- USA expressed as "u s a"
- Dr expressed as "Doctor"
- & expressed as "and" or "ampersand" as desired
WhatsApp Messaging

Studio Messaging Tasks also offer WhatsApp functionality via the existing Messaging channel. If you would like to use WhatsApp functionality simply speak to your Service Provider.
WhatsApp Studio Features
- Images: Studio can receive and send images via WhatsApp. Note: Certain image formats such as GIF are not supported. One media attachment is supported per message, with a size limit of 5MB.
- PDF files: PDF files can be sent and received in exactly the same way as image files.
- Video files: Video files can be sent and received in exactly the same way as image file.
- Web links: Web links can be sent and received. However, it is important not to include http or https when sending a web link. You just need to include the actual URL e.g. www.google.com.
WhatsApp Limitations
There are a few limitations to keep in mind when creating a WhatsApp application.
- You cannot create outbound campaigns with WhatsApp numbers.
- You cannot use the Send SMS node.
Inference React Reference Guide
React is an XSI management platform for BroadWorks service providers and their customers. React allows you to filter virtually any XSI event in your BroadWorks enabled enterprise and respond in any manner you want. You define the filters and the reactions via a user friendly web interface. Hosted on AWS infrastructure, React is extremely flexible and highly scalable allowing enterprises to build powerful apps.
React was launched as a public beta in Q4 2017. Contact the Inference support team if you want to get access.
The resource center is designed to help get you familiarized with the basics, giving you a quick and clean approach to getting up and running with Inference React.
Spotted a typo or can't find documentation on a particular subject? Please reach out to the Inference support team at support@inferencesolutions.com
Getting started with React
If you are new to Inference React, this is the perfect place to start. In this tutorial you will learn how to set up your account, create Filters and trigger Reactions.
TIP
Before continuing with this tutorial please make sure you have the following requirements:
- You have a React account.
- You have Broadsoft credentials for your business phone. If you don't have your Broadsoft credentials, please contact your service provider.
Provisioning your Account
The first step in using React is to provision your account with the your Broadworks credentials. Click on the "Provisioning" link and you will be presented with a screen as shown below:
TIP
Its possible that your account has been provisioned by your service provider. If you see that the provisioning page has pre-populated information, your account has been provisioned for you and you are ready to go!
- Enter your Broadsoft username and password.
- Enter your broadsoft XSI url for actions and events. If you don't know the URL, please contact your service provider.
- Select your account type and subscription mode. If you have a group or enterprise level account, you must enter either a group id, enterprise id, or service provider id.
- There is an optional Provison Studio Account option which is useful if you want to trigger Studio workflows from within React. Let's leave this unchecked for now.
- Click the Provision button. Your account is now provisioned and you are ready to create your first Filter.
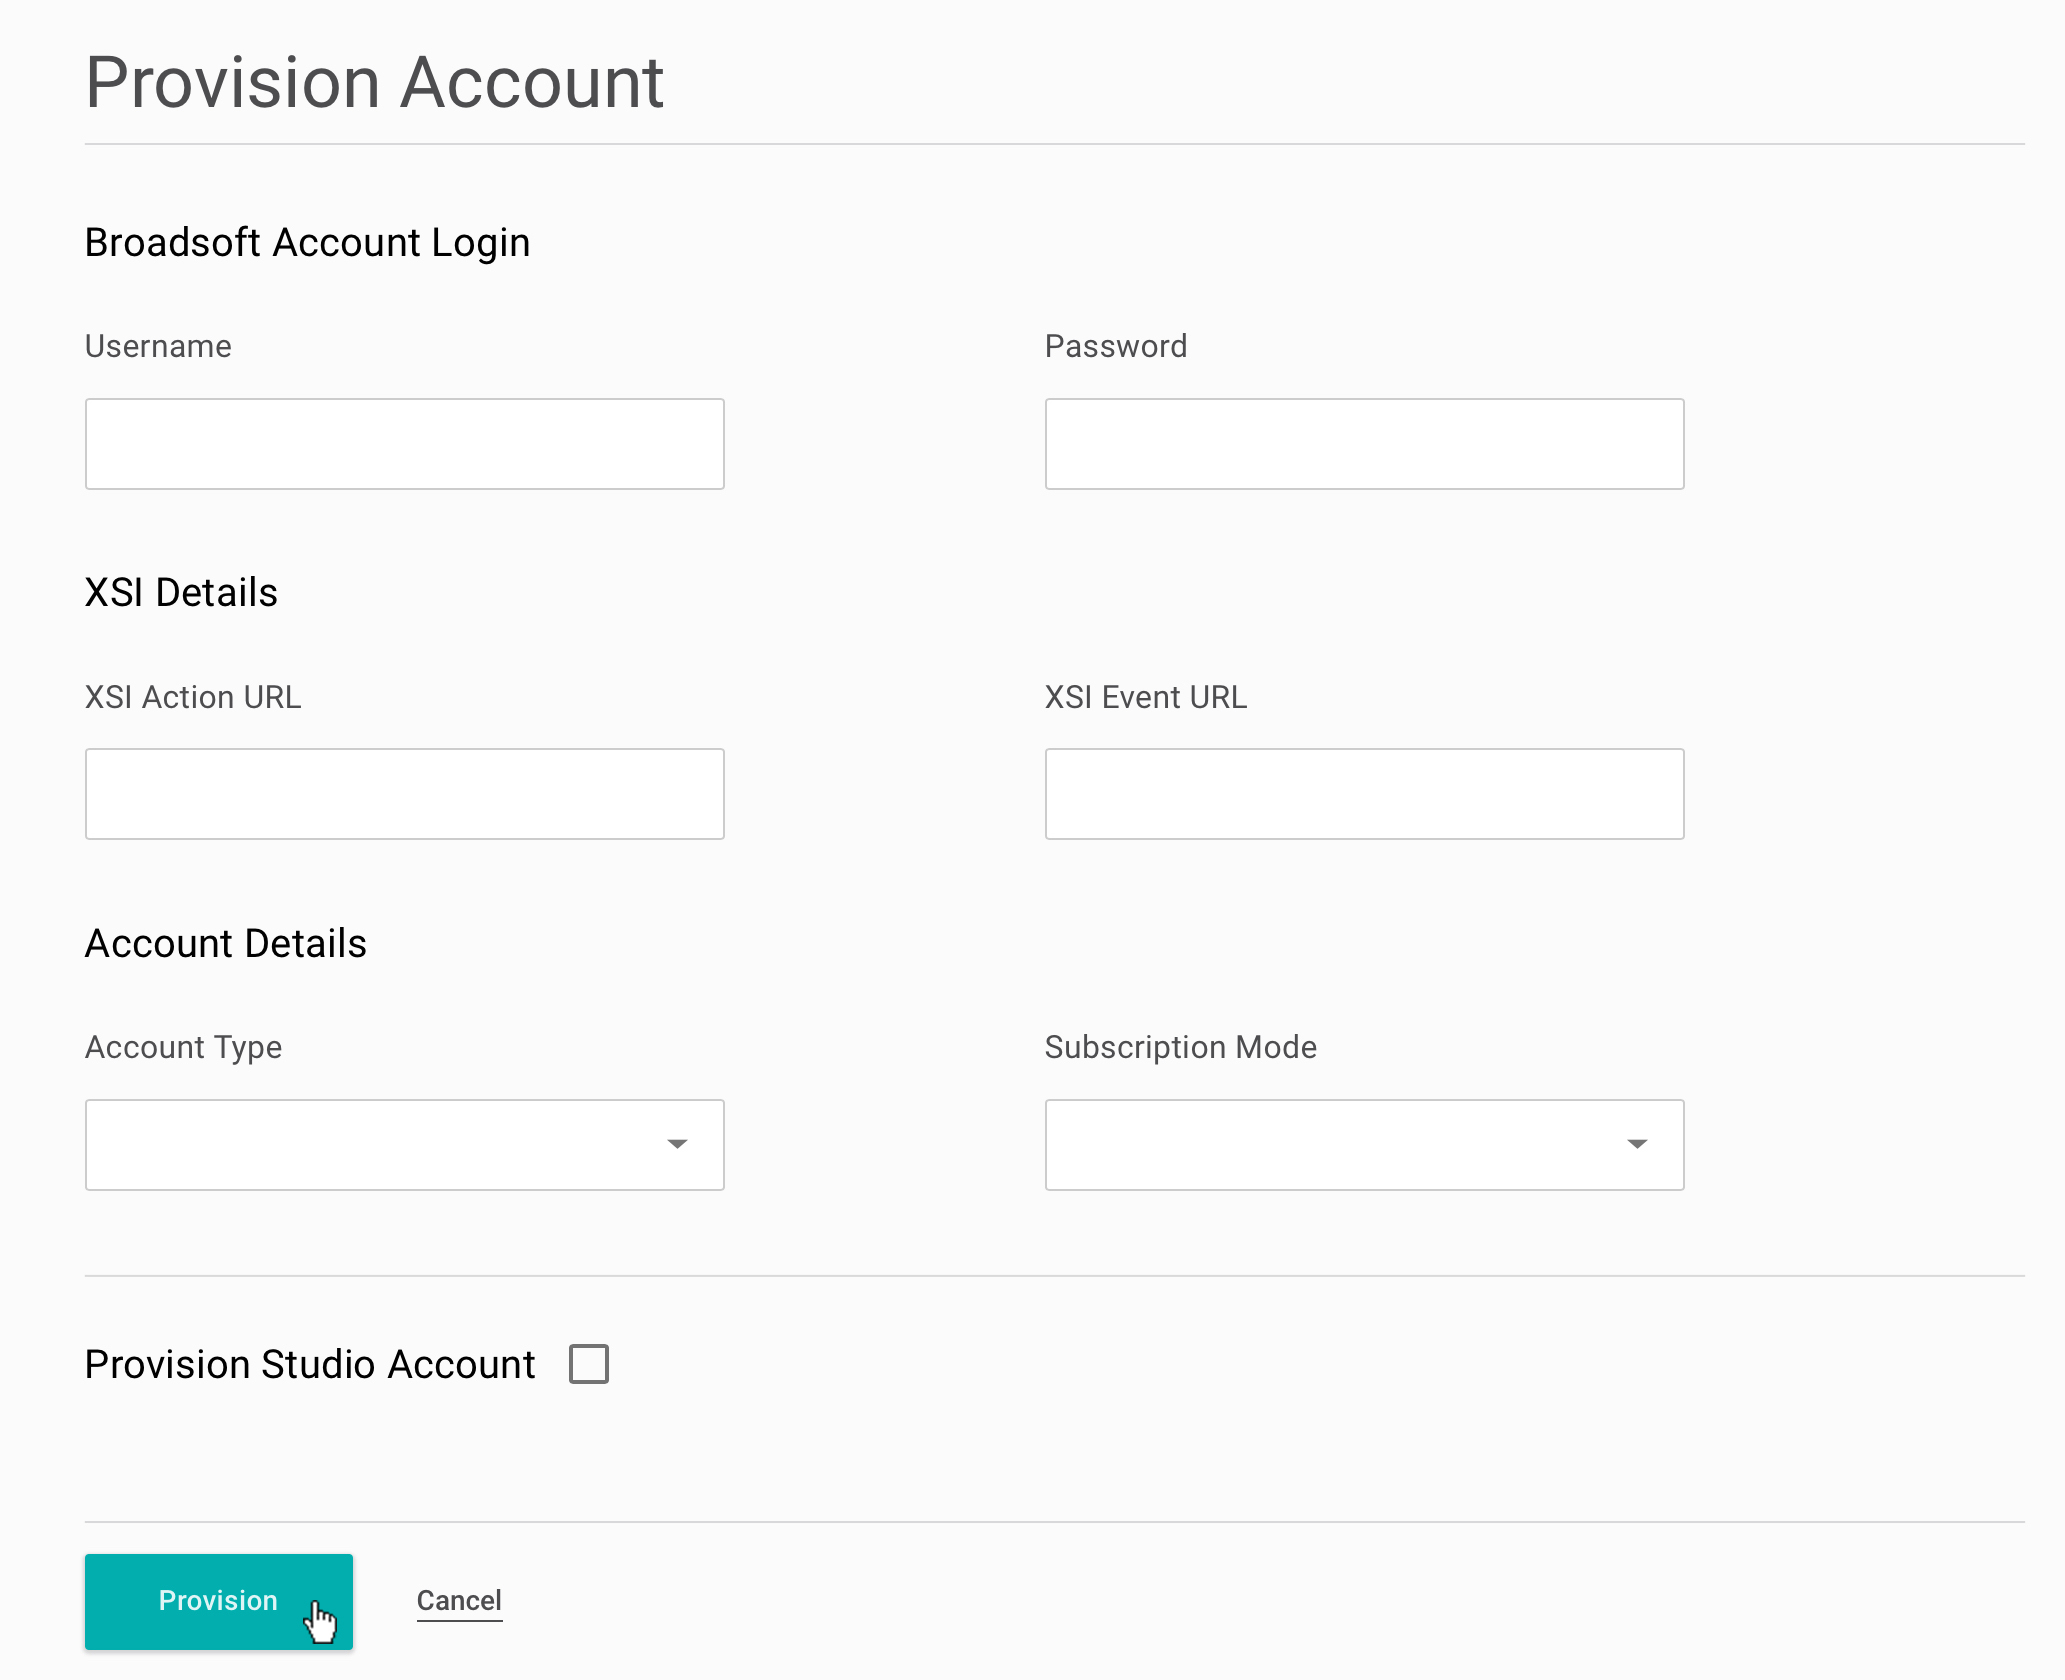
Creating your first Filter
Think of a Filter as a mini application. The Filter monitors the XSI event stream and then filter those events based on whatever parameters you define.
In this tutorial we will create a VIP Alert Filter. This Filter will monitor for incoming calls and if it receives a call from a specific number it will send us an email to let us know.
Filter Details
- Select the New Filter button.
- Provide a Filter name. We will call ours VIP Alert.
- Click the Event Type drop down list. The list contains all the event types that are available within React.
- Select CallReceivedEvent.

Filter Layers
Filter Layers are where you decide what data to filter out from the selected Event Type. In this instance we want to filter out a specific VIP Number.
- Select the Layer 1 dropdown menu and choose ANI (Automatic Number Identification)
- An additional dropdown menu will appear next to your ANI layer. From this dropdown you will need to select an operator value. e.g. includes, excludes. Select the includes option.
- Now let's assign the value for the ANI we want to filter. We will add the phone number 555 555 5555.

Reaction
This is where we define what will happen once the VIP number is detected. You can select a default React item or you can trigger an Inference Studio Workflow providing you are a Studio user and have provided your Studio credentials. In this case we just want to send an email. We will show how to trigger a Studio Workflow in a later tutorial.
- From the Reaction dropdown menu select Send Email.
- In the value text box provide your email address. We will add ours alerts@company.com
- Finally, select Save.

Activating the Filter
We've created our VIP Alert Filter but it is currently switched off.
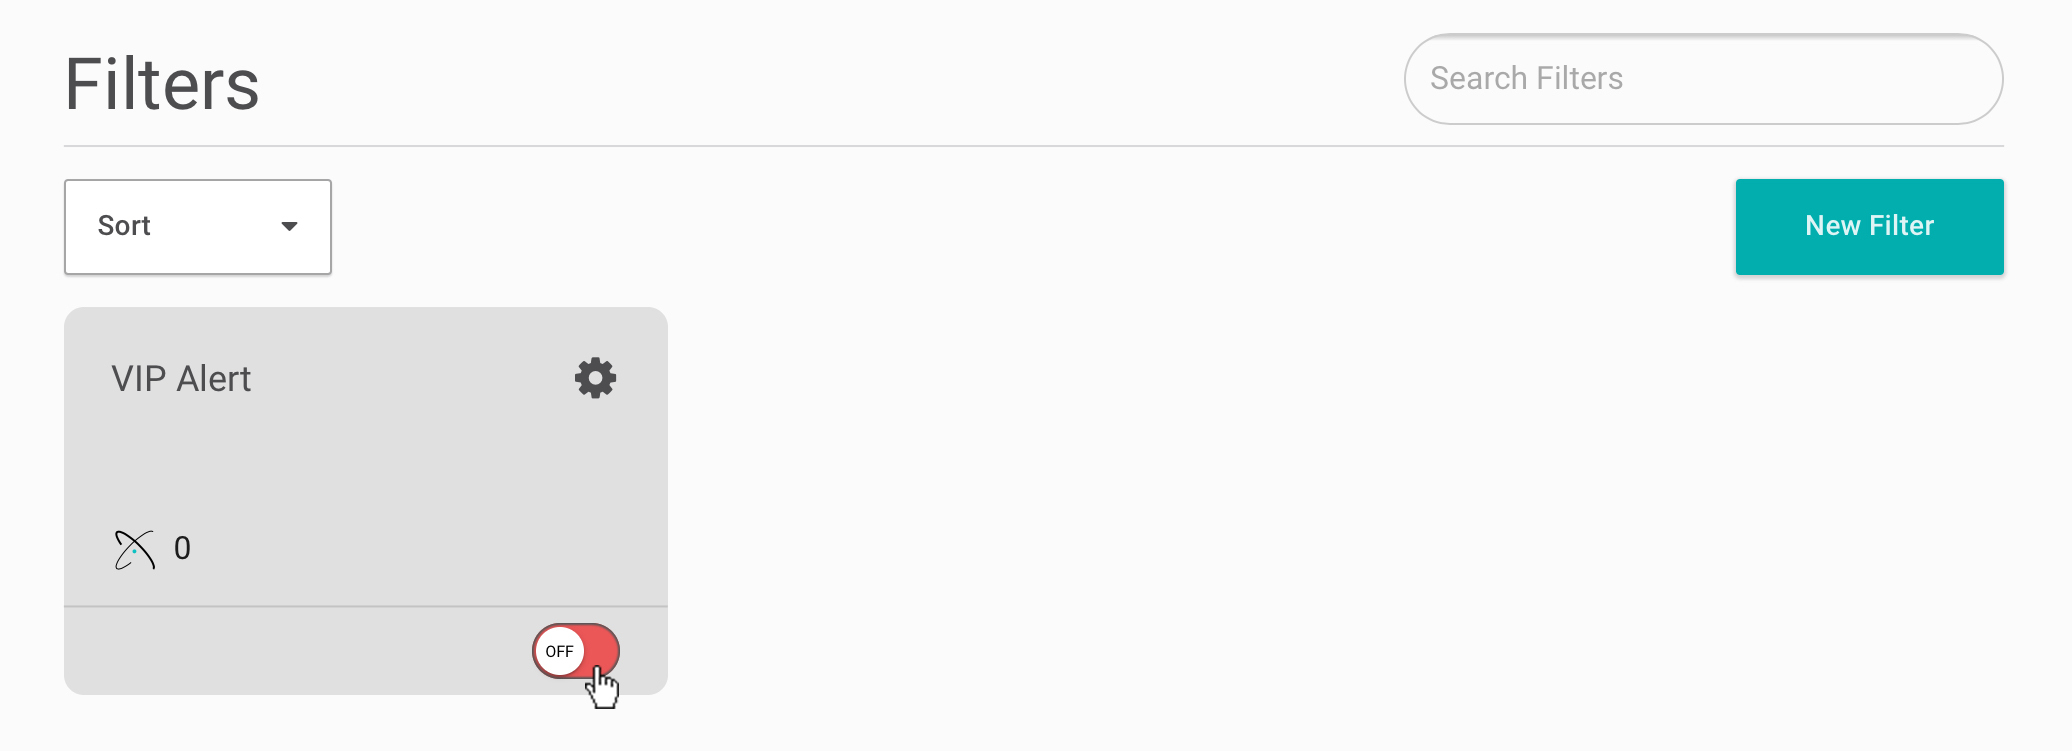
To start the filtering process we simply need to set the toggle from OFF to ON.
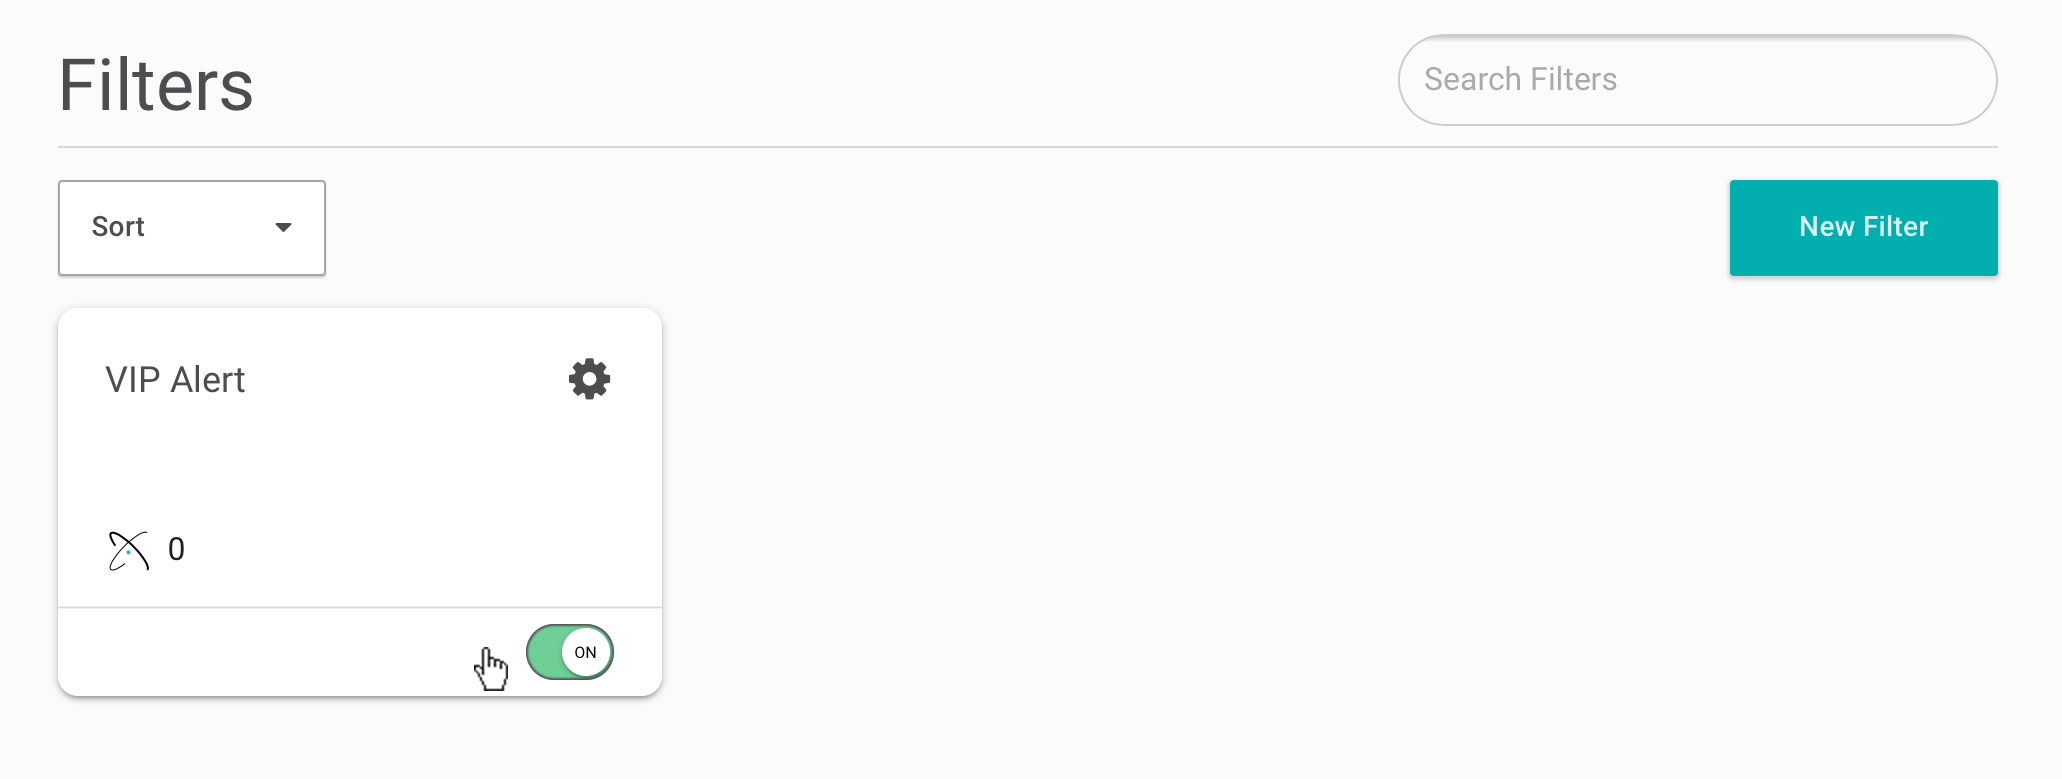
Note: The small React symbol located on the Filter card shows a live update of how many Reactions the Filter has triggered.
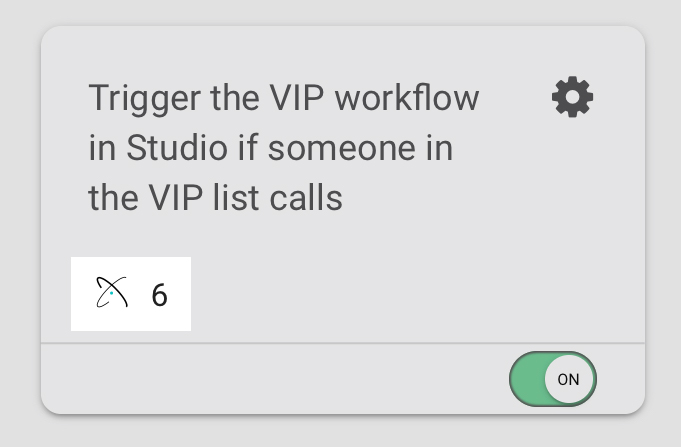
Creating a Custom Reaction
So far we've learnt how to create a Filter and trigger a simple built-in Reaction. Now we want to go one step further and trigger a custom Reaction.
There are two ways you can trigger custom reactions within React.
- The first option is to define your reaction using a Studio Workflow (refer to Studio Workflows for more information) and trigger the workflow from a React filter.
- The second option is to connect to an external webservice that defines your Reaction and then trigger that webservice from your React Filter.
Creating a Studio Workflow Reaction
This guide will cover how to launch a Studio Workflow as a Reaction. You can also learn more about the Studio specific components of Workflows HERE.
Provisioning a Studio account in React
To trigger workflows from React, you need to provision your React account with Studio your credentials.
- Go to the Provisioning page and scroll down to the Provision Studio Account section.
- Select the checkbox.
- Select your Studio region (US/AU/UK).
- Enter your Studio Username.
- Provide your Studio Secret key and API key. How do I find my Studio Credentials?
- Click Provision.
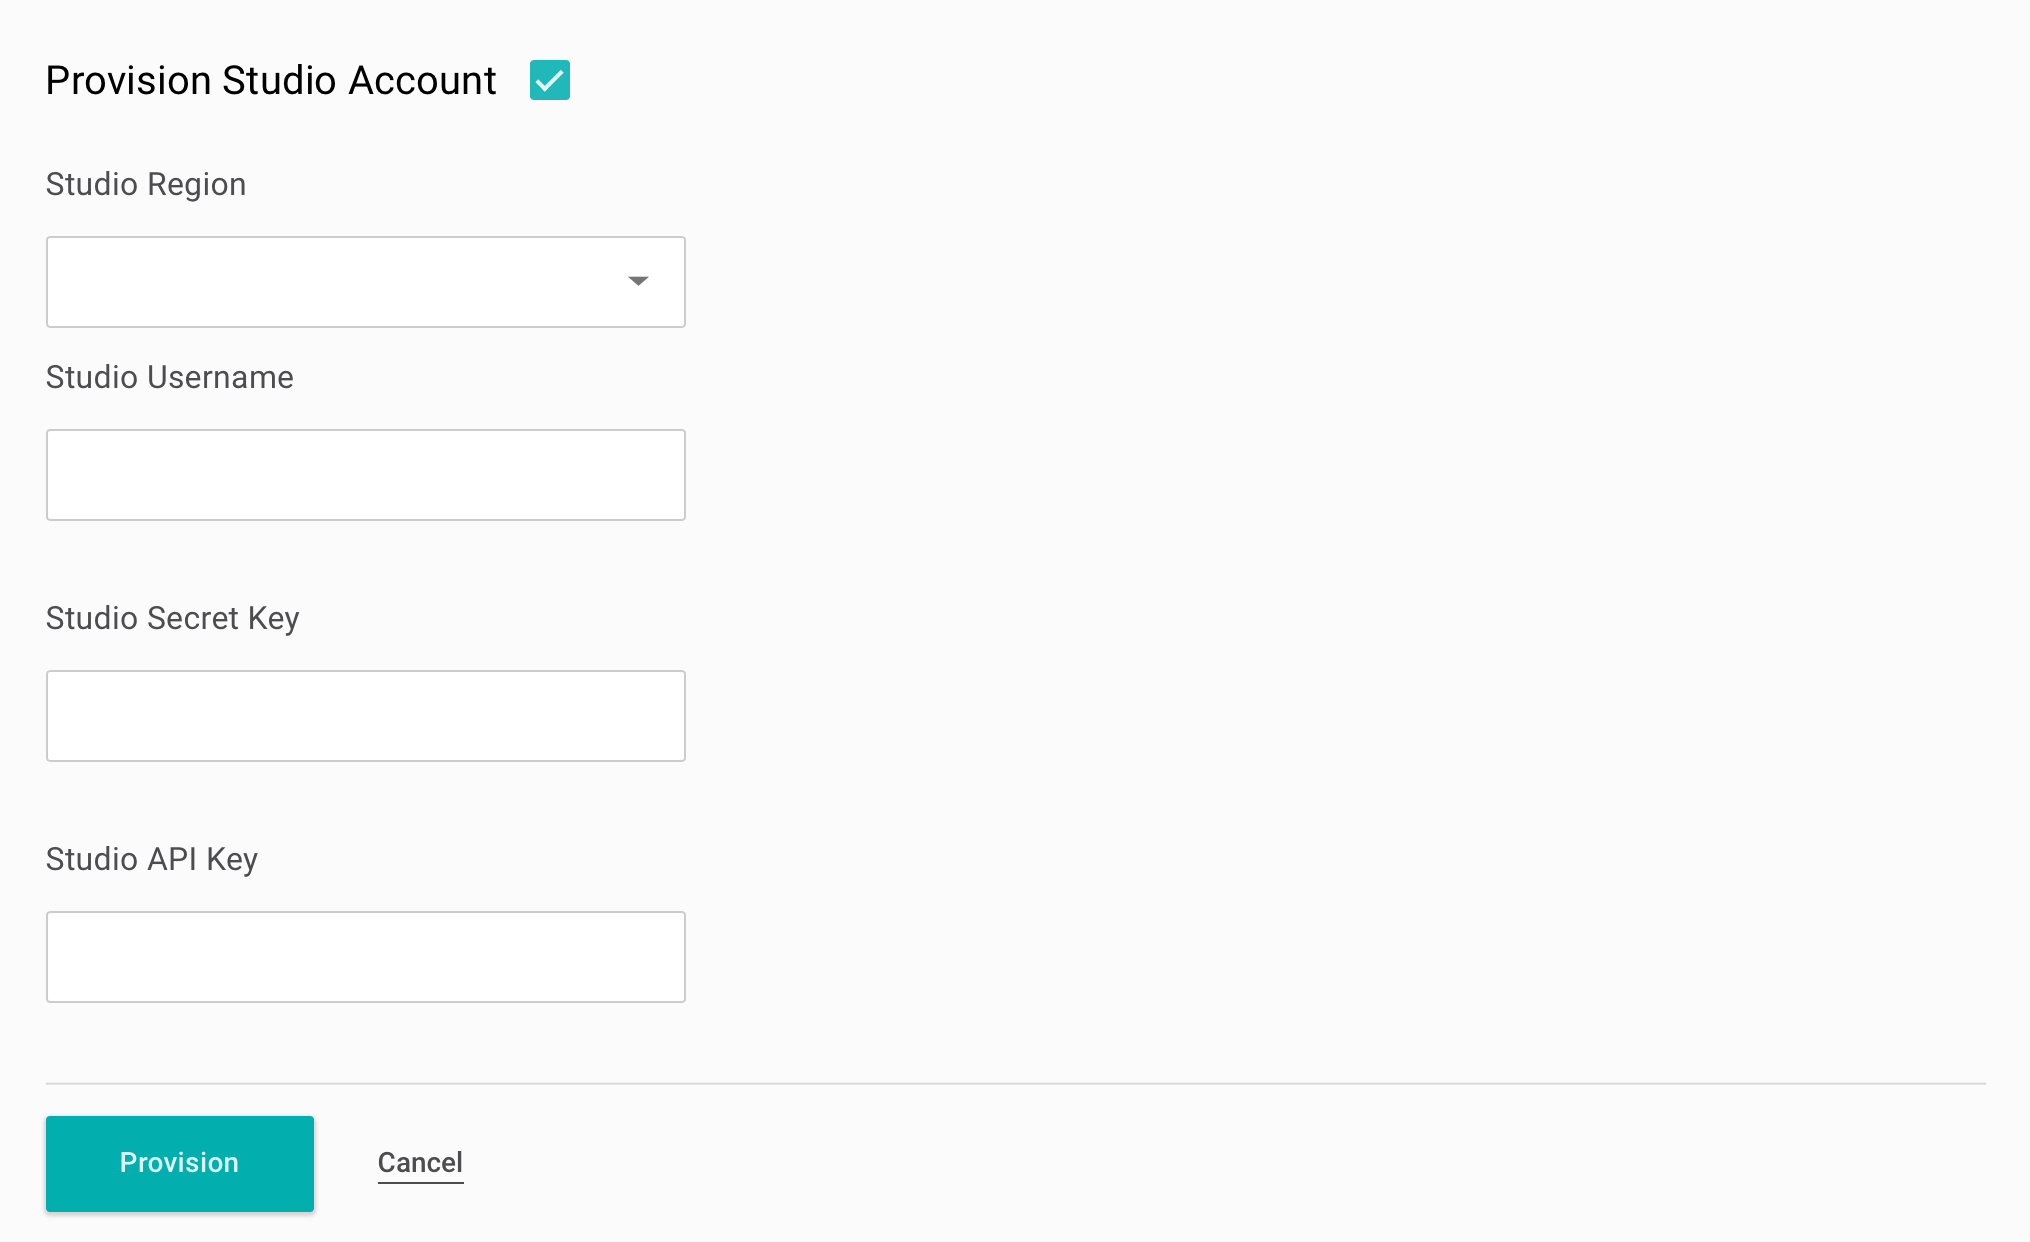
How do I find my Studio Credentials?
To link your Studio details with React you will need your Studio Secret Key and API key. You can find these details via the following steps.
- Sign in to your Studio account.
- Select Settings from the top menu and under Web Configurator, select API Documentation.
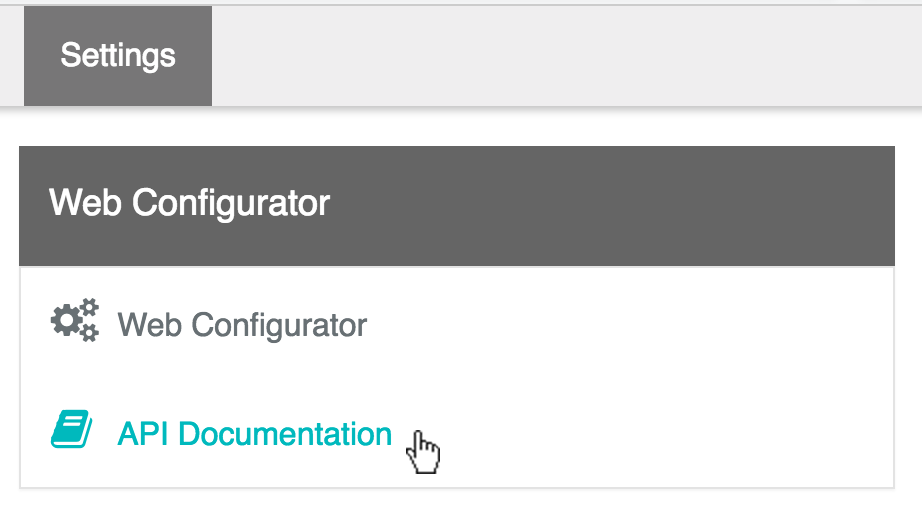
- Under Step 1, select Auth.
- Under the Authentication Method section you will see the required details.
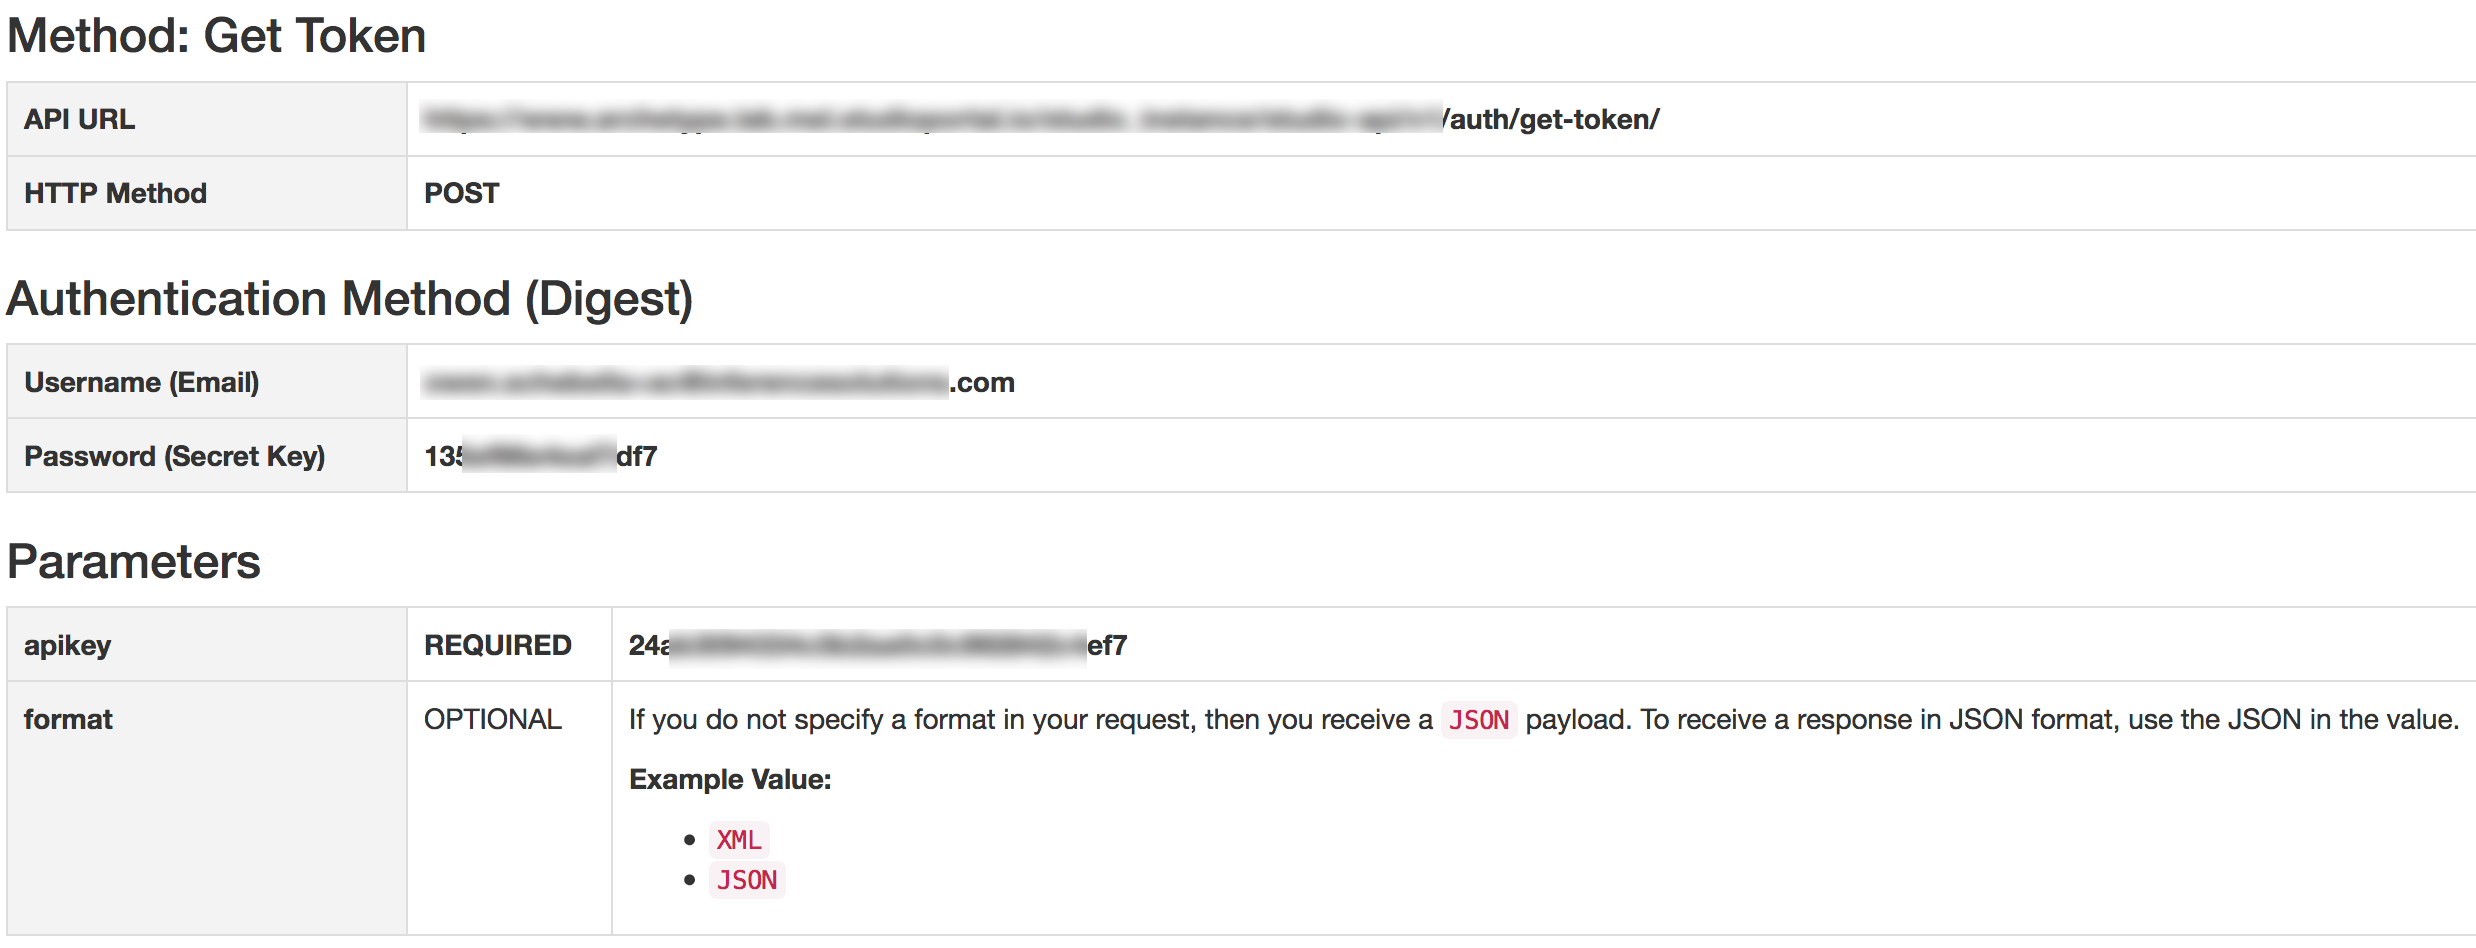
Selecting a Studio Workflow as a Reaction
Now that our Studio account is linked up with React, React will automatically pull in any Workflows from Studio and allow us to select these Workflows as part of our Reaction.
TIP
Please note that only the workflows that have been enabled within the Web Configurator will be listed. For more details refer to Studio API documentation.
- Let's begin by editing our VIP Alert filter by selecting the settings icon for our filter.
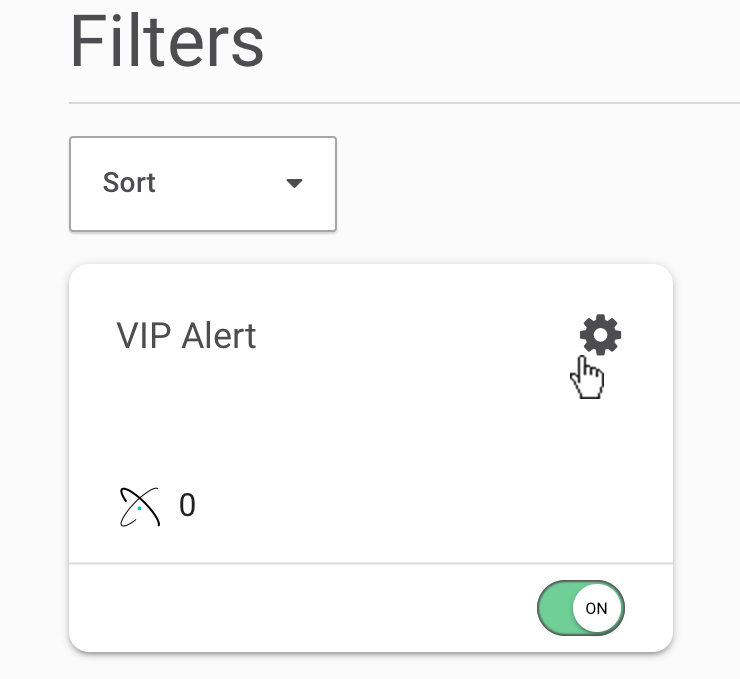
- On the edit filter page change the Reaction from Send Email to Trigger Workflow.
- From the corresponding dropdown list select the Workflow you want to trigger. We have made a Workflow in Studio called VIP Workflow.
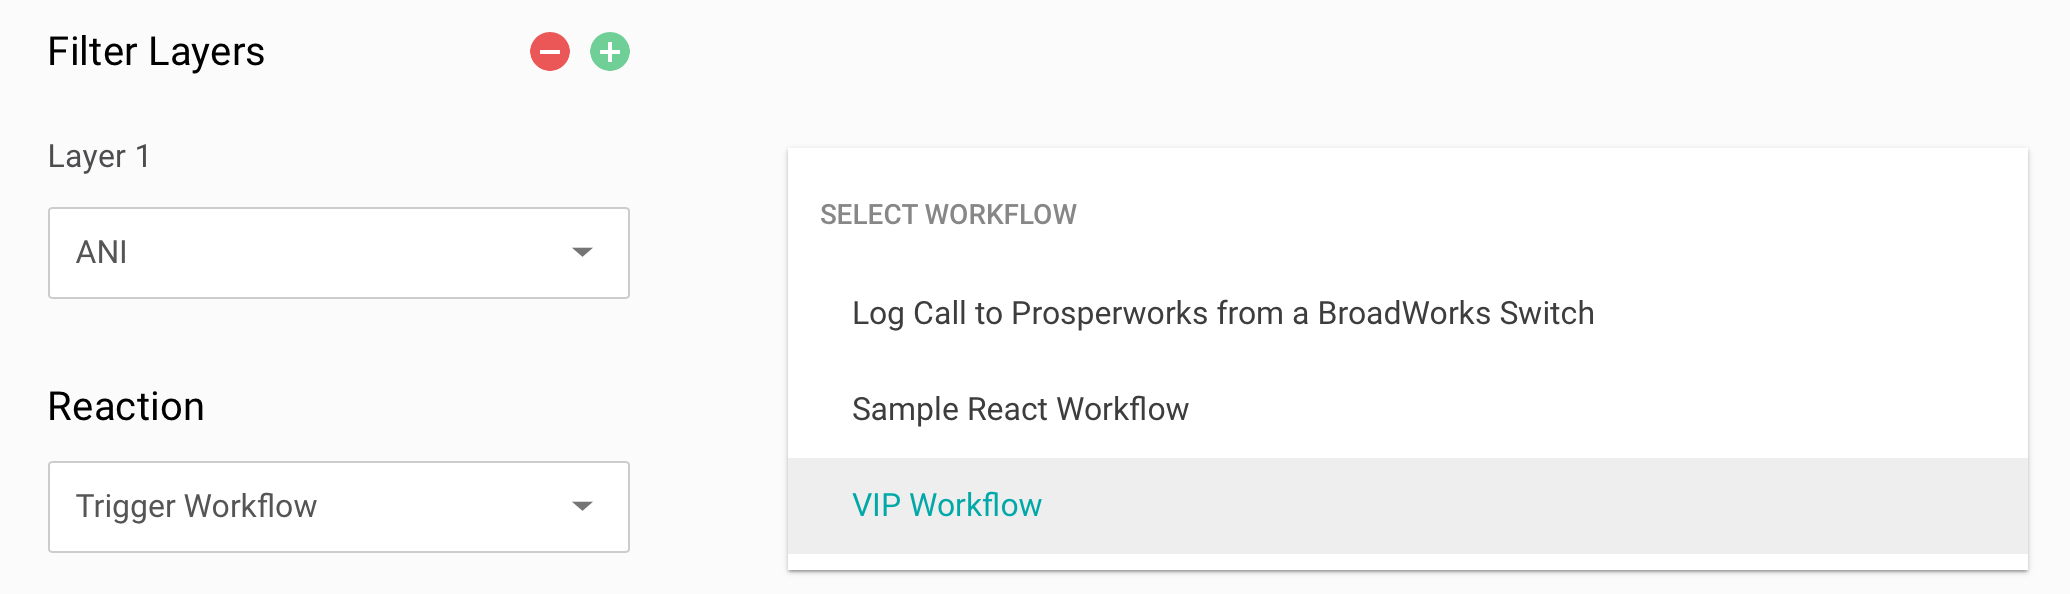
- You will notice we now have the option to pass in any paramters we wish to the Studio Workflow. In this case we want to pass in the ANI se we can use it inside the Workflow.
- Select Save.
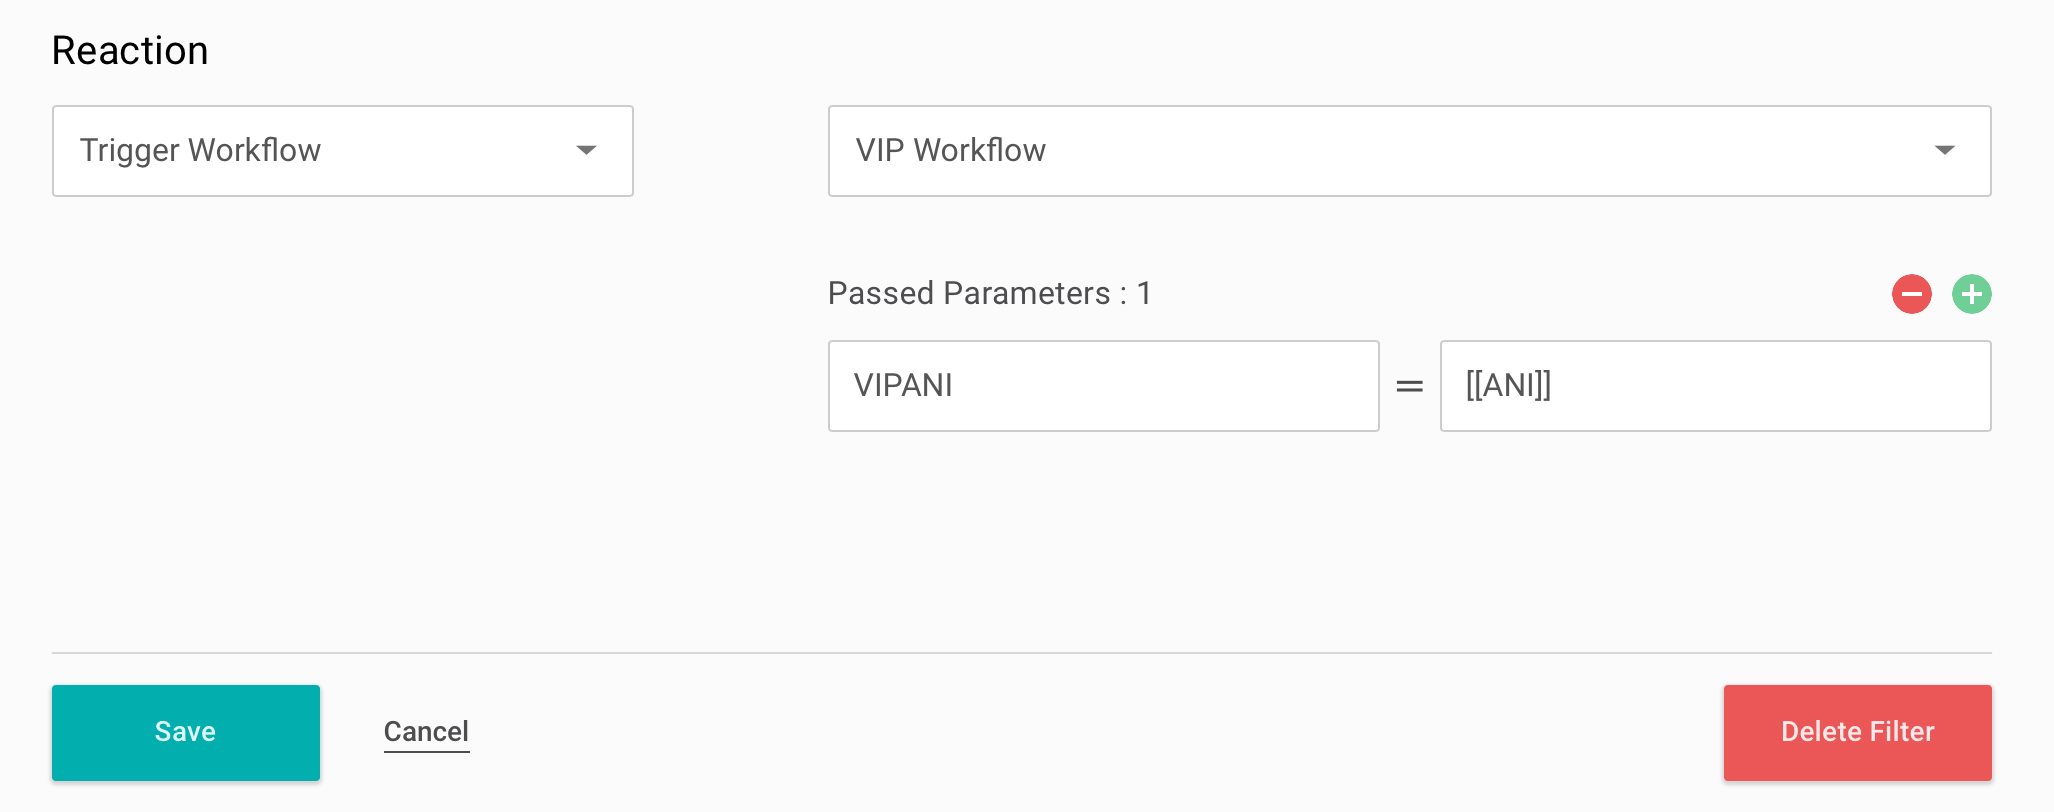
Congratulations, your filter has been updated to trigger a Workflow as its Reaction! 👍
Creating Variables
Variables provide an option to store frequently used data in a single location. In this case, let's do something useful and create a VIP list. Rather than having to create a filter for each of our VIP numbers we can just add them to one list and reuse the list in any of our Filters.
- To create a new variable click on Variables from the side menu.
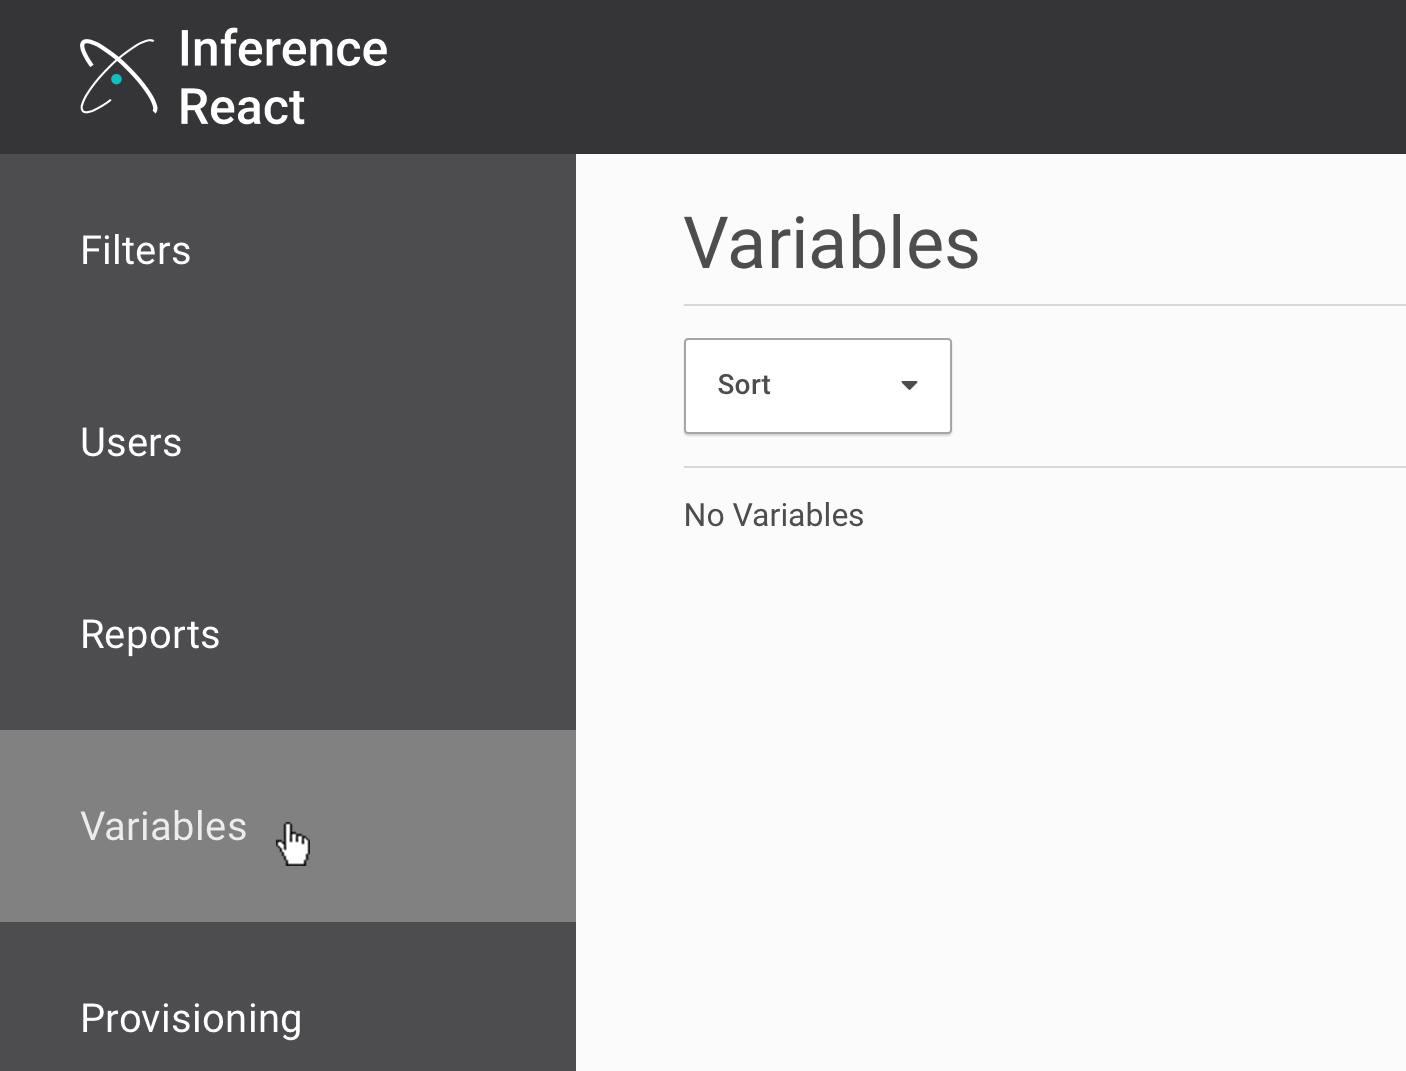
- Select the New Variable button.
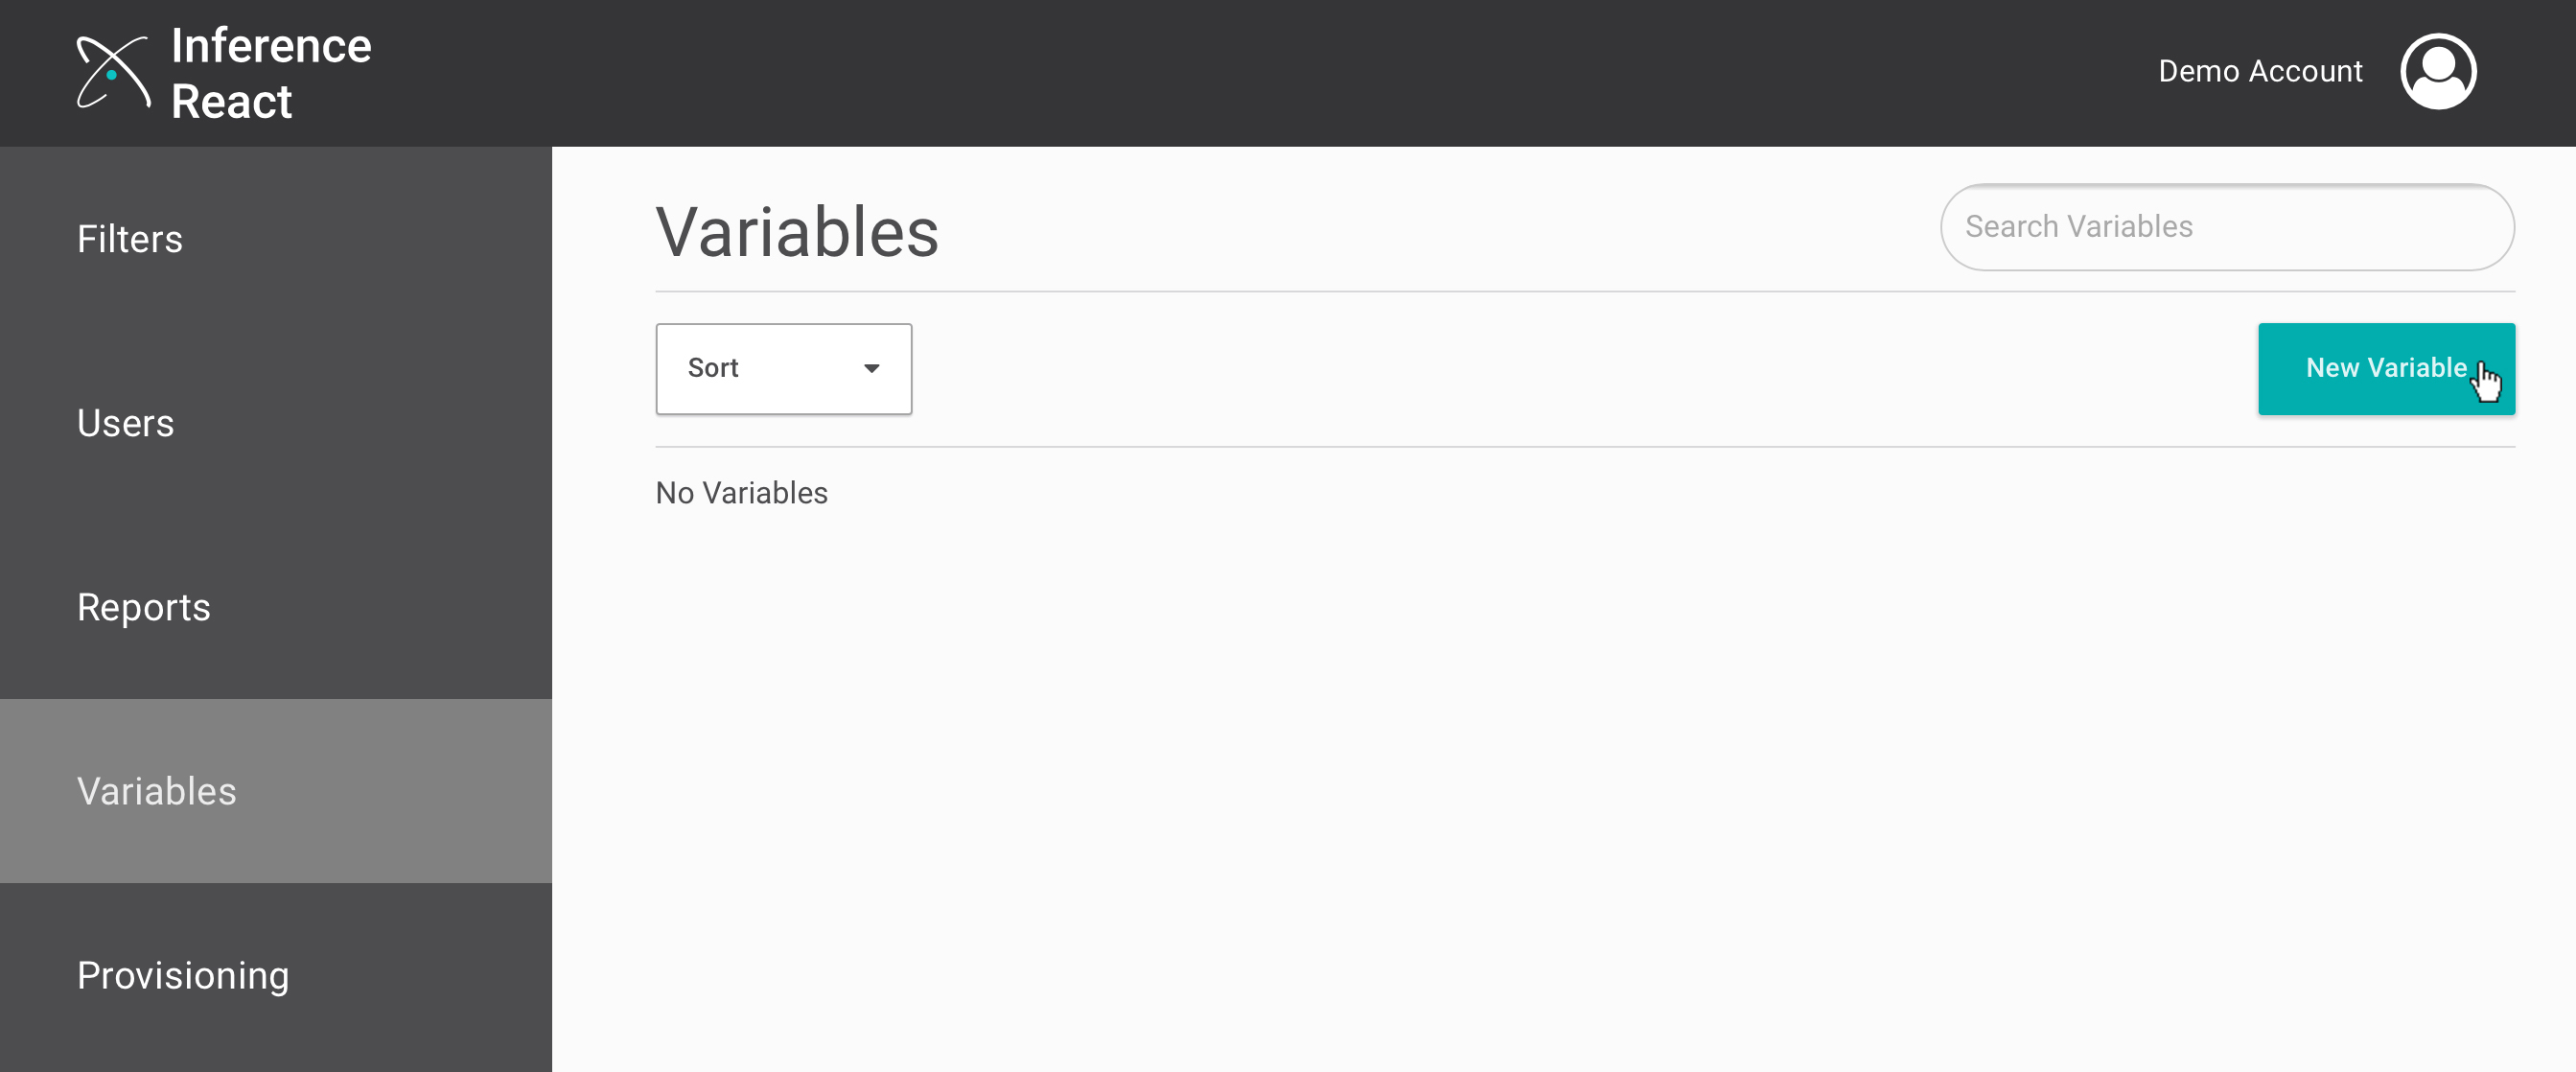
- Give the variable a name. We'll call ours VIP_List.
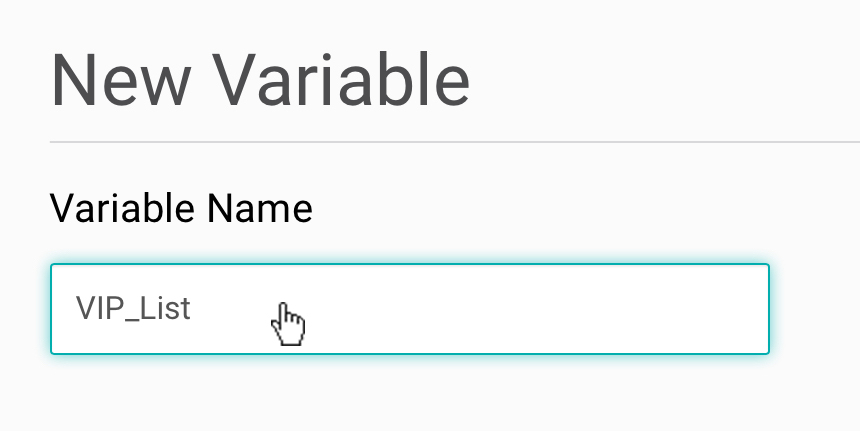
- Variable can be a single value or a list of values. We will select for our variable as we want to enter multiple VIP phone numbers.
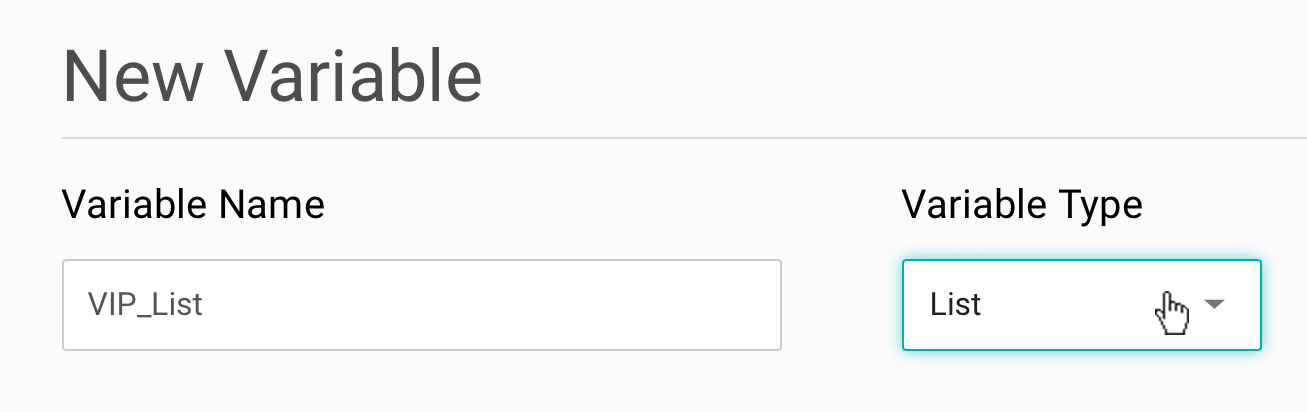
- In the Values field you can enter all the values that you want as a comma separated list or you can upload a CSV file. We will just add in a couple of VIP numbers by typing them directly in.
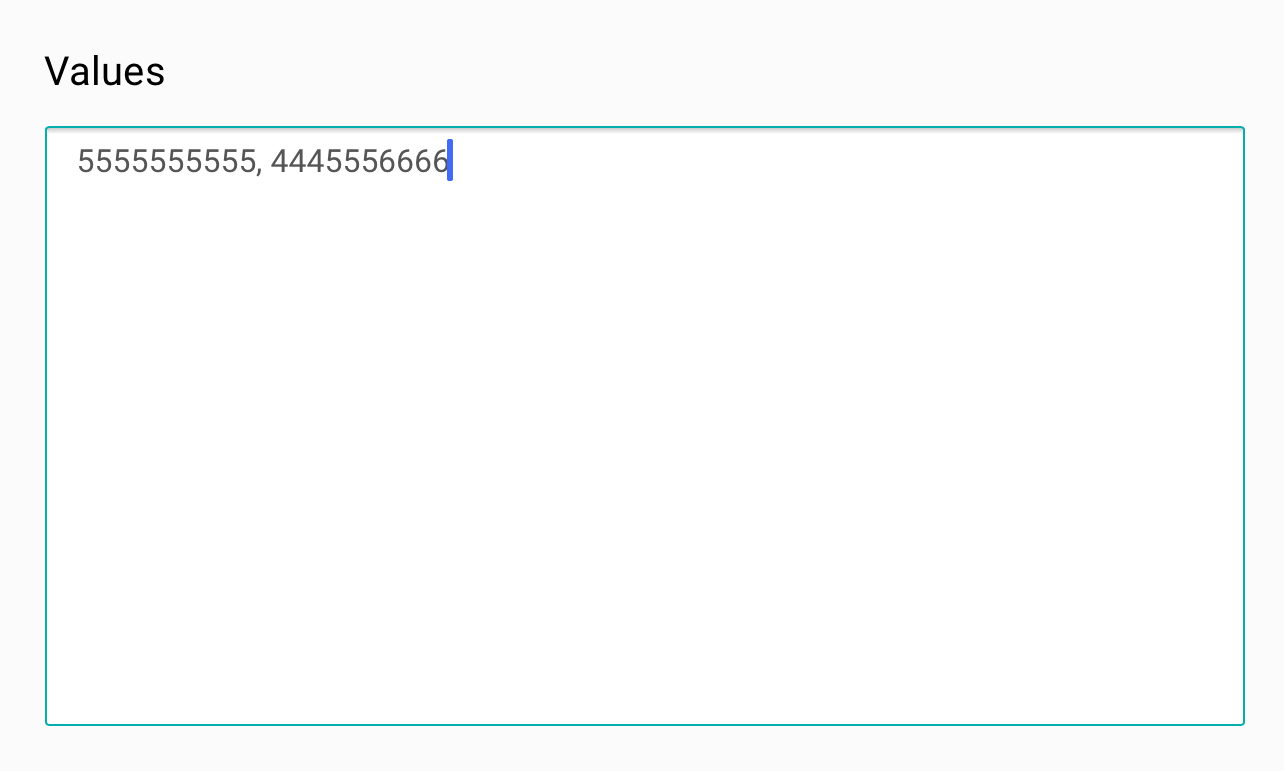
- Click Save.
- From the Variables page you will see the VIP_List has now been added, along with the assigned phone numbers.
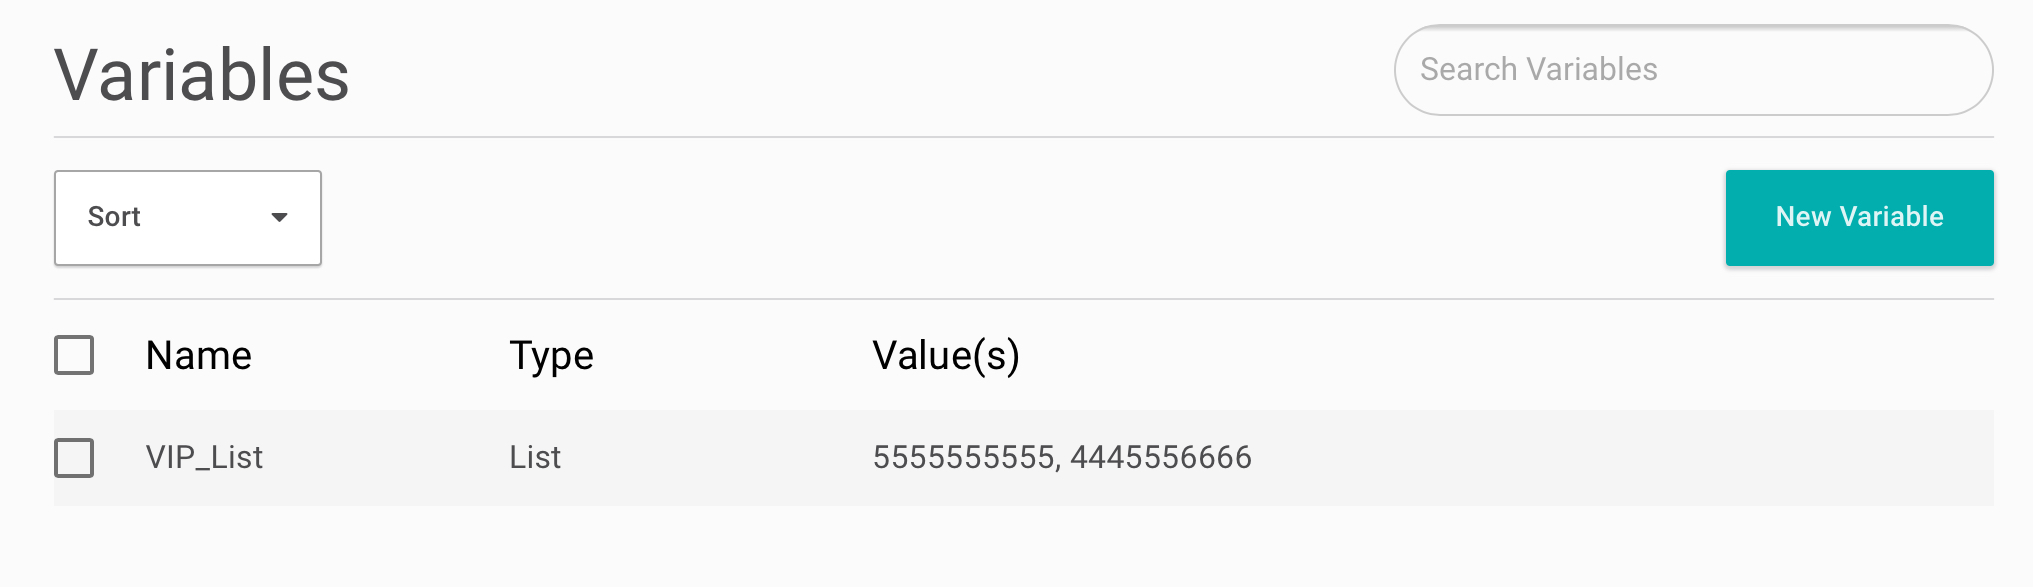
Using Variables within a Filter
Now that we have a VIP_List variable we can edit our original VIP Alert Filter to use this variable.
- From the Filters page, select the settings icon for the VIP Alert Filter.
- From the Filter Layers section, for our Layer 1 ANI delete the phone number we typed in manually and you will see our VIP_List variable is now available as a selection.
TIP
Variables in React follow the double curly brace {{ convention. If you have a large number of variables in your account you manually type them in by using the double curly brace.
- Select the VIP_List variable.
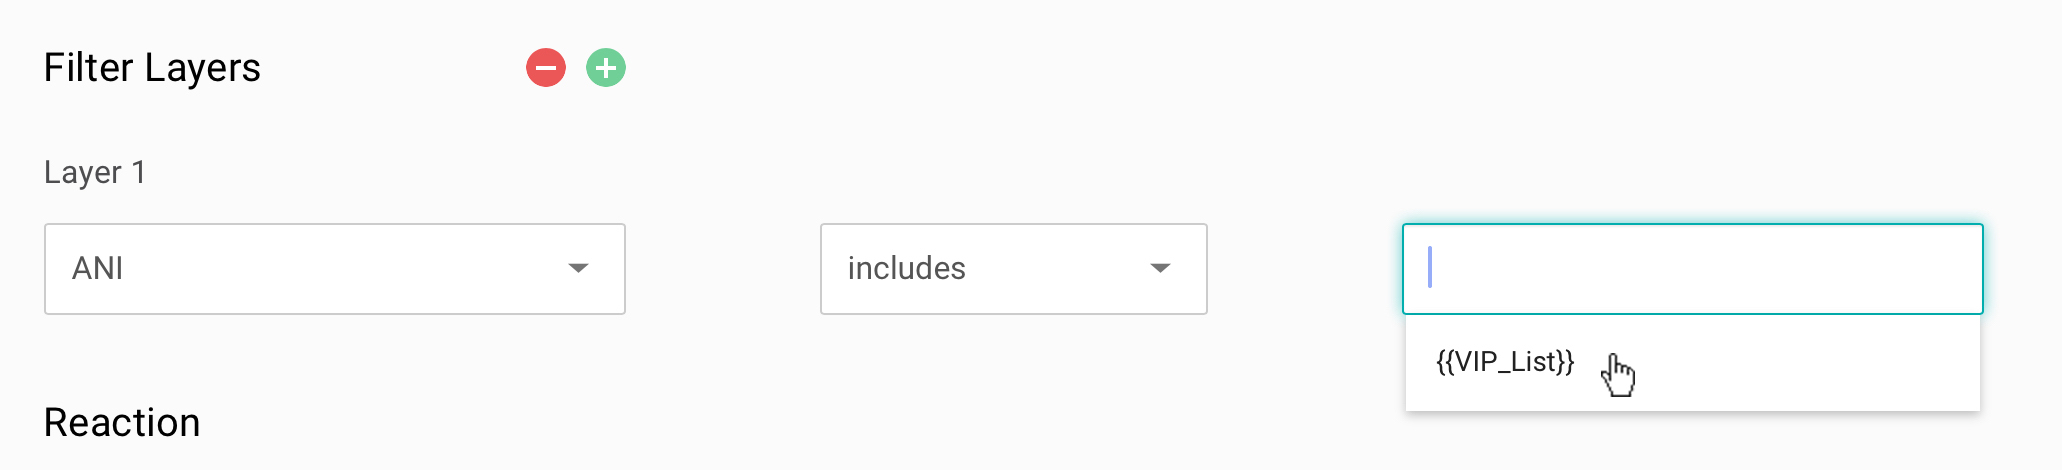
- Click Save.
Our VIP Alert Filter will now filter CallReceived events for any number in our VIP and React by triggering a Studio Workflow! 👍
Additional Resources
Watch our React Webinar video for walkthrough on Inference React and XSI subscriptions.
QforMe Reference Guide
Inference QforMe provides callers with the option to request a call back from the next available agent instead of waiting in the queue.
How it Works
When the expected wait time exceeds a specified threshold, the caller is given the option to request a call back. The application confirms the telephone number for the return call based on the caller ID. If caller ID is unavailable, Inference QforMe prompts the caller to enter the preferred contact number using their telephone keypad. The system holds the caller's place in the queue until answered by an agent, who is prompted to call the customer back.
QForMe is a useful addon to Inference Studio as it:
- Reduces the likelihood of call abandonment.
- Is easy to implement, manage and customize.
- Reduces network costs by minimizing the number of idle calls.
Your QforMe subscription is for a number of waiters. Each waiter allows for one call back to be queued at the same time.
Waiters can be booked via an IVR booking script, an SMS booking script, or externally to studio via API (for instance on your website).
Using QforMe
QforMe is accessed via the Inference Portal. Select the QforMe link from the list of Applications. You will be taken to the Queues page by default.
If this is the first time you are accessing QforMe then this list may appear empty. The screenshot below shows an example of the List Queues page with two queues.
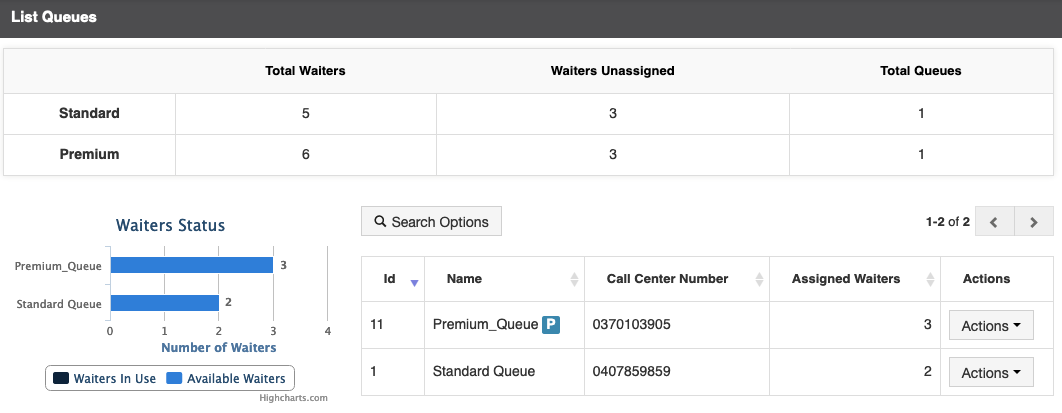
Studio 6.3
Premium QforMe waiters were introduced in Studio 6.3TIP
- Total Waiters is the total number of waiters available to your account. In this example we have a total of 5 waiters.
- Waiters Unassigned shows the number of waiters that you have available and have not been assigned to a queue. We currently have 6 unassigned waiters.
- Total Queues shows the number of queues you currently have running. We currently have two queues. Note: One is a Standard queue and the other is a Premium queue.
For a basic overview on QforMe watch this short webinar video.
For an overview on how to use QforMe Premium waiters watch this webinar.
Portal Reference Guide
Inference Portal provides access to multiple Inference applications and allows customer management of their Inference tenancy.
How it Works
On user profile login, account users can view available applications. Choosing an application icon will navigate to the specific application. Otherwise the Home menu makes the following features available:
- Notifications - system administrator notifications to the account user
- API documentation - tenancy management APIs
- Session usage & reporting for historical and live usage, including API documentation
- Credit usage reporting
- User management - including user creation, deletion and password reset.
- User profile management including configuration of two-factor authentication.
User roles and permissions
Account scope users can have three permission levels
- Admin - full administrative account control
- Read & Write - full account control other than user management
- Read Only - no ability to make persistant changes and some visibility limits
The permissions are as follows.
| Studio Entity | Admin | Read & Write | Read Only |
|---|---|---|---|
| Phone numbers | View, move, un-assign | View, move, un-assign | View |
| Tasks | Full control | Full control | List and view only (note: cannot view node details) |
| Datastores and other content | Full control | Full control | List and view only |
| Reports | Create, edit, run, delete | Create, edit, run, delete | Create, edit, run, delete |
| Users | Create, edit, delete | List | List |
Inference Credits
Inference credits can be purchased for your Studio account, 100,000 credits at a time. The Home page shows the number of credits available to your Studio account.
Inference credits are required to use the following services.
| Studio Service | Inference Credits |
|---|---|
| Datastore Transcription | 8 credits per 15 second block of transcription. |
| Number Insights. Check if the number is landline, virtual, or mobile (get_number_type) | 2 credits to run a number check. |
| Run workflow tasks | 2 credits to run a workflow task. |
| Send and receive SMS including line rental | Refer to the following table, as the line rental and cost per inbound and outbound message is dependent on the region. |
Inference Credits and SMS
The following table shows monthly line rental in credits and the cost in credits for each inbound and outbound message.
| Prefix | Monthly Line Rental | Credits per Inbound Message | Credits per Outbound Message |
|---|---|---|---|
| 1 | 200 | 2 | 3 |
| 27 | 10 | 10 | 10 |
| 31 | 100 | 5 | 40 |
| 34 | 100 | 5 | 34 |
| 44 | 100 | 1 | 15 |
| 52 | 2500 | 1 | 20 |
| 55 | 100 | 5 | 32 |
| 56 | 4000 | 20 | 20 |
| 60 | 2000 | 2 | 10 |
| 61 | 500 | 5 | 32 |
| 86 | 100 | 2 | 12 |
| 91 | 100 | 2 | 6 |
| 252 | 100 | 2 | 30 |
| 254 | 1 | 1 | 1 |
| 263 | 100 | 2 | 12 |
| 1242 | 200 | 2 | 20 |
| 1246 | 200 | 2 | 50 |
| 1264 | 200 | 2 | 20 |
| 1268 | 200 | 2 | 20 |
| 1284 | 200 | 2 | 20 |
| 1340 | 200 | 50 | 500 |
| 1345 | 20 | 2 | 50 |
| 1441 | 200 | 2 | 50 |
| 1473 | 200 | 2 | 20 |
| 1647 | 100 | 2 | 20 |
| 1649 | 200 | 2 | 20 |
| 1664 | 200 | 2 | 20 |
| 1670 | 100 | 2 | 50 |
| 1671 | 200 | 2 | 20 |
| 1684 | 200 | 2 | 500 |
| 1758 | 200 | 2 | 50 |
| 1767 | 200 | 2 | 20 |
| 1784 | 200 | 2 | 20 |
| 1808 | 200 | 2 | 3 |
| 1812 | 200 | 2 | 3 |
| 1849 | 200 | 2 | 20 |
| 1868 | 200 | 50 | 500 |
| 1869 | 200 | 2 | 20 |
| 1876 | 200 | 2 | 500 |
| 1907 | 200 | 2 | 3 |
| 1951 | 100 | 2 | 3 |
| 46732 | 0 | 1 | 1 |
| 58108 | 0 | 1 | 1 |
TIP
Studio reports accessible from the Home menu, Credits | Messaging Usage Summary show the breakdown of credits spent on SMS through your Studio account.